5.4 Se
VIDEO reco
1. Press the MENU butt, Select VIDEO and press OK to
select
2. Select RESOLUTION by OK to enter
resolution selec
3. Select UP or D
Full HD ), 1080P30(1440x108 0), 720P30 (1280
W, V640 x 48 0),x 24 0)
then press OK to
PICTUR
1. Press the MENU butt
select
2. Select the , pre
select
3. Select UP or D
3M (2048
then press OK to confirm sett
5.5 Tak
1. Open screen / turn on your camera.
2. Press the MODE button t
3. Use the LCD screen as a viewfinder composing t
4. Press the REC button for tp V
recording.
Note: 1. Keep
5.6 Zoo
Your camera oom and 4 oom).
Push the zoom butting des
Note the .
5.7 Play
1. Press the ) once to en
again to / VIDEO ic
screen).
2. Push the D/ VIDEO.
3. Press OK
4. Wout or in .
5. Press OK again for starting the slide
6. WOK to
7. W
the VIDEO.
5.8 De
1. Press the ( ) button once to enter the PHOTO playback mode,
again to
Select the or video t
2. Press the MENU buttto enter the delete mode.
3. Push the D
and press OK to confirm.
4. Press the MOD
6.
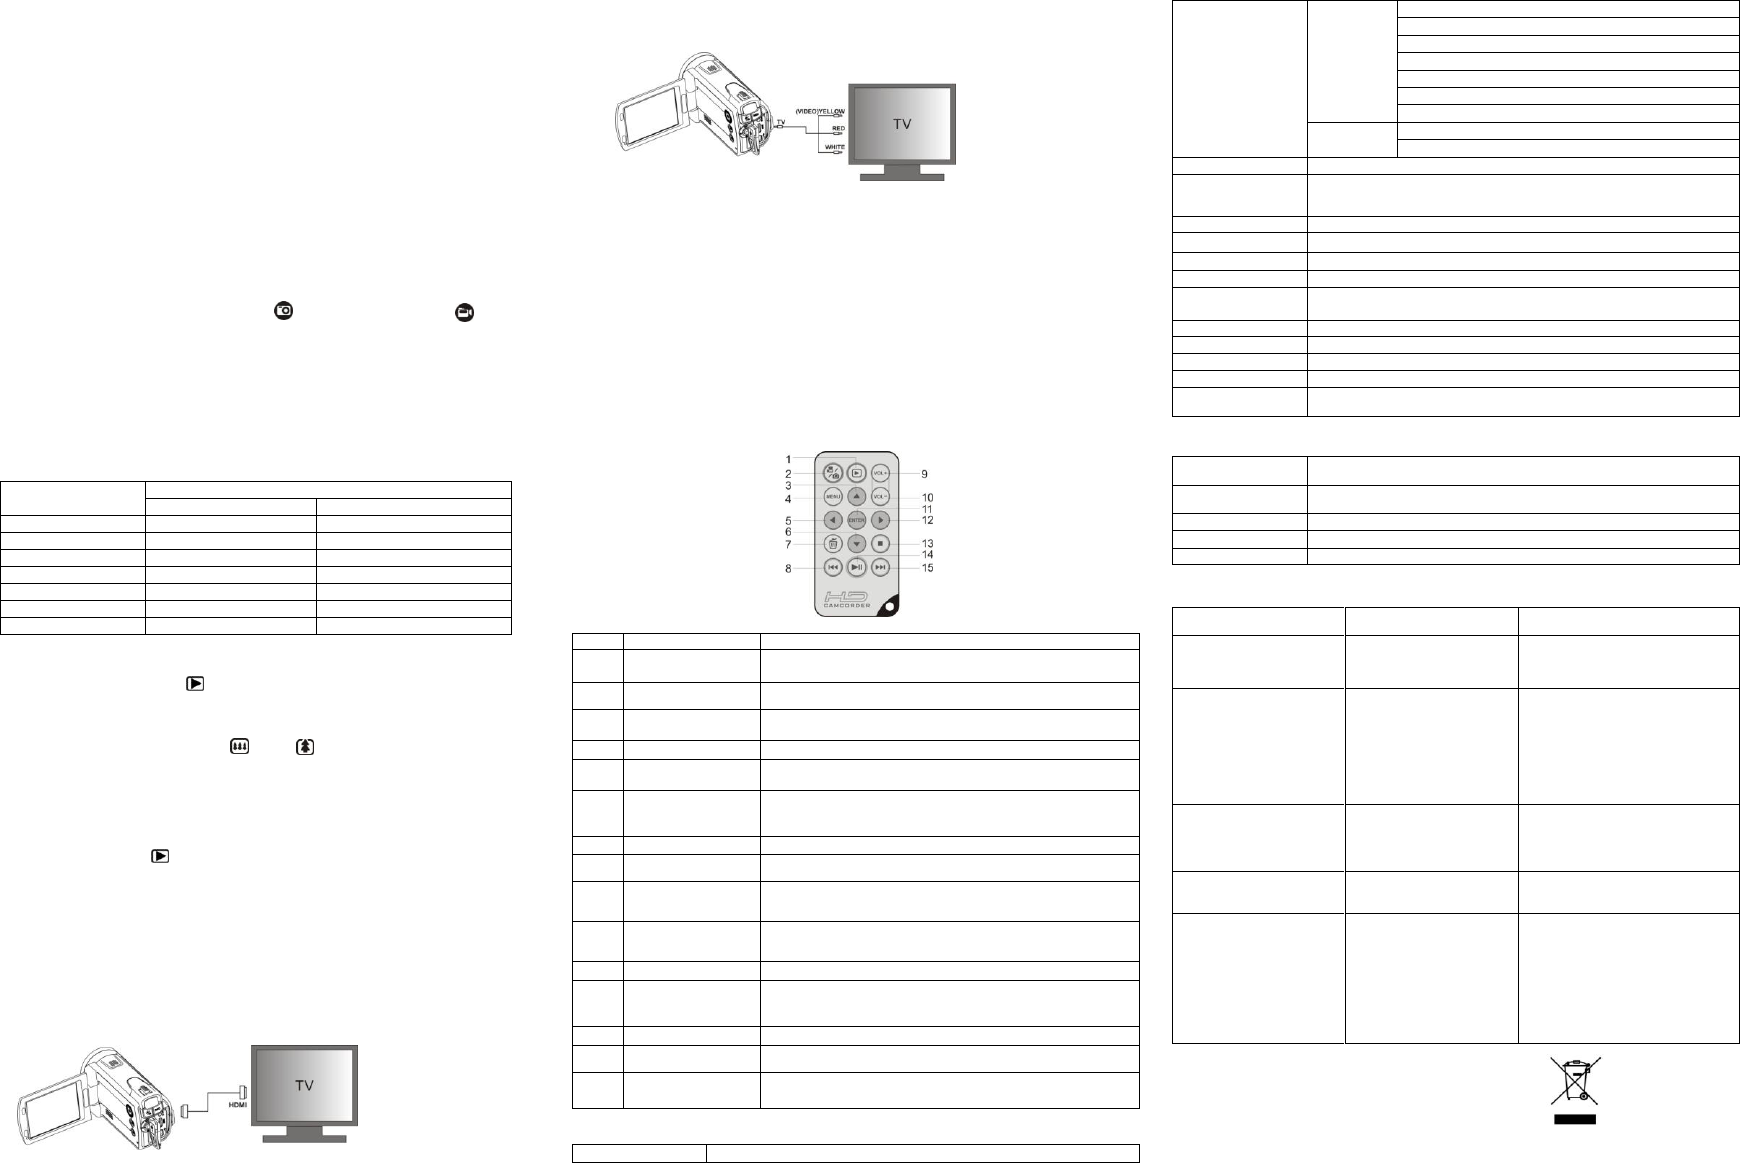
6.1 Conn
WHigh D pleas
connect as s
Set y
buttons in the
You may alsstandard TV set . Make the
connect
6.2 Con
You may alsing P
computer
Uplo
Please install plo ad to YouTube. This will take you
directly t
Installing
1. Please insert prompts to install
Direct
2. Use t
3. Open M
4. Clic
You may als
best
HD Video data is– older and
slower comput
7. Remot
Press this
switching to
Press this k
recording.
In M
or PHOTO mode, push
Press to
In M
PHOTO m f
In
VIDEO or PH pusey DOW enter
Ba
Press it to
During
this key again .
Press this k
In DC , P,
press the key
Press this kk.
In DC
press the key
Selecting
In M
VIDEO or ey RIGHT to ent
exposure value set
Press the key
During play
play c
During
this key again
8. S
5.0 M
Full HD
1080P440x 108 0), up to
720P
W), up to
W
VGA (640x480), up
QVGA (320x240), up
5.0 Mega pix
3.0 Mega pix
Macro: 3cm~ 1M(W~ 20cm; T~ 1M);
Normal mode: 20cm~∞(W~ ∞;T~ ∞) ;
Full mode: 3cm~∞(~ ∞;T~ ∞);
Zoom in up and 4 X digital Zoom)
3.0” fine grade LTPS color LCD
Auto / Sunny / Cloudy / Fluorescent /
Support up B SD memory c
pictures, class 4 or above SD card
VIDEO: OV ; PICTURE: JPEG
3.7V 1700mAh Li -ion rechargeable
High Definition VIDEO: HDMI
Standard TV (NTSC or
9. PC s
W
Mac
Pentium
Pentium
At least 1G B (recommended)
nVidia Geforce 7600
10. Troubleshooting
Cannot turn
ON
Low battery
Battery not ins
properly.
Charge t
Check t
when installed
VIDEO or PICTURES
cannot
are tak
1. SD c
installed
2. The SD c
been formatted properly
3. M
shows „M
1. I
2.
mode of the c
to s
3. D
videos from the c
computer t
space.
Computer does
recognize your
when connect(You
cannot
Make sure
secured. R
necess
The battery life is
short.
Incorrect
battery
Replace ion
rechargeable bat
1. The HD camera is
held st
recording
2. The lens of HD
camera is
3. Inc
sett
1. Hold t
when taking
the beep sound
2. C
3. Set
focus according
camera to subjec
“Normal” setting
for typic
For EU
A
AM-V55B5-GB -AGF -R