Quick Star
RT
802.11ac F
P
A quick look at y
NOTE: If any of the items is damaged or missing, please con
1.
Setting up a Home Networ
2.
1. If the
browser
2. If QIS does not launch automatically
• Onhttp://192.168.1.1 or http://router. Use the default username admin
and password admin to log int
• ClickQuick Internet Setup on the left panel on the Network Map page.
• The
time or when your wireless rout
3.
Français
1. Connectezlespériphériques.
2.
gestionnairedecongurationrapided’Internetenligne(
3. Lacongurationestterminée. .
Deutsch
1. Schließen Sie Ihre Geräte an.
2.
Schnelleinstellungsschritten(QIS).
3. Die Einrichtung ist fertig.
Italiano
1. Collegareleperiferiche.
2.
InternetSetup).
3. Lacongurazioneèstatacompletata..
Pусский
1. Подключите ваши устройства.
2.
подключениякИнтернету(QIS).
3. У
Português do Brasil
1. Conecteseusdispositivos.
2.
Setup(QIS).
3. A instalação foi concluída.
Бълг
1. Свържет
2.
InternetSetup(QIS)(Б
3. Конфигурирането приключи.
Česky
1. Připojtezařízení.
2.
RychléhonastaveníInternetu(QIS).
3. Instalacejedokončena.
Dansk
1.
2.
trinene.
3. Opsætningfuldført.
Nederlands
1. Sluit uw apparaten aan.
2.
Setup(snelleinternetinstelling)).
3. Deinstellingisvoltooid.
Eesti
1. Ühendage seadmed.
2.
(Interneti-ühendusekiirhäälestus(QIS))samme.
3. Häälestusonlõpuleviidud.
Suomi
1. Kytkelaitteet.
2 ja QIS-asennuksen
vaiheita.
3. Asennusonvalmis.
Ελληνικά
1. Συνδέστε τις συσκευές σας.
2.
ακολουθήστε τα βήματ
Internet(QIS).
3. Η εγκατάσταση έχει ολ
Magyar
1. Csatlakoztassaazeszközöket.
2. a
beállítás(QIS)lépéseit.
3. Abeállításbefejeződött.
Bahasa Indonesia
1. Sambungk
2.
QuickInternetSetup(QIS).
3. Kongurasiselesai .
Latviski
1. Savienojietsavasierīces.
2.
(Ātrāsint
3. Iestatīšanairpabeigta.
Lietuvių
1. Prijunkiteprietaisus.
2
internetinėssąrankos(QIS)nuor
3. Sąrankabaigta.
Bahasa Malaysia
1. Sambungk
2.
Lancarkanpen
InternetPantas(
3. Persediaanselesai.
Norsk
1. Koble til enhetene dine.
2.
Start
oppsettavInternett).
3. Oppsetteterferdig
Polski
1. Podłączswojeurządzenia.
2.
poleceniamiSzybk
3. Konguracjazostałazakończona.
Português
1. Ligueosdispositivos.
2.
rápida da Internet.
3. Aconguraçãocaassimconcluída.
Română
1. Conectaţidispozitiveledvs.
2.
laInternet(QIS).
3. Conectareaestenalizată.
Slovensky
1. Pripojtesvojezariadenia.
2.
Stručnéhonávoduprenasta
3. Nastaveniejedokončené
Español
1. Conectesusdispositivos.
2.
funciónQuickInternetSetuprápidadeInternet.
3. Hanalizadolaconguración.
Svenska
1. Anslut dina enheter
2.
inställning).
3. Inställningenslutförd.
ไทย
1. เชื่อมต่ออุปกรณ์ของคุณ
2.
ตด่วน(QIS)
3.
การตั้งค่าเสร็จสมบูรณ
Tü
1. Aygıtlarınızıbağlayın.
2.
Kurulumu)(QIS)adımlarınıizleyin.
3. Kurulum tamamlanır
У
1. Підключіть пристрої.
2.
Запустіть браузер і до
з’єднаннязмережеюІнтернет(QIS).
3. Налаштування завершено.
תירבע
.ךתושרבש םירישכמה תא רבח .1
.המייתסה הרדגהה .2
הריהמה הרדגהה תוארוה יפ לע לעפו טנרטניאה ןפדפד תא לעפה 3
.)QIS( טנרטניאה לש
Slovenščina
1. Pripojtesvojezariadenia.
2.
narýchlenastavenieinternetu(OIS).
3. Nastaveniejedokončené.
簡体中文
1.
連接設置。
2.
開啟网頁瀏覽器并按照快速网際网路設定
操作。
3.
設置完成。
繁體中文
1. 連接裝置。
2. 開啟網頁瀏覽器並按照快速網際網路設定(QIS)的步驟
操作。
3. 設定完成。
Q15918/RevisedEdition
NOTE: F
C
ASUS Recycling/T
ASUSrecyclingandtakebackprogramsc
environment
components,aswhttp://csr f
detailed recycling information in di
1)LAN1~4LED 5)Po 9)USBport
2) 6)Resetbutton 10)
3)USBLED 7)Powerswit 11)
4)2.4GHz/5GHzLED 8)Po 12)LAN1~4ports
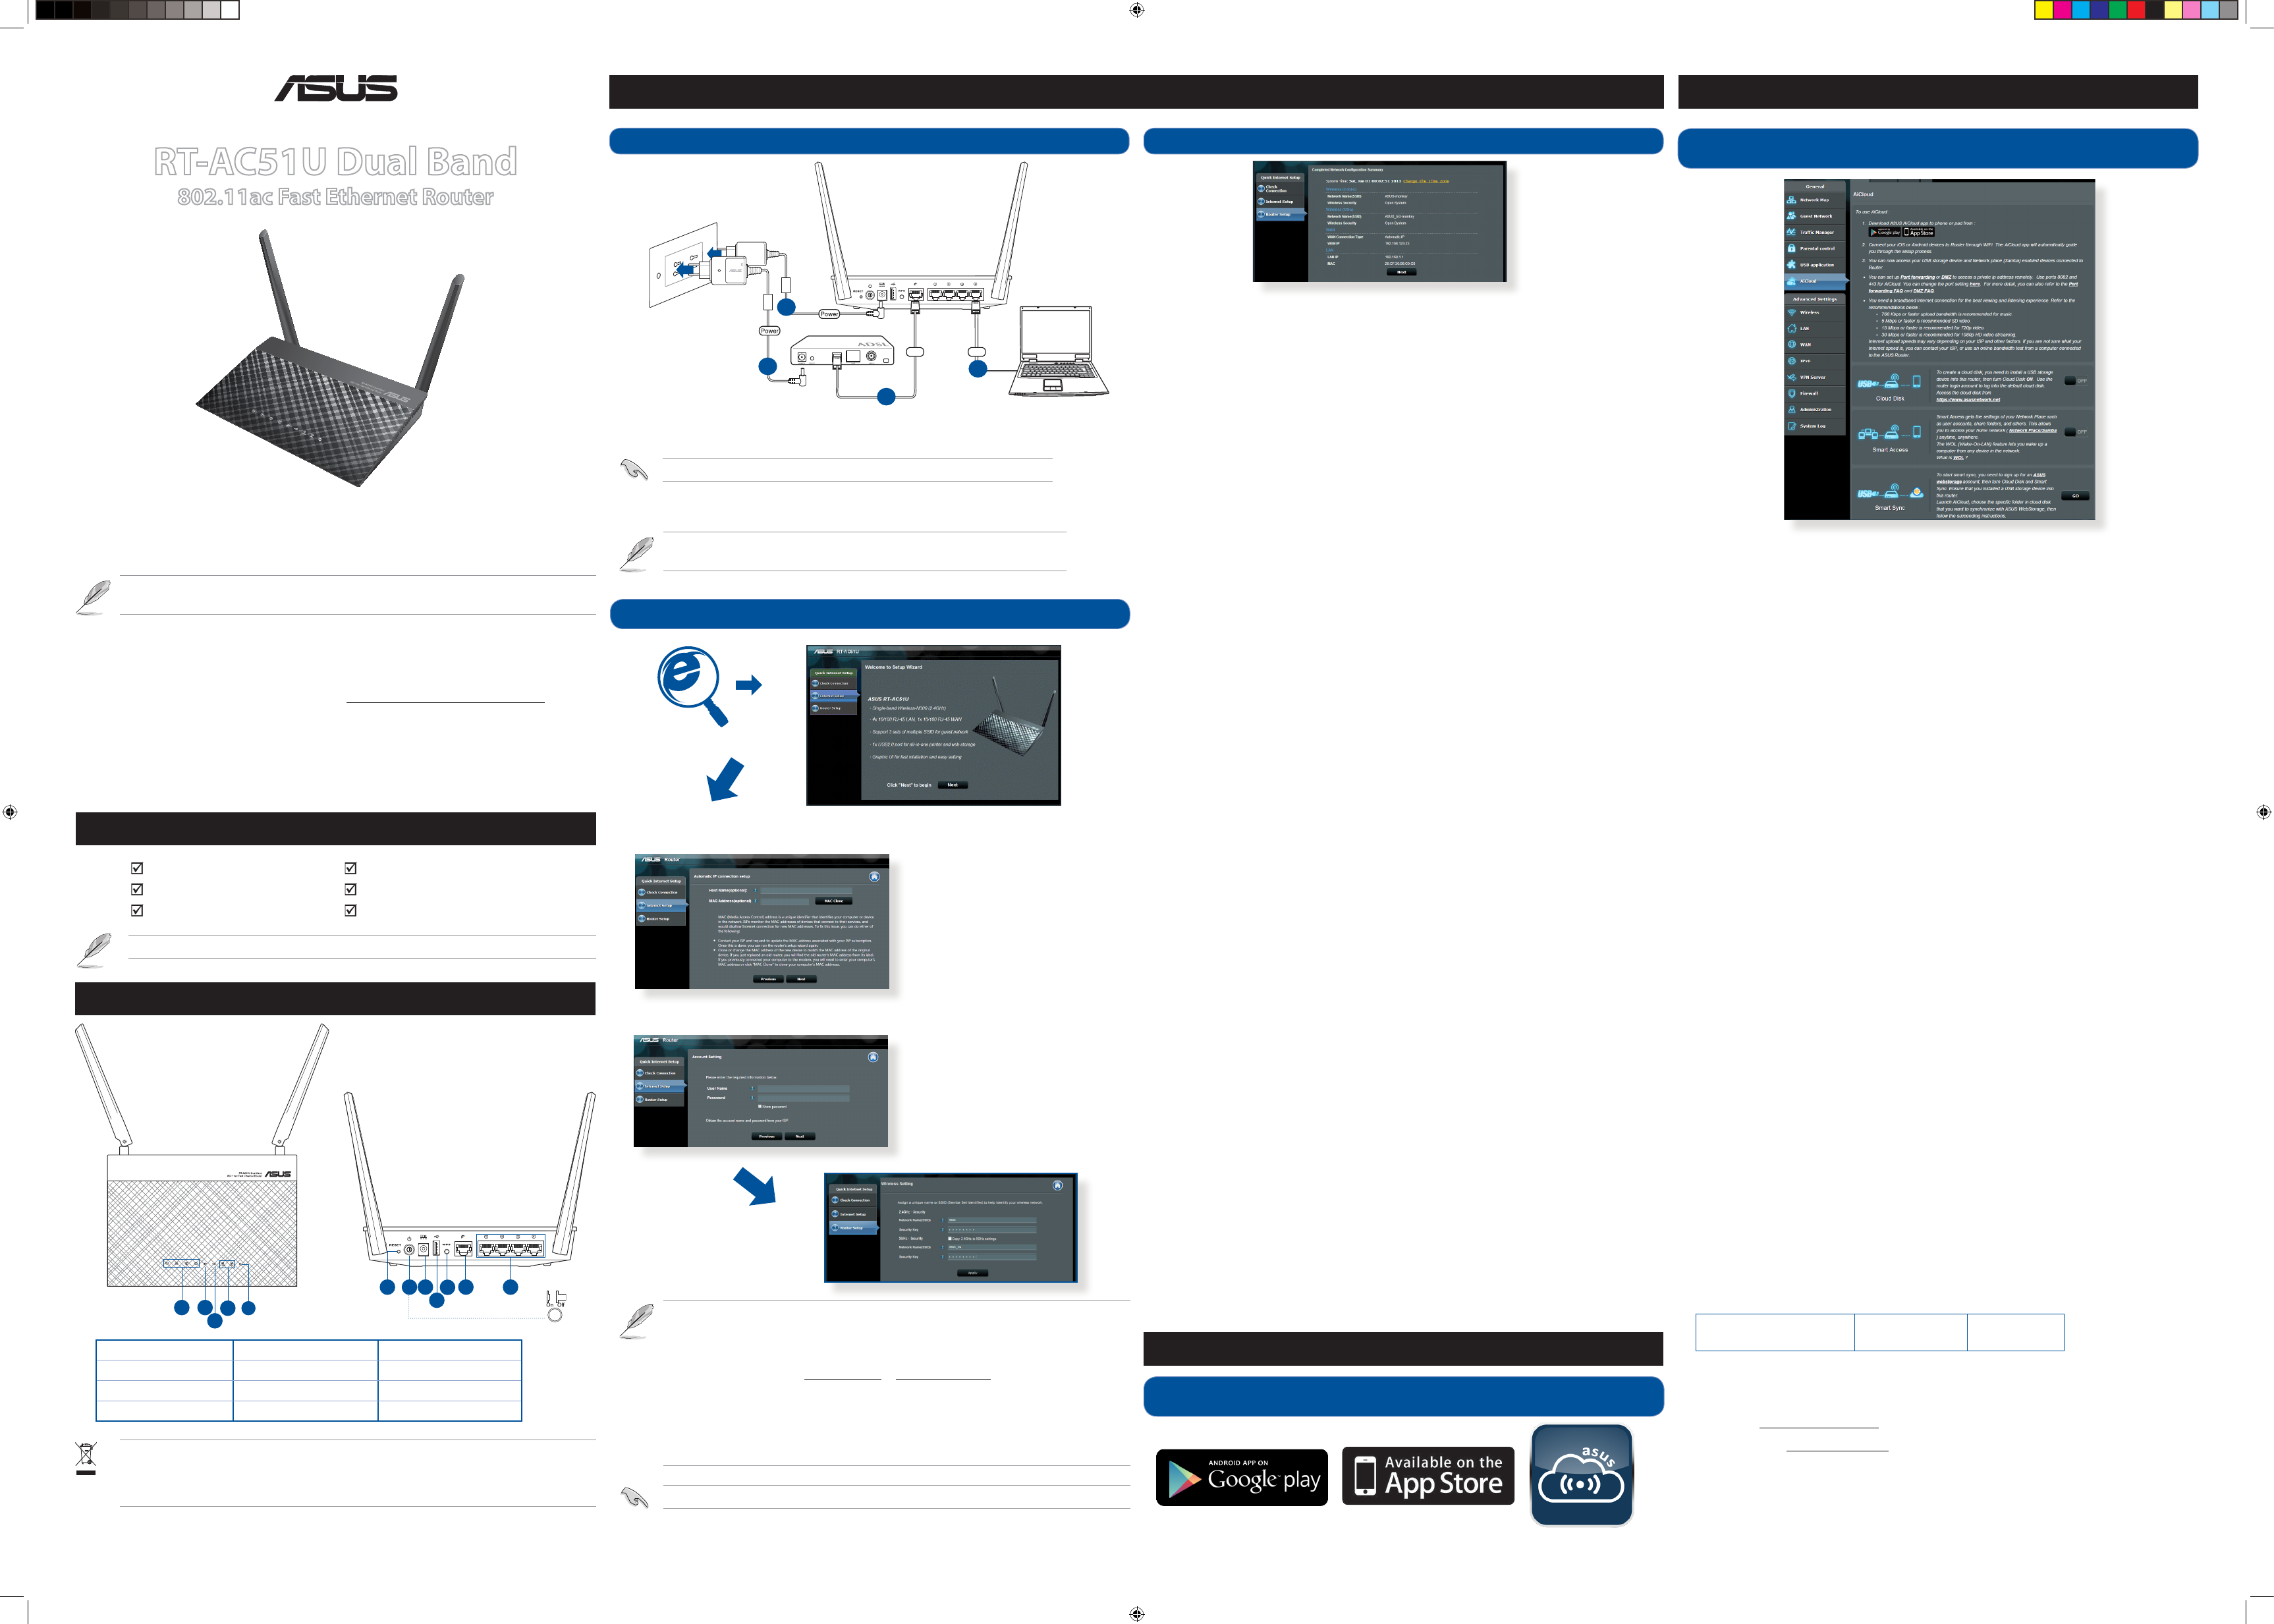
1.
2. Usingthebundlednetworkcable
IMPORT!Ensuretha
3.
4.
Client
Modem
WAN LAN
1
3
4
2
NOTE: Before
two minutes, rec
forAutoma
forPPP
IMPORT!Obtainthenecessaryinformationfromy
1 2
3
5
8
9
12
10
7
11
6
CAUTION! DONOTthrowthispr
enableproperreuseofpartsandrecycling.
thattheproduct(electricalandelec
Checklocalregulationsf
1.
to your smart device
U
2.
AiCloud setup proc
U
RT ACadapter
Networkcable(RJ-45) QuickStartGuide
SupportCD(UserManual/utilities) W
F
The client cannot establish a wir
Out of Range:
• Puttherout
• T
Authentica
• Usewiredconnectiontoconnecttotherout
• Checkthewirelesssecuritysettings.
•
Cannot nd the router
•
•
Cannot ac
• Movetherouterclosert
• Checkwhetherthewirelessadapterisconnectedtothecorr
• Checkwhetherthewirelesschannelinuseconformstothechannelsa
• Checktheencryptionsettings.
• CheckiftheADSLorCableconnectioniscorrect.
• RetryusinganotherEthernetcable.
If the ADSL
not possible - the Router is unable to establish a connection with the ADSL
network.
• Ensurethatallyourcablesar
• Disconnectthepowercordfr
• IftheADSLlightcontinuestoblinkorstaysOFF
Network name or encryption key
• T
• PresstheResetbutt
• F
User name / Passw
admin / admin
IP address: 192.168.1.1 SSID:
ASUS
Where can I nd mor
• UserManualinthesupportCD
• OnlineF http://support.asus.com/faq
• Tite: http://support.asus.com
• CustomerHotline:Refert
Q15918_RT-AC51U_QSG_V5.indd 1 2019/9/16 9:31:53