10
Installation
– Scope of delivery: dryer, installation and instruction manual, jug, basket for woollens
(depending on the model).
– Check dryer for transport damage.
– The dryer is heavy. Do not attempt to lift it on your own.
– Be careful to avoid sharp edges.
– Do not install in a room where there is a risk of freezing. Freezing water may cause damage.
– If in doubt, have the appliance connected by a specialist.
– Do not lift the dryer by protruding parts (e.g. the door) - risk of breakage.
Setting up the dryer
– The appliance plug must always be accessible.
– Ensure that the appliance is installed on a clean, level
and firm surface.
– Keep the cooling grille on the front of the dryer
clear.
– Keep the area around the dryer clean.
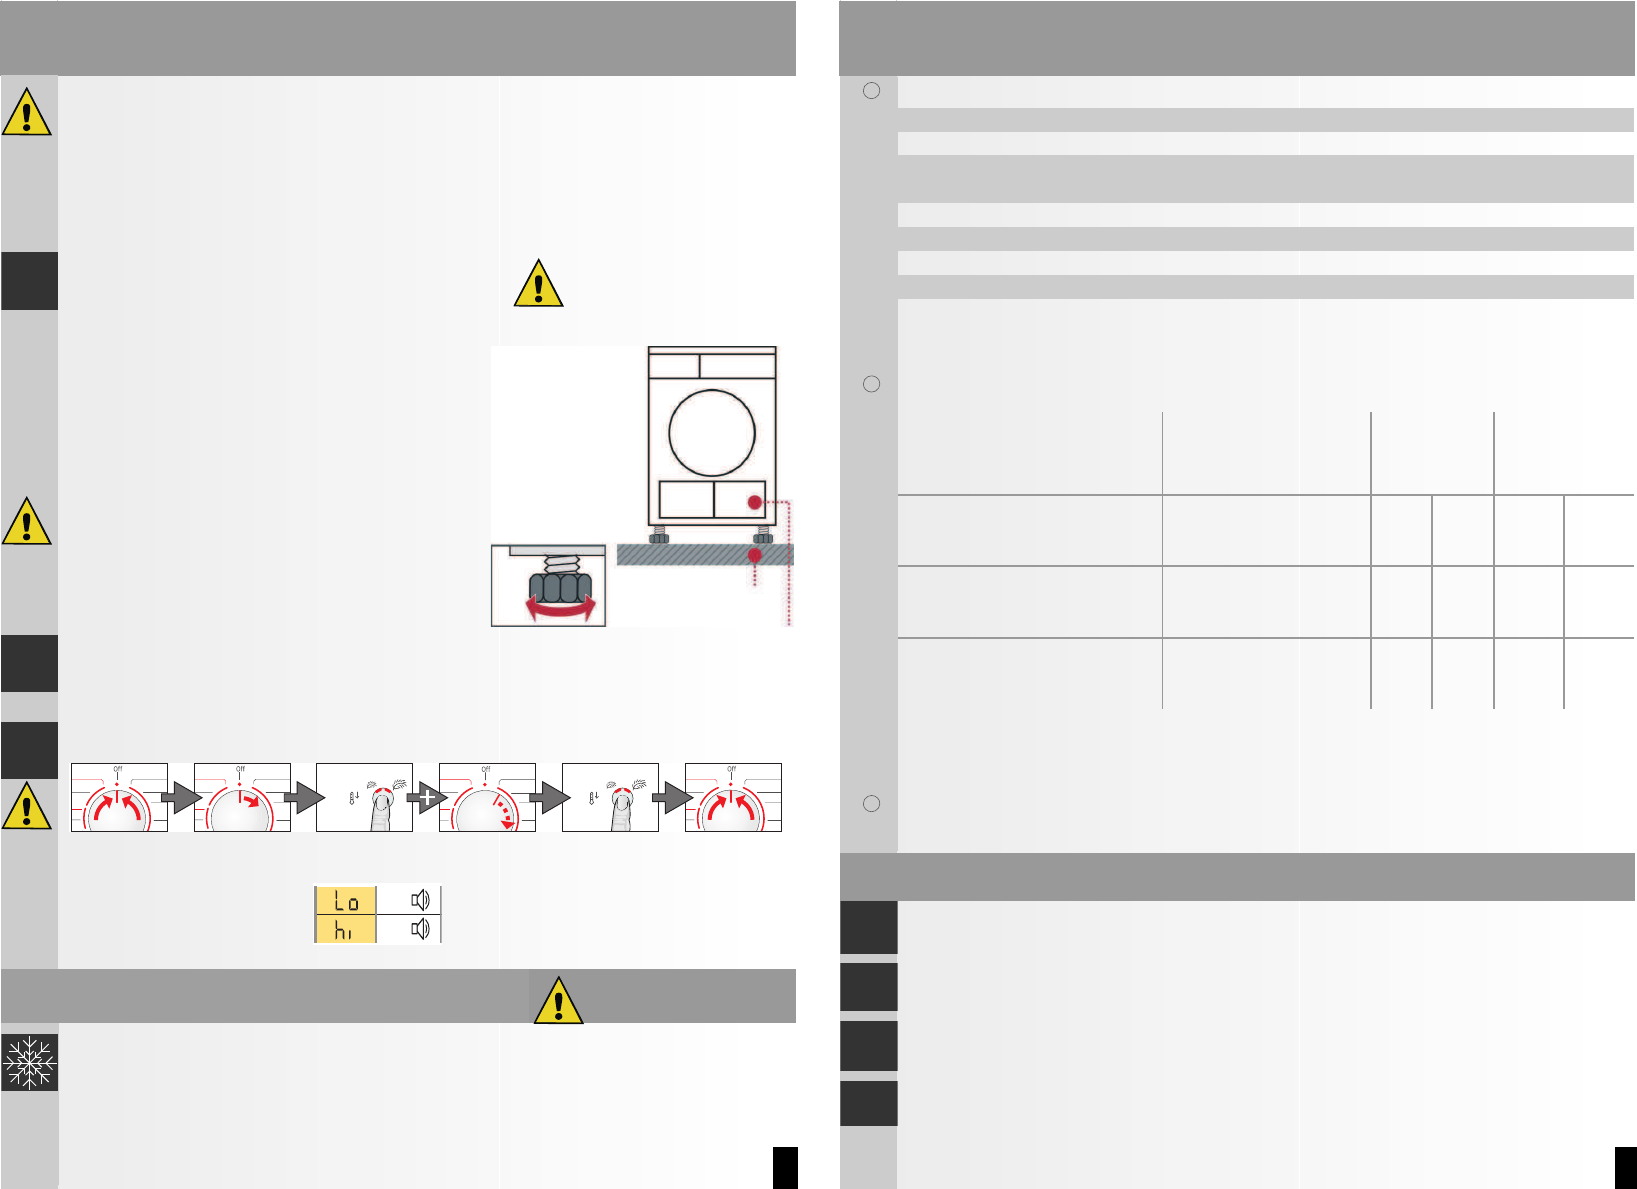
– Level the dryer using the threaded feet.
Use a spirit level.
– Do not remove the threaded feet under any
circumstances.
Mains connection see safety information a page 13.
– Connect to an AC earthed socket. If in doubt, have the socket checked by a specialist.
– The mains voltage and the voltage shown on the rating plate (a Page 11) must be the same.
– The connected load and necessary fuse protection are specified on the rating plate.
Converting the installed load Note the fuse protection of the socket.
10/16 Amps
Frost protection / Transport
Preparation
1. Empty the condensation container a page 4.
2. Select any programme using the programme selector.
3. Press the
(Start/
Stop) button a condensation is pumped into the container.
4. Wait 5 min., and then empty the condensation container again.
5. Turn the programme selector to Off.
The water tank must not contain any distilled water. If necessary, run the Steam/Refresh programme.
11
Technical data
ʠ
Dimensions (DxWxH) 60 x 60 x 85 cm (adjustable height)
Weight approximately 43.5 kg
Max. capacity 8 kg
Condensation container 4.0 l
Water tank approx. 0.4 l
Connection voltage 220-240 V
Connected load max. 2,800 W
Fuse protection 10 A / 16 A
Ambient temperature 5 - 35 °C
Product number
Production number
Inside of door
The rating plate can be found on the back of the dryer.
ʠ
Consumption rates
These are guide values determined under standard
conditions.
Spin speed in rpm
(residual moisture)
Drying time
in min.**
Energy
consumption
in kWh**
Cottons M 8 kg 10 A 16 A 10 A 16 A
Cupboard Dry* 1400 (approx. 50 %) 131 105 3.74 3.74
1000 (approx. 60 %) 148 122 4.49 4.49
800 (approx. 70 %) 165 139 5.17 5.17
Iron Dry* 1400 (approx. 50 %) 109 83 2.24 2.24
1000 (approx. 60 %) 126 100 3.44 3.44
800 (approx. 70 %) 143 117 3.86 3.86
Synthetics I 3.5 kg 1000 45 39 1,05 1,05
Cupboard Dry* 800 (approx. 40 %) 48 42 1.35 1.35
600 (approx. 50 %) 60 51 1.65 1.65
*Test programme to DIN EN 61121
**The values may differ from those given, depending on overvoltage and undervoltage, the
type of fabric, composition of the laundry to be dried, the residual moisture in the fabric and
the size of the load.
ʠ
Drum interior light (bulb E14, 25 W)
The drum is illuminated after the door is opened or closed, and after the programme has
started. The light goes out automatically. To change the bulb a page 12.
Optional accessories (order from the after-sales service using the order number)
Connecting kit for condensation outlet
The condensation is drained off immediately via a hose.
Platform
For better loading and unloading. The basket contained in the drawer can be used to carry
the laundry.
Washer-dryer stack connection set
The dryer can be stacked on top of a suitable washing machine of the same depth and width,
to save space. The dryer must be secured to the washing machine with this connection set.
Same as WTZ 11310, but with pull-out worktop: WTZ 11300
Installation underneath the worktop
Instead of the appliance covering plate, you must have a metal cover fitted by a specialist.