2. P
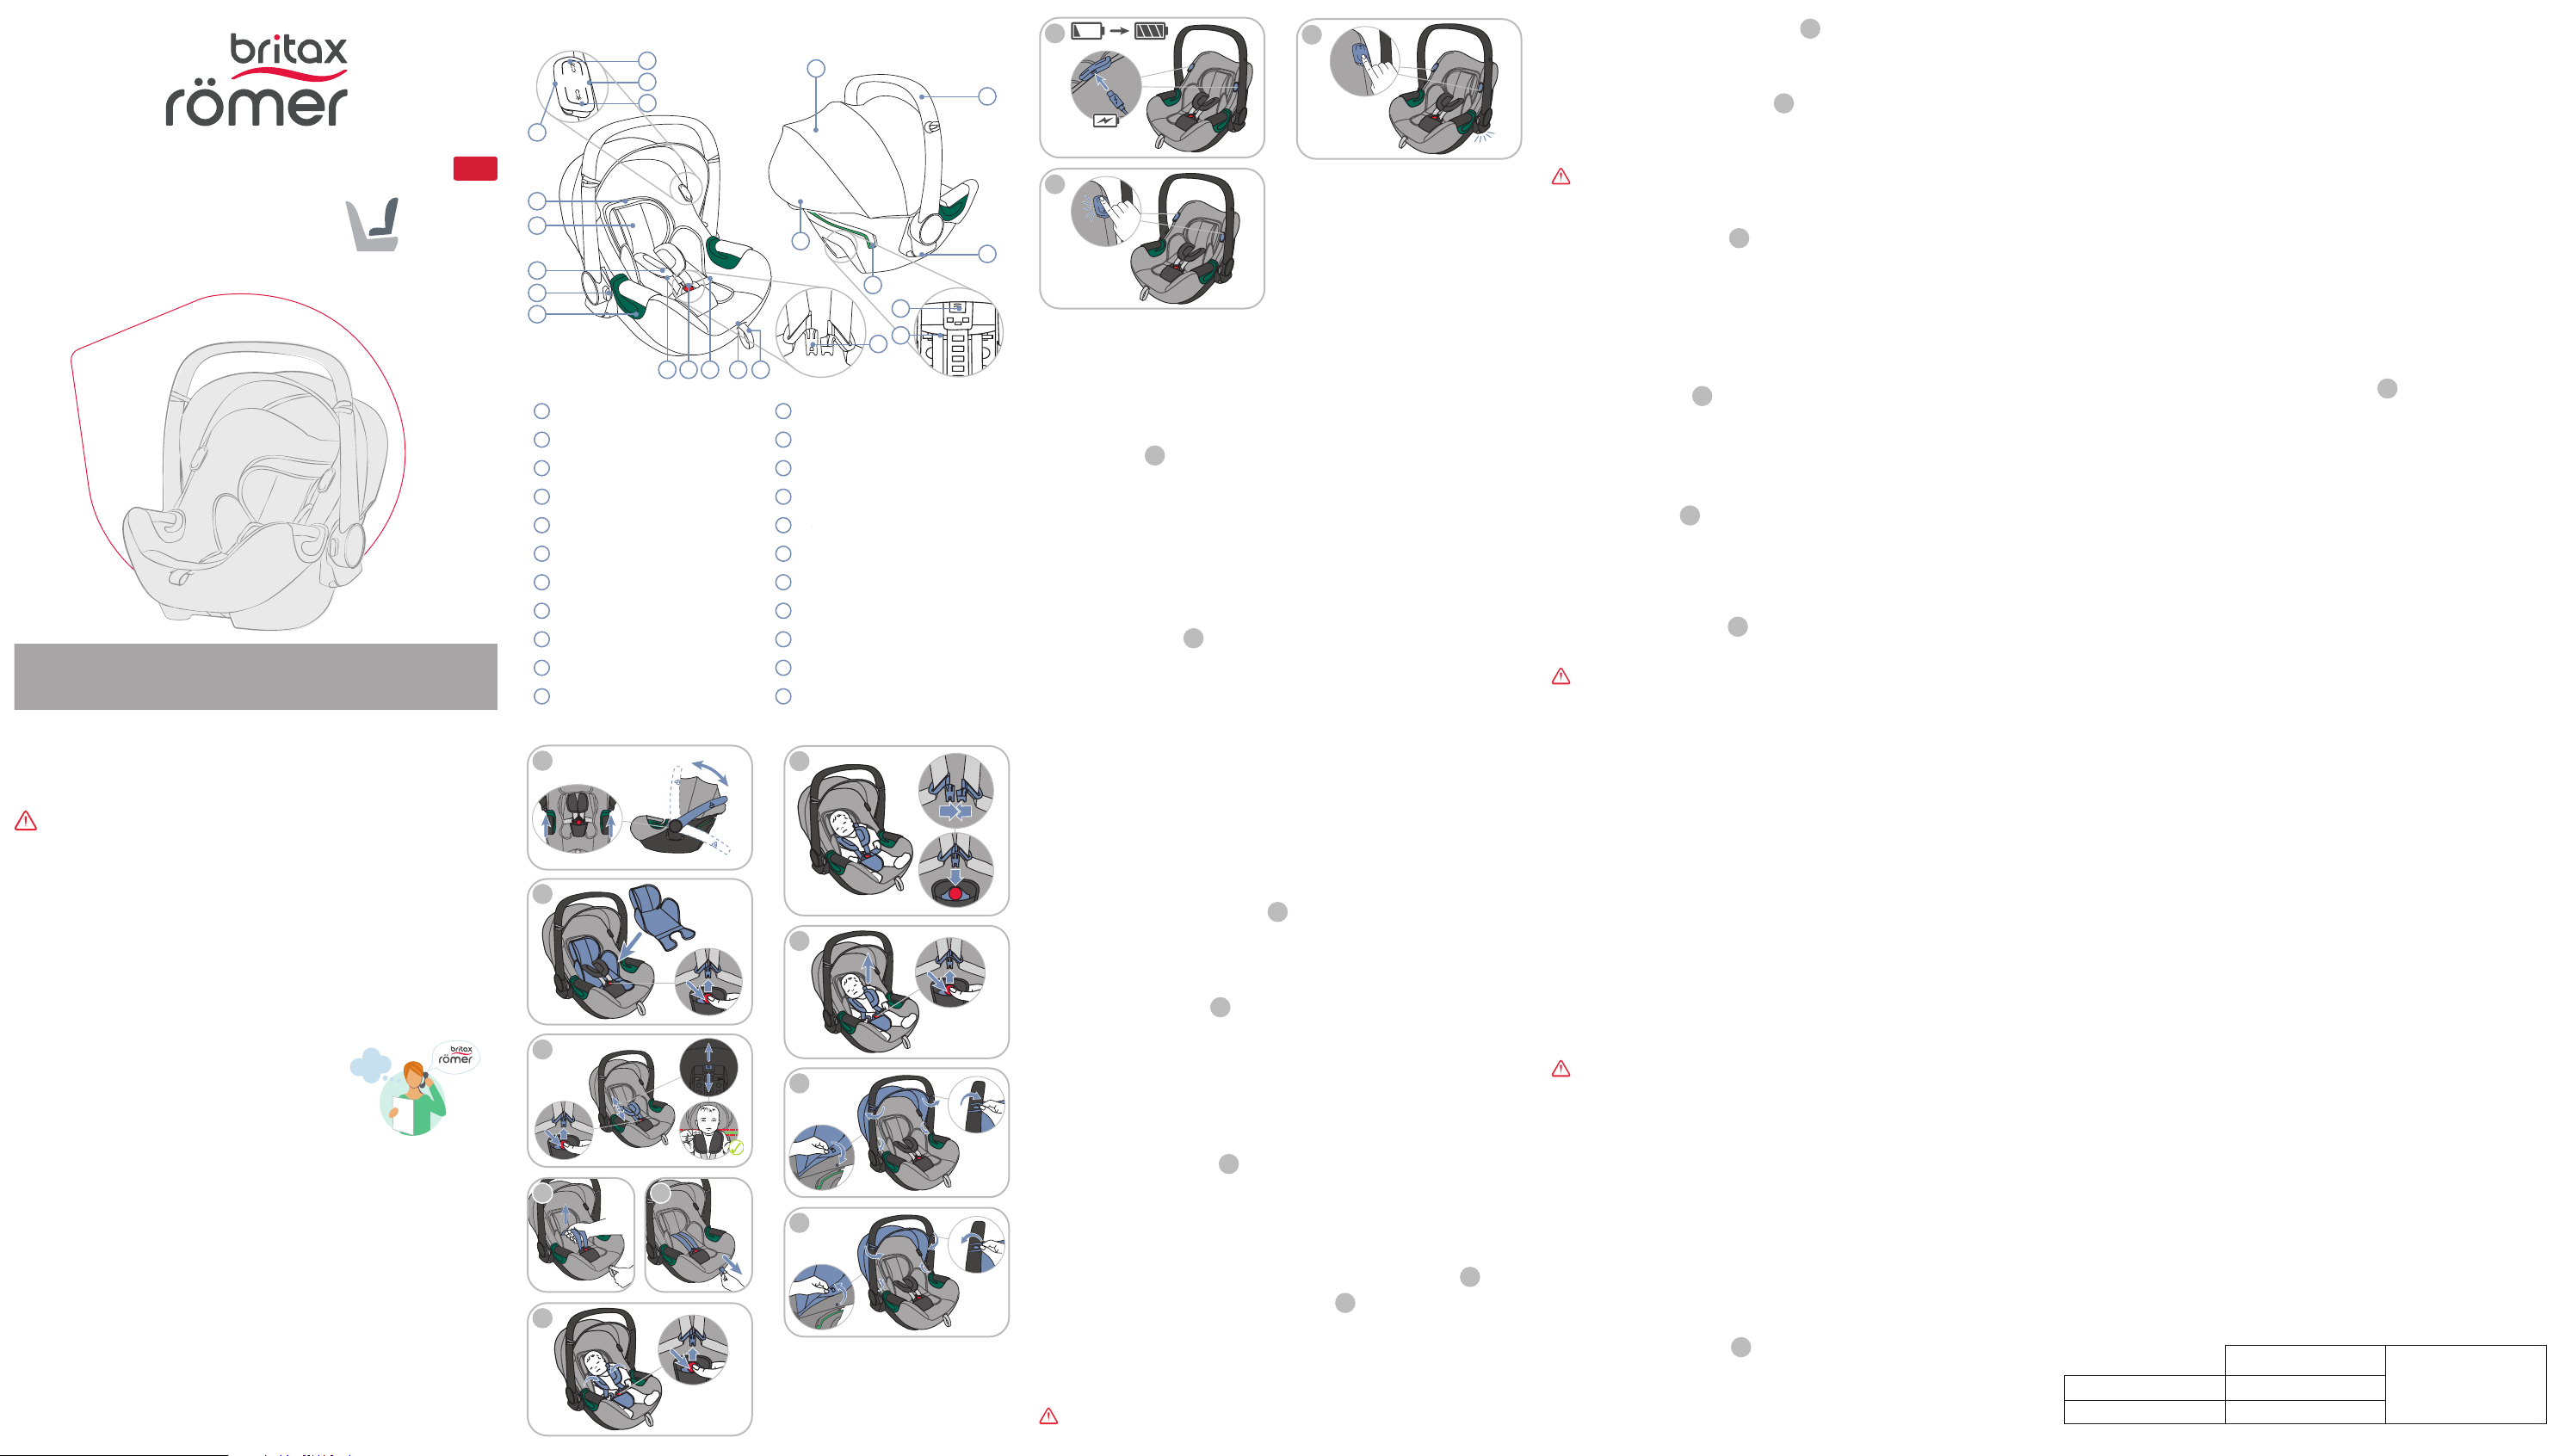
01 T 12 Lap belt
02 USB-C charging connection 13 Adjustment button
03 Bottom button 14 Adjustment belt
04 Red LED 15 Buckle tongues
05 Headrest 16 Shoulder str
06 Seat reducer 17 Release button
07 Shoulder pad 18 Light-green belt holder
08 Swivel button 19 Grey r
09 Dark-green belt guides 20 Sunshade
10 Shoulder strap 21 Handle
11 Harness buckle (red button) 22 Hold points
≤ 13 kg
www.britax-roemer
BRIT
1. About this document
WARNING! This oper
the product and contributes to its safe use. Non-compli-
ance may lead to serious or even fatal injuries. If in doubt,
do not use product and immediately contact your retailer
►Read operating instructions.
►Keep with the product for r
►If the product is given to thir
with the product.
Contact information
If there ar
BRIT
www.britax-roemer
hello@britax-roemer
BRIT
Theodor-Heuss-Str
89340 Leipheim
Germany +49 (0) 8221 3670 199
BRIT
1 Churchill W
Andover
Hampshire SP10 3UW
United Kingdom +44 (0) 1264 386034
BRIT
Jörgen Kocksgatan 4
SE-211 20 Malmö
Sweden
?
Handle
Y in three positions: A, B and C:
A - F
B - F
C - F
Adjust handle 1
►Hold down both swivel buttons.
►Move handle to desired position.
►Release swivel button.
►Ensure that the handle is locked in place.
Seat reducer
Use the seat reducer when your child baby is still very small.
Insert seat reducer 2
►Pr t
►Place seat reducer in the infant carrier
)The part filled with the foam blocks must be facing downwards.
►Thread the lower part of the seat r underneath the shoulder straps .
►Make sure that the seat r is in contact with the backrest of the infant
carrier
Shoulder straps
A properly adjusted headr ensures optimal pr
infant carrier is corr
the shoulder straps ar
shoulders.
Loosening the shoulder str 4
►Hold adjustment button down.
►Pull both shoulder str
►Release adjustment button.
Adjust shoulder straps 3
►Pr t
►Pr on the shoulder str
)The release button is on the back of the infant carrier
)The outlet slots for the shoulder belt must be roughly two finger
(25mm) below the child's shoulders.
►Ensure that adjustment button on the shoulder str
Tighten shoulder straps 5
►Pull adjustment belt out str
)Do not pull adjustment belt upwards or downwar
Buckle child in
►Loosen the shoulder str 4
►Pr t 6
►Move harness buckle forwards.
►Place child in final carrier
)A
►Pass shoulder str
WARNING! Ensurare not twist
►Bring both buckle tongues together 7
►Lock buckle tongues in harness buckle.
ªBuckle tongues audibly lock.
►Pull adjustment belt out str 5
)Do not pull adjustment belt upwards or downwar
ªPlace shoulder straps tight t
WARNING! Ensur
over your child's hips.
Unbuckle child 8
►Pr
►Remove child.
Sunshade
The sunshade protects your child's head fr
and closed with the handle.
Remove sunshade 9
►Release push buttons on the side.
►Remove elastic seam edge.
►Hang refer
►Attach sunshade hooks.
Attach sunshade 10
►Attach refer
►Pull the elastic seam over the head end of the infant carrier
►Secure the elastic seam at the side with the fasteners.
Charge battery 11
)Only available for BAB
WARNING! Risk of e
damage to the battery
►Do not immerse battery in water
►Keep battery away fr
►Pr
and stor
►Never remove, modify or r
ous substances.
►If the battery is damaged or has deformations or cracks, do not dismantle
it or modify its structure.
►If the battery loses electrolyt
liquid. If there is contact with the eyes or skin, see a doctor
F The first charging pr-
cess enables the light functions. Use the charging cable pr
charging the battery
charge the battery in ambient t
foreign objects into the char
500 charge cycles.
►Connect charging cable to one of the two USB-C char
)Each control element has a USB-C char
WARNING! Risk of strDo not lead the charging cable acr
the child seat. Lead the char
►Connect charging cable to a 5V USB adapt
ªIf the red LED is permanently on, the battery is char
ªIf the red LED is no longer on, the battery is fully char
►Remove charging cable and stor
compartment).
►Recharge the battery as soon as the char
)Y
flashes three times, the char
)The interior lighting, the installation light and the safety light can be used
during charging.
Interior lighting 12
)Only available for BAB
)Operation of the BAB
The interior lighting can be controlled manually both with the left and right
control element. In addition, delayed switching-o can be activated. The light
switches o automatically after a few minut
Switch light on and o
►Briefly press the top butt
ªLight switches on.
►Briefly press the top butt within a few minutes.
ªBrightness is increased.
)The brightness can be increased twice. P again
switches o the light.
)If the light is on and you press the top butt
light goes out.
Activate delayed switching on
►Hold down the top button until the light flashes once.
ªDelayed switch-o is enabled.
)The light switches o automatically after a few minut
Installation and safety light 13
)Only available for BAB
)Automatic mode can be activated aft
The installation light aids with the installation of the product. Y
to other drivers with this safety light. Both lights are switched on and o
automatically by sensors. The sensors react t
to the compatible station FLEXBASEiSENSE, as well as to compatible
BRIT
Activate automatic mode
►Briefly press the bottom butt
ªAutomatic mode is active.
)If you install the infant carrier with a 3-point seat belt, we recommend
disabling automatic mode.
Switch on light manually
Y
the left and right control element. T
automatic mode must be active. As soon as you remove the child seat fr
station or a pushchair
►Briefly press the bottom butt
ªSafety light turns on.
ªInstallation light turns on.
►Briefly press the bottom butt
ªSafety light remains on.
ªInstallation light turns o.
►Briefly press the bottom butt
ªSafety light turns o.
ªInstallation light turns on.
►Briefly press the bottom butt
ªManual mode is disabled.
ªAutomatic mode is active.
Disable automatic mode
►Hold down the bottom button for two seconds.
ªAutomatic mode is disabled.
ªInstallation and safety light are disabled.
Switch o installation and safety light manually
)See “Disable automatic mode”
3. Intended use
This product has been designed, test
quirements of the Eur
This product many only be used to secur
or on a pushchair
Rear-facing Never use the pr
forward-facing.
Body height 40 - 83 cm
Body weight Maximum 13 kg
1
2
3
4
8
7
10
5
6
11
12
13
9
11
22
21
06
08
09
03
15
07
02
13
20
16
14
18
19
17
01
04
05
10 12
2000035156 A6
USER GUIDE
BAB
BAB
EN