651R/751Razur
21
ENGLISH
The 651R has 4 HDMI (High Definition Multi-Media Interface) inputs and two
HDMI outputs. The 751R has 6 HDMI inputs (one of which is on the front)
and two outputs. HDMI is a fully digital audio/video system for picture and
audio in digital format for best possible picture quality.
HDMI outputs on Blu-ray, DVD players and Set-top boxes also often support
higher resolution formats including progressive scan types. Consult both your
HDMI source and TV manuals for details, it is often possible to select from
various options, you will want to select the highest quality output that both
your source and TV are compatible with.
From Blu-ray players, HDMI can also carry the latest Dolby Digital Plus and
True-HD formats as well as DTS-HD High Resolution and Master Audio.
Ensure that the HDMI output of your player has been set to ‘Bitstream’ or
‘Raw’ to pass the formats to the 651R/751R for decoding. Also some Blu-ray
players feature settings to allow down conversion of Dolby Digital Plus etc. to
backwards compatible Dolby Digital 5.1 for older AV receivers which do not
support these formats.
Ensure any such settings are disabled to allow our 651R/751R access to all
the latest formats. For all the above reasons HDMI is the preferred
connection method for both Audio and Video.
The 651R/751R can however also accept Composite, S-Video and
Component video for sources without HDMI outputs and automatically
transcode and scale this video to the HDMI output. Each of the HDMI and
Component inputs are freely assignable in the OSD to any source. The
Composite and S-Video inputs are physically fixed.
The default setup is as below.
Highlight each HDMI and Component input in turn if you wish to assign it to
a different source (with the Left and Right arrows).
Note: The first four sources are Assigned both an HDMI and a Component
input.
This may seem strange but this just means that these sources have not only
their own HDMI connections but their own Component connections and the
physically assigned S-Video and Composite Video connections all available to
them.
This is useful because Zone 2 uses the analogue video inputs only. Thus if
you are using Zone 2 you will probably want a source to be assigned an HDMI
for viewing in the main room and plus perhaps a component video
connection for viewing in Zone 2. What video input you select to view when
you select each source in the main room is determined by the Video Input
Select menu explained next.
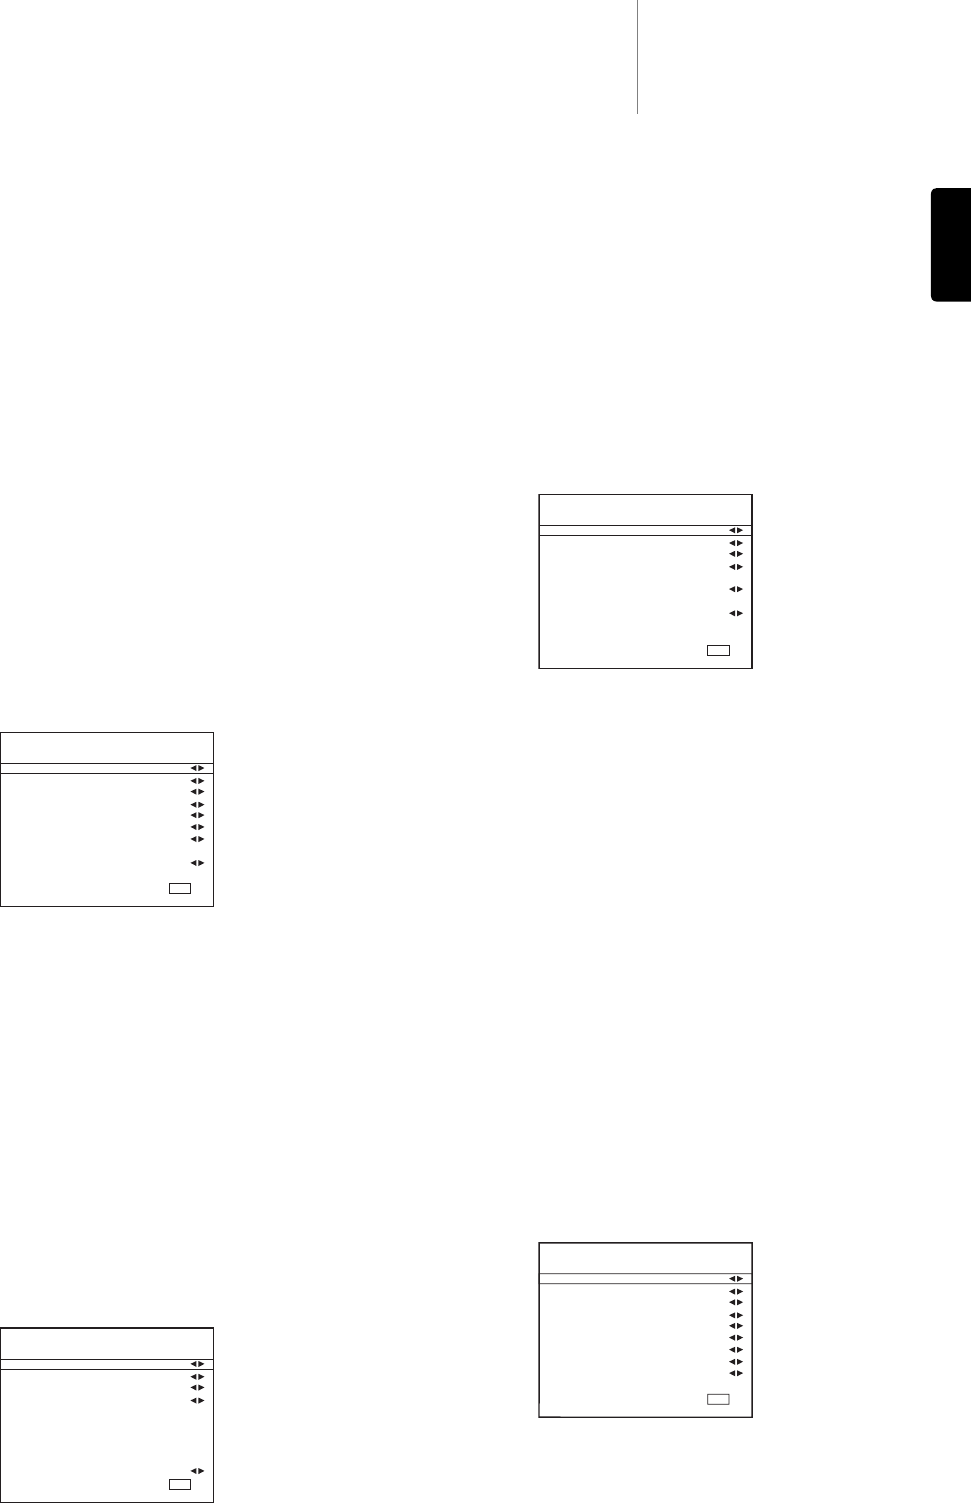
Navigate to the Video Input Select menu.
For each source the currently selected video input type will be shown. This
menu allows you to choose which of the possible video connections that
each source has you actually wish to use.
i.e. if your games console has only an S-Video output and is connected to the
VIDEO1 source, you would select VIDEO1 and then change it from HDMI 2 to
S-Video.
For the main room the 651R/751R automatically transcodes any analogue
video sources selected to HDMI using the Scaler settings as described later.
Note: Assigning a HDMI input to a source automatically also selects Scaler
Bypassing for that source.
You can process these sources if you wish simply by setting the Scaler to
Process in the Scaler Assign Processing menu afterwards.
Assigning video inputs
The next step is to select each source input in turn on the 651R/751R and
tell the unit:
• The type of audio connection you want to use for that source (Analogue,
Digital or HDMI).
• The processing mode for that source.
The 651R/751R remembers these settings individually for every source
input and automatically recalls them as and when you change source input.
Audio connection type
Select the ‘Audio Input Select’ menu. Highlight each source in turn and select
either analogue, digital or HDMI input types (use the Left and Right arrows):
The options shown will be Analogue, Digital and HDMI if that source has been
assigned an HDMI input for video as above.
Analogue inputs will require a stereo phono/RCA to phono/RCA cable
connection to the 651R/751R. Digital inputs will require either a 75ohm
digital type phono/RCA to phono/RCA co-axial cable (S/P DIF) or an optical
fibre cable (TOSLINK). The 651R/751R will automatically use whichever is
connected. Do not make connections to both the Optical and Co-axial inputs
for a source.
Once you have set the audio types exit the OSD to save.
This setting can also be changed at any time without using the OSD by
pressing the Audio Input Type button on the front panel or remote, this will
then cycle between analogue, digital or HDMI input types where available for
the currently selected source, as usual they will then be remembered the
next time you return to that source.
Scaler assign/processing
The 651R/751R features an Anchor Bay ABT2010 digital video processor/
scaler.
This can if desired process any of the video sources and scale them up (or
down) to various resolutions.
This feature is most useful with analogue video sources where the processor
can clean up the picture and scale it to 720p, 1080i or 1080p before
outputting them over HDMI to a suitable TV.
On entering this menu you will see that the sources that you assigned an
analogue video input are automatically set to Process.
Sources that you assigned an HDMI input for video are automatically set to
Bypass (i.e. no processing).
This is because many HDMI sources will be natively 1080p or may have high
quality processing built in where it is best to send this video directly to the TV
without any further processing in the 651R/751R.
Source setup