Operation Guide 3147
10
To set the time and date manually
1. In the TimekA until the city code starts to flash,
which indicates the setting screen.
2. Use E and B to select the city code you want.
• Make sure y
setting.
• For full inf“ City Code ”.
3. Press D to mov
other settings.
Y
Seconds
Hour
Minutes
Day
Month
12/24-Hour
Format
Pow
Saving
Barometric
Pressure Unit
Altitude Unit
T
Unit
City Code
DST
• The follo
4. When the timekeeping setting yE and/
or B to change it as described below
Do this:
Use E (east) and
B(west).
Press E.
Press E.
Change the city code
Cycle between Auto DST (AvtA),
Daylight Sa
ON) and
Standard Time OFF ).
T
12H
)
and 24-hour (
24 H
) timekeeping.
Screen
ON
5. Press A to exit the setting screen.
Note
• Auto DST (
AvtA) can be selected only while
LON
,
PAR
,
BER
,
ATH
,
HKG
,
TPE
,
TYO
,
LAX
,
DEN
,
CHI
, or
NYC
is selected as the
Home City code.“ Da”
below
• Y
follo
P“T”)
T“ T
temperature, barometric pressure”)
Press E.
Use E (+) and B (– ).
Reset the seconds to
00
Change the hour or minutes
Change the year
Daylight Sa
Daylight Sa
from Standard
Daylight Saving
The time calibration signals transmitted from Mainflingen (Germany), Anthorn
(England), or Fort Collins (the United States) include both Standard
DST data.
between Standard
with the signals.
• Though the time calibration signal transmitted by the Fukushima and
Fukuoka/Saga, Japan tr
currently is not implemented in Japan (as of 2007).
• The default DST setting is A
AvtA) whenev
LON
,
PAR
,
BER
,
ATH
,
HKG
,
TPE
,
TYO
,
LAX
,
DEN
,
CHI
, or
NYC
as your Home City code
• If you experience prob
area, it probably is best to s
Saving
To change the Daylight Saving Time (summer time) setting
1. In the TimekA until
the city code star
the setting screen.
2. Press D and the DST setting screen appears.
3. Use E to cycle through the DST settings in
the sequence shown belo
Auto DST (
AvtA
) DST off (
OFF
) DST on (
ON
)
•
If you change y
area, the current DST setting will be retained.
outside y
T
•
HKG , TPE , and TYO
• LAX , DEN , CHI , NYC, ANC, and HNL
• LON , PAR , BER , and ATH
• All other city codes
4. When the setting you want is selected, press A to e
• The DST indicator appears to indicate that Daylight Sa
l
l
l
l
l
l
l
l
l
l
l
l
l
l
l
l
l
l
l
l
DST indicator
Reference
This section contains more detailed and technical information about watch
operation.
features and functions of this w
Auto Return Features
• The watch returns to the
perform any b
Alarm, Receive, or Barometer/Thermometer Mode.
• If you do not perf
Altimeter Mode, the watch will return to the
automatically
• If you leav
minutes without performing any oper
screen automatically
Initial Screens
When you enter the
when you last e
Scrolling
The E and B buttons are used on the setting screen to scroll through data
on the displa
operation scrolls through the data at high speed.
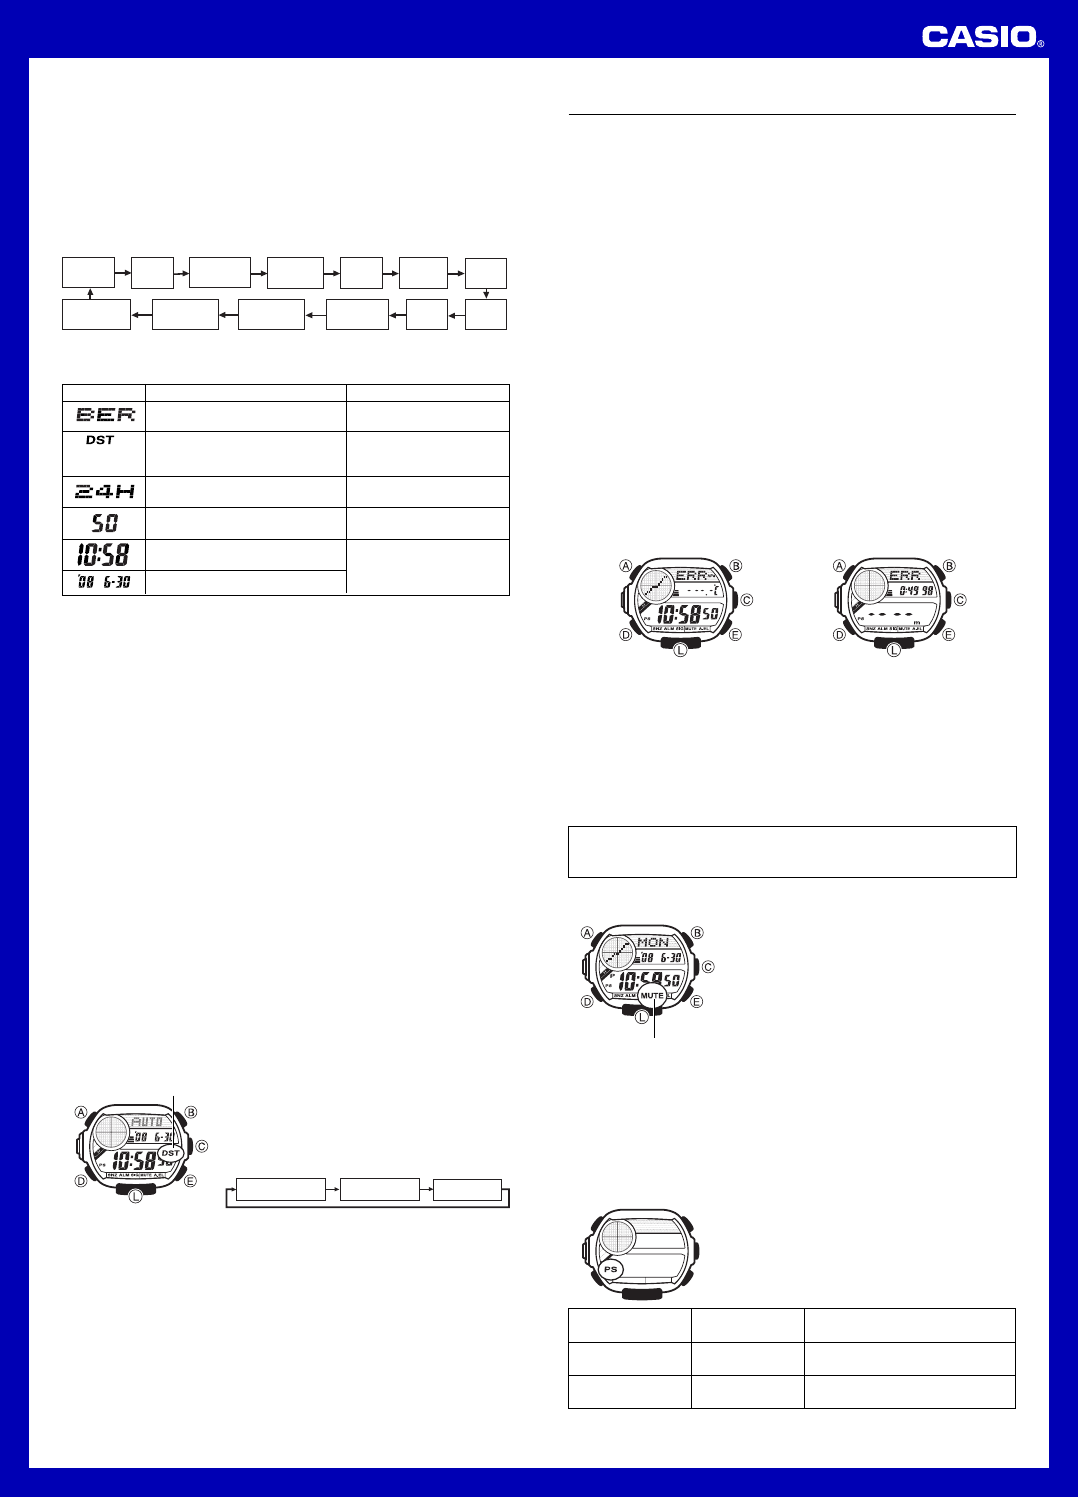
Sensor Malfunction Indicator
Subjecting the watch to strong impact can cause sensor malfunction or
improper contact of internal circuitr
ERR
(error) will
appear on the display and sensor oper
Barometric Pressure
Measurement
Altitude
Measurement
• If ERR appears while a measurement operation is being perf
sensor mode, restart the measurement. If
ERR appears on the displa
again, it can mean there is something wrong with the sensor
• Even if battery power is at Le
Mode or Altimeter Mode sensor ma
voltage av
ERR will appear on
the display
resume once battery voltage returns to its nor
• If
ERR keeps appearing during measurement, it could mean there is a
problem with the applicab
Whenev
your original dealer or nearest authorized CASIO distributor as soon as
possible.
Button Operation
The button oper
press one of the watch’s buttons.
button oper
• Even if you turn off the button oper
the alarm, Hourly Time Signal, and Countdo
Timer Mode alarm all operate normally
To turn the button operation tone on and off
In any mode (e
the display), hold doD to toggle the b
operation tone on (MUTE not displa
(MUTE displa
• Since the D button is also the mode change b
the button operation on or off also causes the w’s current mode to
change.
• The MUTE indicator is display
tone is turned off.
Mute indicator
P
When turned on, Po
state automatically whene
a certain per
table below sho
aff
• There actually are two sleep state lev
“display sleep ” and “ function sleep”.
Elapsed Time
Dark
60 to 70 minutes
(Display Sleep)
6 or 7 days
(Function Sleep)
Display
Blank, with
PS flashing
Blank, with
PS not flashing
Operation
Displa
are enabled.
All functions are disab
timekeeping is maintained.