Operation Guide 4334
3
3. Perf
on the display
• While the start time setting is flashing, use D (+) and B ( –) to change it.
• Set 0:00 to specify 100 hours
• While the auto-repeat on/off setting ( 0N or 0F ) is flashing on the displa
D to toggle auto-repeat on ( 0N ) and off ( 0F ).
4. Press A to exit the setting screen.
• The auto-repeat on indicator (
) is display
screen while this function is turned on.
• F
Alarm
When the alarm is tur
alarm time is reached.
Time Signal, which will cause the watch to beep twice
ev
• All of the operations in this section are perf
Alarm Mode, which you enter by pressing C.
Hourly time signal
on indicator
Alarm on indicator
Alarm time
(Hour : Minutes)
AM indicator
T
1. In the Alarm Mode, hold down A until the hour setting
of the alarm time star
setting screen.
• This operation turns on the alarm automatically
2. Press C to mov
minute settings.
3. While a setting is flashing, use D (+) and B ( –) to
change it.
• When setting the alarm time using the 12-hour format, take care to set the time
correctly as a.m.A indicator) or p.m.P indicator).
4. Press A to exit the setting screen.
Alarm Operation
The alarm sounds at the preset time for 10 seconds, regardless of the mode the watch
is in.
• T
T
In the Alarm Mode, hold down D to sound the alarm.
l
l
l
l
l
l
l
l
l
l
l
l
T
In the Alarm Mode, press D to cycle through the settings shown below
• The alarm on indicator and the Hourly Time Signal on indicator are shown on the
display in all modes while these functions are turned on.
Alarm Off
Signal Off
Alarm On
Signal Off
Alarm Off
Signal On
Alarm On
Signal On
Alarm Off
Signal Off
Alarm On
Signal Off
Alarm Off
Signal On
Alarm On
Signal On
Light figures on a dark background
Dark figures on a light background
W
The W
50 cities (30 time zones) around the world.
• The times kept in the
synchronized with the time being kept in the
Timekeeping Mode.
any
your Home
Timekeeping Mode time
• Select a city code in the
current time in any particular time zone around the
globe.“UTC Diff” for
information about the UTC diff
supported.
• All of the operations in this section are perf
World C.
City code
Current time in
selected city
Date and day of the week
in the selected city
T
While in the WD to scroll eastward through the city codes
(time zones) or B to scroll westward.
T
1. In the D and B to displa
city code (time zone) whose Standard
Saving
2. Hold down A to toggle DaDST
indicator displayDST indicator
not display
• The DST indicator is shown on the
while Daylight Sa
• Note that changing the Daylight Sa
code causes the setting to be applied to all city codes.
DST indicator
Illumination
This watch has an EL (electro-luminescent) panel that
causes the entire display to glow f
dark. The watch’s auto light switch turns on illumination
automatically when you angle the watch to
• The auto light switch m
the auto light s
• See “Illumination Precautions ” for other important
information about using illumination.
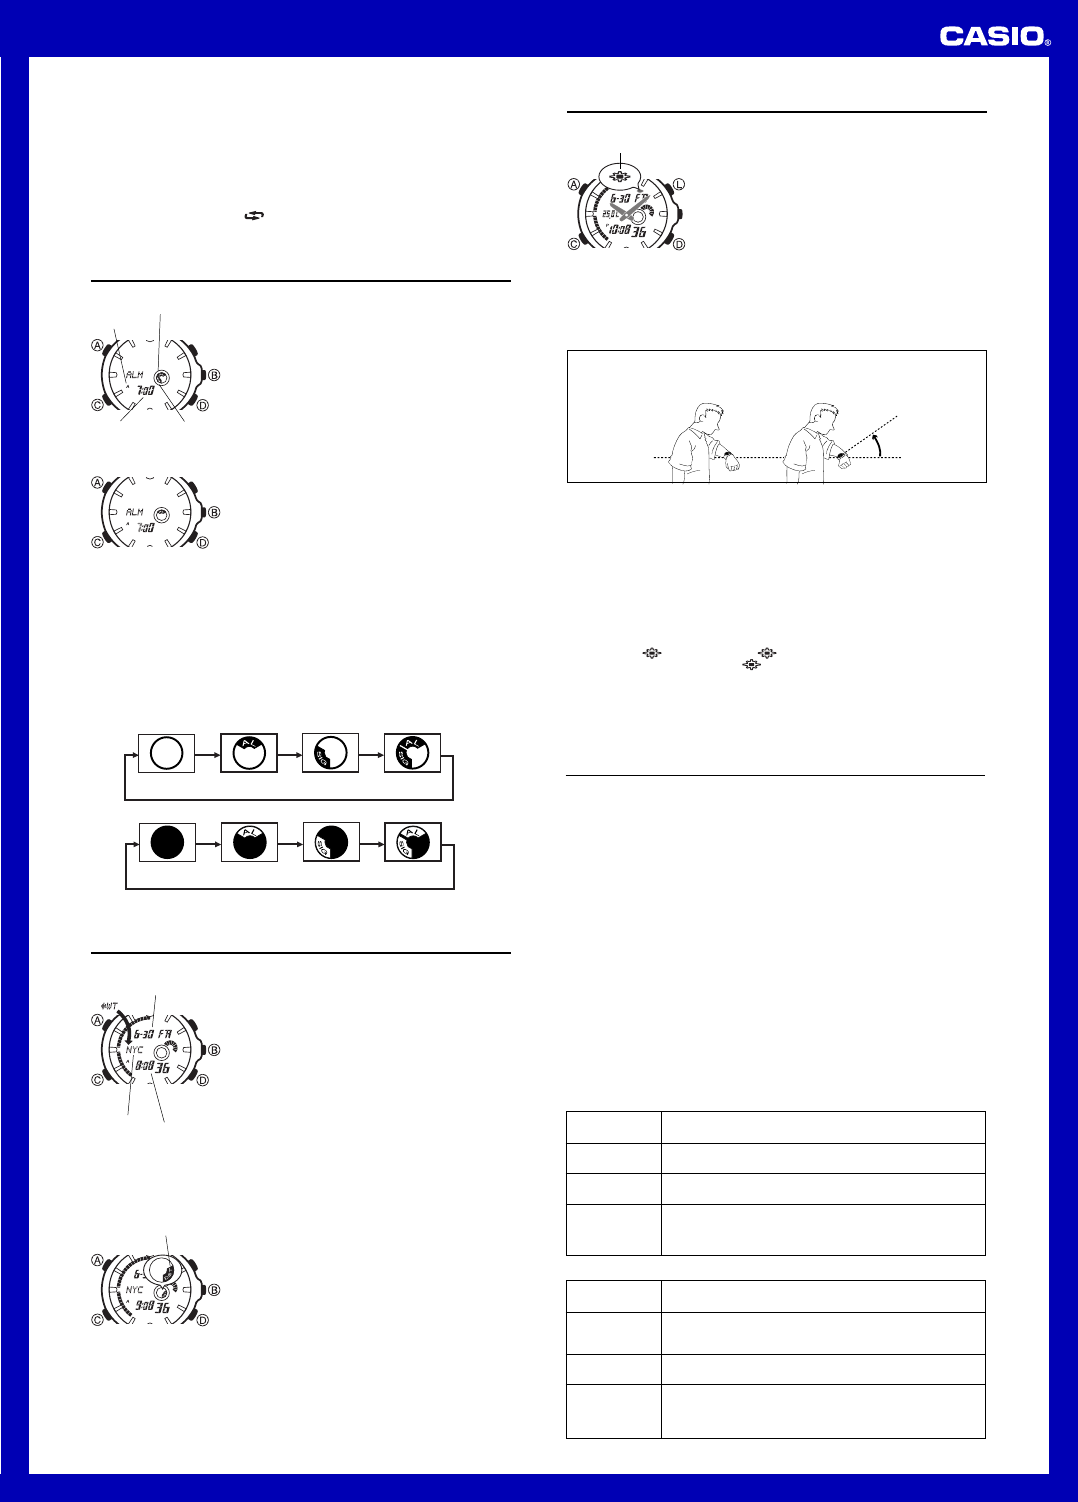
T
In any mode, press L to illuminate the displa
1.5 seconds.
• The abov
the current auto light s
Auto light switch
on indicator
About the Auto Light Switc
T
your wrist as described below in any mode, e
screen.
Moving the watch to a position that is par
you more than 40 degrees causes illumination to turn on.
• Wear the watch on the outside of y
Par
ground
More than
40°
Warning!
•
•
• Always make sure y
display of the watch using the auto light s
running or engaged in any other activity that can result in accident or injury
Also take care that sudden illumination b
startle or distract others around y
•
•
• When you are wearing the watch,
off before riding on a bicyc
vehicle.
distraction, whic
T
In the D f
light switch on (
displayed) and off ( not displayed).
• The auto light switch on indicator (
) is on the display in all modes while the auto
light switch is turned on.
• In order to protect against running down the battery
automatically about six hours after you turn it on.
turn the auto light switch back on if y
• Illumination is alwa
while an alarm is sounding.
Reference
This section contains more detailed and technical information about watch oper
It also contains important precautions and notes about the various features and
functions of this watch.
Stopwatch Modes
The following describes ho
stopwatch modes.
Managing Memory Data
Pressing the D button in the Single Stopwatch Mode or the D or B button in the
Dual Stopwatch Mode to start a new elapsed time measurement operation creates a
new log in memory
A new log is created each time y
A log contains a log title screen, and records of all the lap times that are recorded
during elapsed time measurement.
• The capacity of the watch's memory is 50 records.
• If y
full, adding another record causes the oldest record in the log to be deleted
automatically to make room f
• If y
memory becomes full, adding another record causes the oldest log in memor
all of its records to be deleted automatically to make room f
How stopwatch data is stored
The following tab
button operations
Single Stopwatch Mode data
Stopwatch
Button Operation
F
press D to start.
Press D to
display lap time
Press A to stop
elapsed time
measurrement
and reset.
Data Storage Description
Creates a new log (ST1).
pressed, and the log number
Creates a new record with each b
time and total elapsed time at the point the button is pressed.
Resets the elapsed time to all zeros without recording data.
Stopwatch
Button Operation
F
press D or B to
start.
Press D or B to
display lap time
Press A to stop
elapsed time
measurement
and reset.
Data Storage Description
Creates a new log (ST2).
pressed, and the log number
Creates a new record with each button operation.
time the point the button is pressed.
Resets the elapsed time to all zeros without recording data.
Dual Stopwatch Mode data