3
Operation Guide 4778
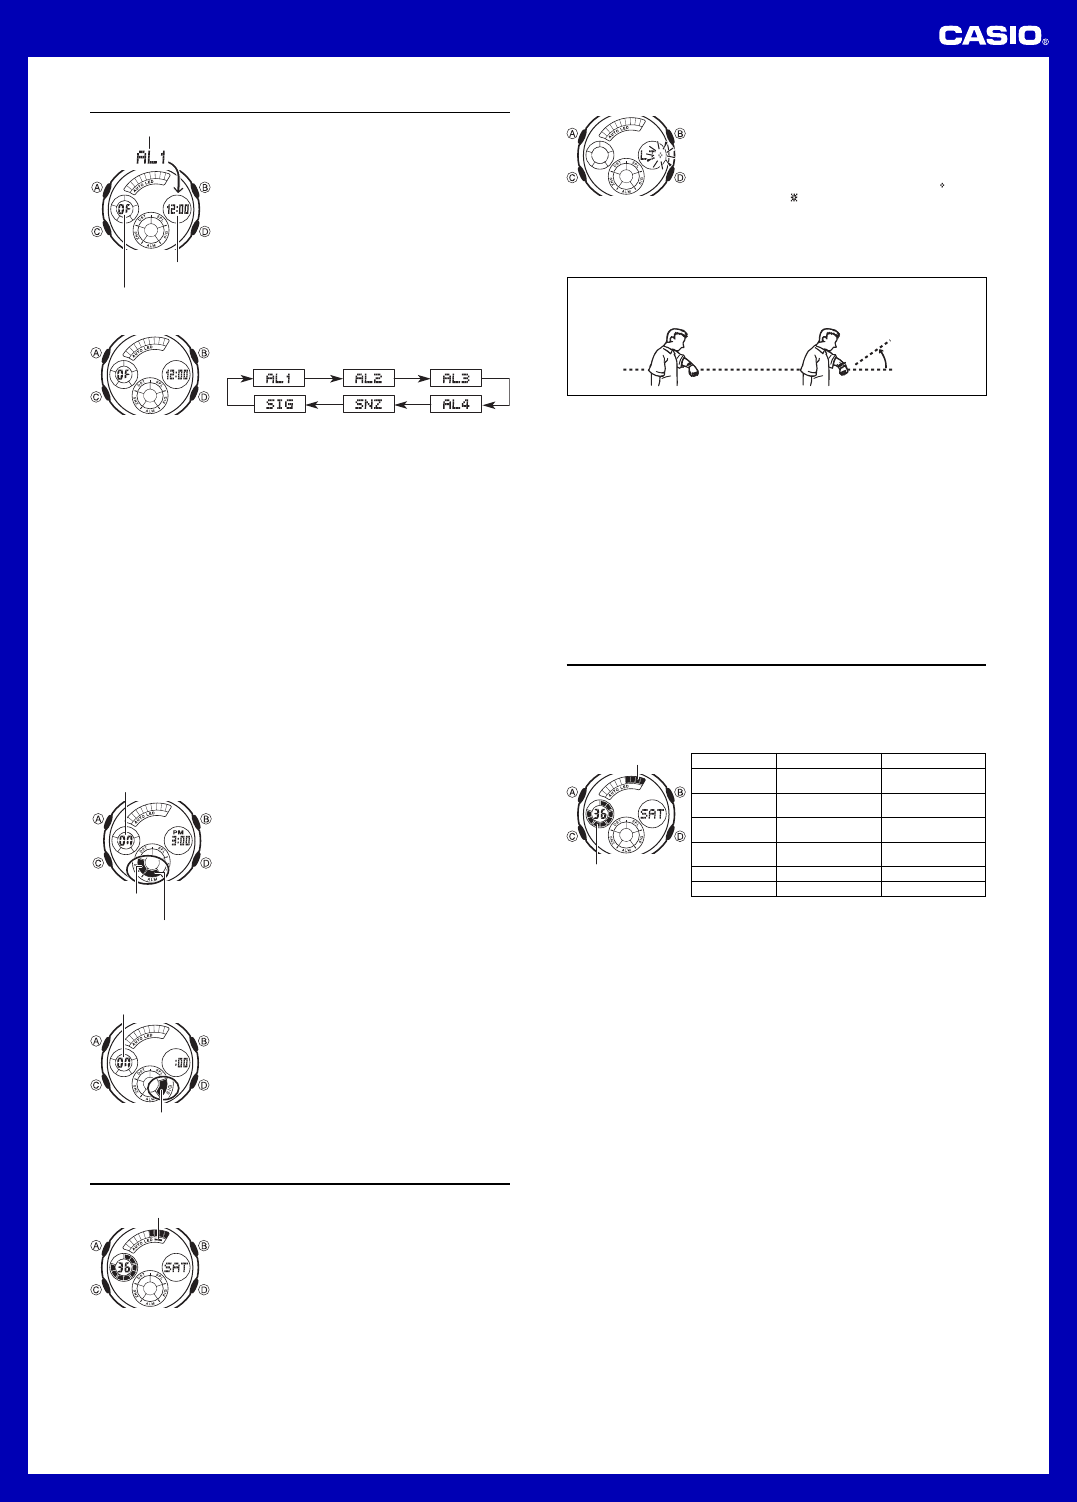
Alarm number
Alarm time
(Hour : Minutes)
On/Off status
Alarms
Y
alarm is turned on, the alarm tone sounds when the alarm
time is reached. One of the alarms is a snooze alarm,
while the other four are one-time alarms.
Y
watch to beep twice every hour on the hour
• There are six screens in the
one-time alarms (indicated by numbers from
AL1through AL4), one is for a snooze alarm
(indicated by
SNZ), and one is for the Hourly T
Signal (indicated by
SIG).
• All of the operations in this section are performed in the
Alarm Mode, which you enter by pressing C.
To set an alarm time
1. In the D to scroll through the alarm
screens until the one whose time you want to set is
displayed.
• T
from
AL1through AL4. T
by
SNZ.
• The snooze alarm repeats every five minutes.
2. After you select an alarm, hold down A until the hour setting of the alarm time
starts to flash, which indicates the setting screen.
• This operation automatically turns on the alarm.
3. Press C to move the flashing between the hour and minute settings.
4. While a setting is flashing, use D (+) and B ( –) to change it.
• When setting the alarm time using the 12-hour format, take care to set the time
correctly as a.m. (no indicator) or p.m. (PM indicator).
5. Press A to exit the setting screen.
Alarm Operation
The alarm sounds at the preset time for about 20 seconds, regardless of the mode the
watch is in. In the case of the snooze alarm, the alarm operation is performed a total
of seven times, every five minutes, or until you turn the alarm off.
• Alarm and Hourly T
Timekeeping Mode digital time.
• T
• Performing any one of the following operations during a 5-minute interval between
snooze alarms cancels the current snooze alarm operation.
Displaying the Timekeeping Mode setting screen
Displaying the
SNZ
setting screen
To test the alarm
In the D to sound the alarm.
To turn an alarm on and of
1. In the D to select an alarm.
2. Press A to toggle it on (
ON
displayed) and off
(
OF
displayed).
• Turning on a one-time alarm (AL1through AL4)
displays the alarm on indicator on its Alarm Mode
screen.
• Turning on the snooze alarm (
SNZ) displays the alarm
on indicator and snooze alarm indicator on the
Mode snooze alarm screen, and in all other modes.
• In all modes (except for the
indicator is shown for any alarm that is currently turned
on.
• The alarm on indicator flashes while the alarm is
sounding.
• The snooze alarm indicator flashes during the 5-minute
intervals between alarms.
To turn the Hourly T
1. In the D to select the Hourly Time
Signal (
SIG).
2. Press A to toggle it on (
ON
displayed) and off
(
OF
displayed).
• The Hourly T
display on the
and in all other modes while the Hourly T
turned on.
On/Off status
Hourly time signal
on indicator
On/Off status
Alarm on indicator
Snooze alarm
indicator
Auto light
switch indicator
Illumination
An LED (light-emitting diode) illuminate the display for
easy reading in the dark. The watch’s auto light switch
illuminates the display automatically when you angle the
watch towards your face.
• The auto light switch must be turned on (indicated by
the auto light switch indicator) for it to operate.
• See “ Illumination Precautions ” for more important
information.
To specify the illumination duration
1. In the Timekeeping Mode, hold down A until the
seconds start to flash, which indicates the setting
screen.
2. Press C nine times so the illumination duration setting
screen is on the display
3. While the illumination duration setting is flashing, press
D to toggle the setting between one second (
) and
three seconds (
).
4. Press A to exit the setting screen.
About the
While the auto light switch is enabled, illumination turns on for about one second or
three seconds, whenever you position your wrist as described below in any mode.
Moving the watch to a position that is parallel to the ground and then tilting it
towards you more than 40 degrees causes illumination to turn on.
• Wear the watch on the outside of your wrist.
Warning!
•
•
• Always make sure you are in a safe place whenever you are reading the watch
using the auto light switch. Be especially careful when running or engaged in
any other activity that can result in accident or injury
sudden illumination by the auto light switch does not surprise or distract
others around you.
•
•
• When you are wearing the watch, make sure that its auto light switch is turned
off before riding on a bicycle or operating a motorcycle or any other motor
vehicle. Sudden and unintended operation of the auto light switch can create
a distraction, which can result in a traffic accident and serious personal injury
To turn the auto light switch on and of
In any mode, hold down B for about two seconds to toggle the auto light switch on
(auto light switch indicator displayed) or off (auto light switch indicator not displayed).
• The auto light switch indicator is on the display in all modes while the auto light
switch is turned on.
• In order to protect against running down the battery
automatically turns off approximately six hours after you turn it on.
To turn on illumination manually
In any mode (except when a setting screen is on the display), press B to turn on
illumination.
• The above operation turns on illumination regardless of the current auto light switch
setting.
•
Y
the illumination duration. When you press
B
, the illumination will remain on for about
one second or three seconds, depending on the current illumination duration setting.
Parallel to ground
More than 40
°
Mode
T
World T
Countdown
T
Stopwatch
Alarm
Hand Setting
Graphic Area A
T
seconds
World Time Mode
seconds
Countdown time
minutes
Stopwatch time
seconds
No indication
No indication
Graphic Area B
T
minutes
World Time Mode
minutes
Countdown time
seconds
Stopwatch time
1/10 seconds
No indication
No indication
Reference
This section contains more detailed and technical information about watch operation.
It also contains important precautions and notes about the various features and
functions of this watch.
Graphic Areas
The following describes the information indicated by the graphic area in each mode.
Graphic area A
Graphic area B
Auto Return Feature
If you leave a screen with flashing digits on the display for two or three minutes
without performing any operation, the watch automatically exits the setting screen.
Scrolling
The B and D buttons are used in various modes and setting screens to scroll
through data on the display
operation scrolls through the data at high speed.
Initial Screens
When you enter the World T
last exited the mode appears first.
Timekeeping
• Resetting the seconds to
00
while the current count is in the range of 30 to 59
causes the minutes to be increased by 1. In the range of 00 to 29, the seconds are
reset to
00
without changing the minutes.
• With the 12-hour format, the PM indicator appears on the display for times in the
range of noon to 1
midnight to 1
• With the 24-hour format, times are displayed in the range of 0:00 to 23:59, without
any indicator
• The year can be set in the range of 2000 to 2039.
• The watch ’s built-in full automatic calendar makes allowances for different month
lengths and leap years. Once you set the date, there should be no reason to change
it except after you have the watch’ s batteries replaced.
World Time
• All World T
Timekeeping Mode using UTC time dif
• The UTC differential is a value that indicates the time dif
reference point in Greenwich, England and the time zone where a city is located.
• The letters “UTC ” is the abbreviation for “Universal Time Coordinated ”, which is the
world-wide scientific standard of timekeeping. It is based upon carefully maintained
atomic (cesium) clocks that keep time accurately to within microseconds. Leap
seconds are added or subtracted as necessary to keep UTC in sync with the Earth’s
rotation.