Never look directly at the Sun with the naked eye or with a telescope unless you have the proper solar filter. Permanent and irreversible eye damage may result.
Never use your telescope to project an image of the Sun onto any surface. Internal heat build-up can damage the telescope and any accessories attached to it.
Never use an eyepiece solar fi lter or a Herschel wedge. Internal heat build-up inside the telescope can cause these devices to crack or break, allowing unfi ltered sunlight to pass through to the eye.
Do not leave the telescope unsupervised, especially when children or adults unfamiliar with the correct operating procedures of your telescope are present.
We recommend saving your telescope box so it can be used to store the telescope when it is not in use. Unpack the box carefully
as some parts are small. Use the parts list below to verify that all parts and accessories are present.
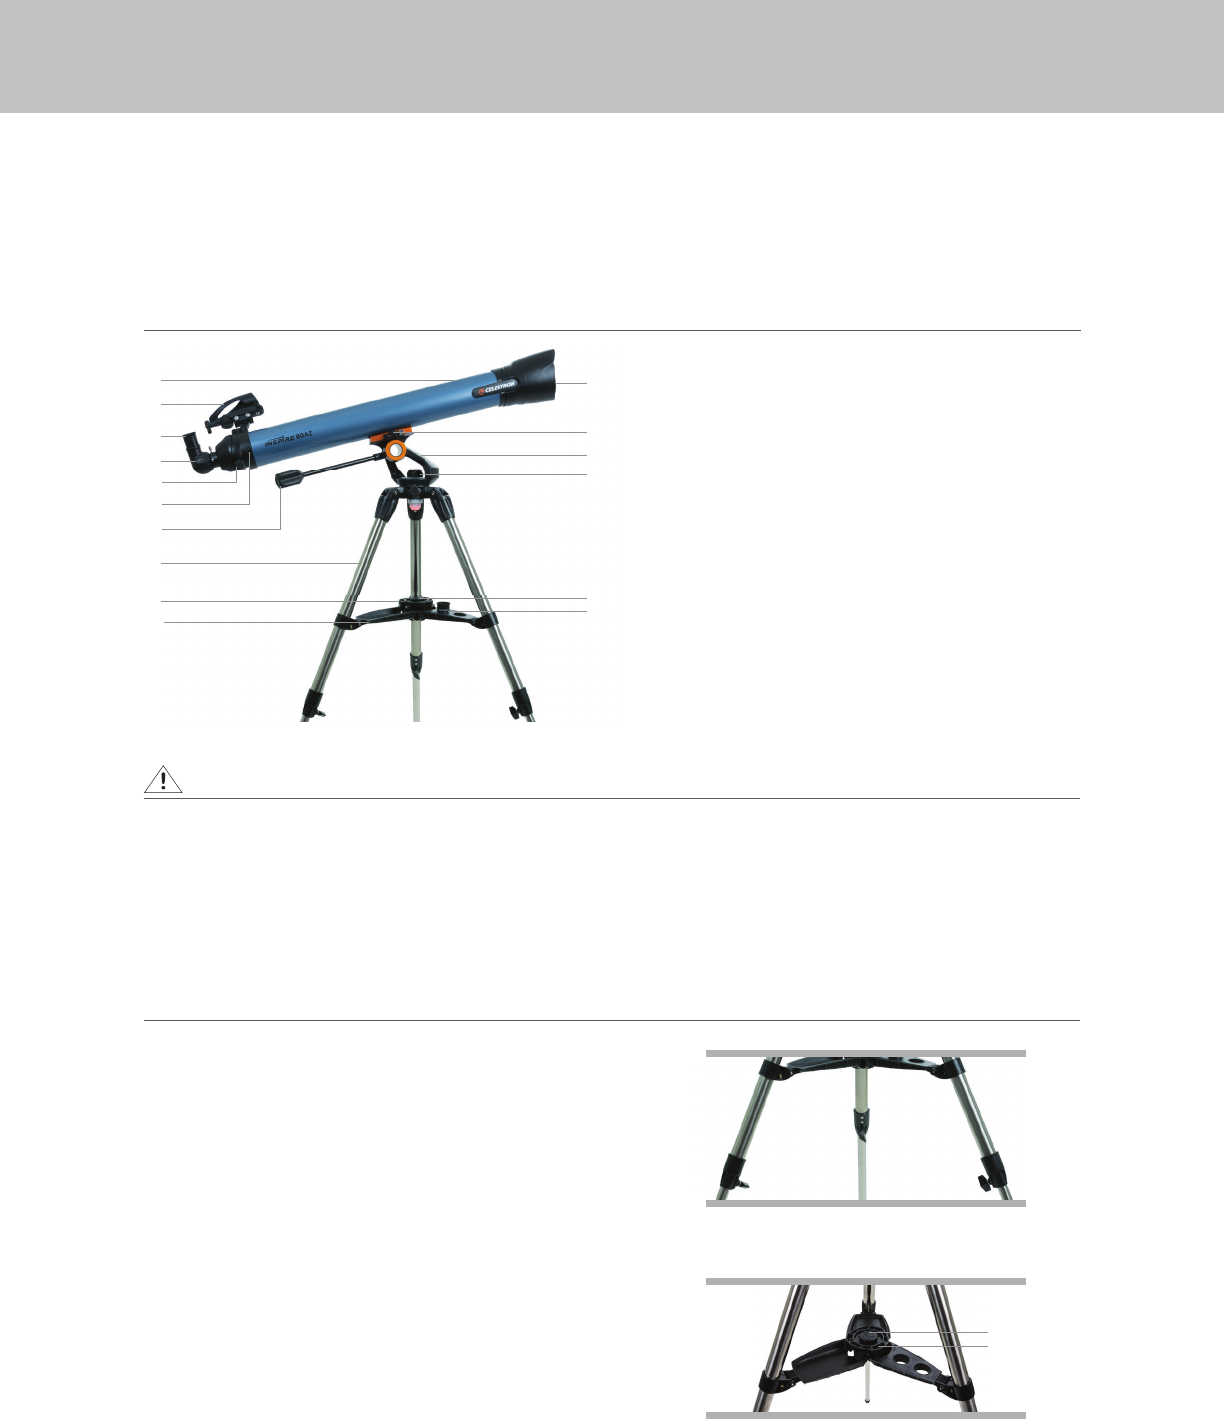
PARTS LIST
WHAT’S IN THE BOX
ASSEMBLING YOUR TELESCOPE
THE MOUNT
The Inspire mount and tripod come fully assembled, so setting it
up is easy.
1.Remove the tripod and mount from the box.
2. Loosen the hand knobs at the bottom of each leg and extend
the inner section of the leg to the desired length. Tighten the
knobs to secure the legs, being careful not to over tighten.
3. Stand the tripod upright and pull the tripod legs apart until the
folding accessory tray snaps into place.
4. Line up the tabs on the spring-loaded accessory tray locking
knob with the notches in the accessory tray and press
downward. Turn the locking knob clockwise about 20 degrees
to fully lock the tray in place.
5. Turn the accessory tray tension knob clockwise until it stops.
Do not over tighten.
NOTE: When closing the tripod at the end of the observing session, be sure to fi rst loosen the tension
knob all the way, then loosen the locking knob by turning it counterclockwise until the spring
pops the locking knob upward. Grab the knob and lift upward and the tripod will fold up.
Libble nimmt den Missbrauch seiner Dienste sehr ernst. Wir setzen uns dafür ein, derartige Missbrauchsfälle gemäß den Gesetzen Ihres Heimatlandes zu behandeln. Wenn Sie eine Meldung übermitteln, überprüfen wir Ihre Informationen und ergreifen entsprechende Maßnahmen. Wir melden uns nur dann wieder bei Ihnen, wenn wir weitere Einzelheiten wissen müssen oder weitere Informationen für Sie haben.
Art des Missbrauchs:
Forenregeln
Um zu sinnvolle Fragen zu kommen halten Sie sich bitte an folgende Spielregeln:
Lesen Sie zuerst die Anleitung;
Schauen Sie nach, ob die Frage bereits gestellt wurde;
Stellen Sie die Frage so deutlich wie nur einigermaßen möglich;
Erwähnen Sie was Sie bereits versucht haben um das Problem zu lösen;
Ist Ihr Problem von einem Besucher gelöst dann lassen Sie ihn / sie wissen in diesem Forum;
Falls Sie reagieren möchten, so verwenden Sie bitte das Antworten- Formular;
Da ihre Frage für alle Besucher sichtbar ist, sollten Sie lieber keine persönliche Daten erwähnen.
Neu registrieren
Registrieren auf E - Mails für Celestron 22401- Inspire 70AZ wenn:
neue Frage gestellt werden
neue Handbücher vorhanden sind
Sie erhalten eine E-Mail, um sich für eine oder beide Optionen anzumelden.
Das Handbuch wird per E-Mail gesendet. Überprüfen Sie ihre E-Mail.
Wenn Sie innerhalb von 15 Minuten keine E-Mail mit dem Handbuch erhalten haben, kann es sein, dass Sie eine falsche E-Mail-Adresse eingegeben haben oder dass Ihr ISP eine maximale Größe eingestellt hat, um E-Mails zu erhalten, die kleiner als die Größe des Handbuchs sind.
Ihre Frage wurde zu diesem Forum hinzugefügt
Möchten Sie eine E-Mail erhalten, wenn neue Antworten und Fragen veröffentlicht werden? Geben Sie bitte Ihre Email-Adresse ein.