2
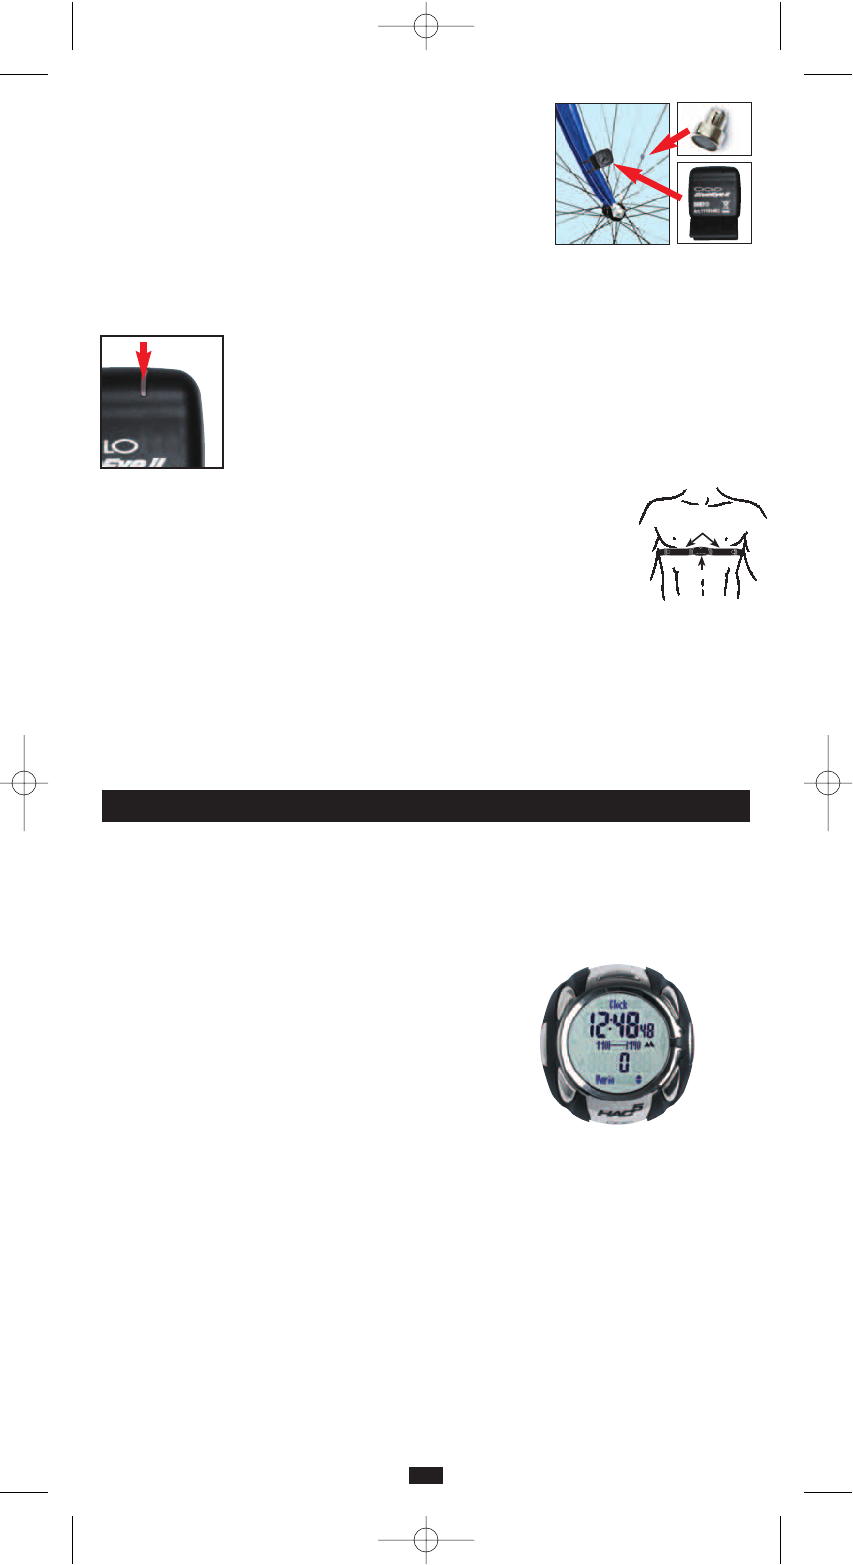
• Installing the speed transmitter:
Attach the speed transmitter at the fork or the rear construction
with the aid of the cable ties (the printed side of the transmitter
with the marking must point to the spokes).
Mount the magnet to a spoke directly opposite the marking on
the transmitter.
Do not over tighten the fixing screw on the magnet. Adjust transmitter in such a way that the
distance between transmitter and magnet does not exceed 3 millimetres.
• Installing the cadence transmitter:
Attach the cadence transmitter to a strut opposite the pedal crank with
the aid of the cable ties (the printed side of the transmitter with the mar-
king must point to the crank).
Mount the magnet on the pedal crank directly opposite the transmitter
with the help of the cable tie, so that the magnet points exactly to the
marking on the transmitter. Adjust transmitter in such a way that the
distance between transmitter and magnet does not exceed 3 millimetres.
Putting on the breast belt
Hang the transmitter belt in the elastic breast belt and then put the breast belt
around your (naked) upper torso. The transmitter (plastic part with inscription)
should be placed above the middle of your upper stomach region, slightly be-
low the breast and the inscription on the transmitter (when seen from the front)
must be legible (pictured).
Pacemaker wearers should consult their doctor before using any heart rate measuring
device!
If your skin is too cold or too dry, the electrical contact between the skin and the electrodes can
be so minimal that an accurate measurement is not possible. It often helps to wet the electrodes
and the skin where they are to be attached with your finger (do not wet the transmitter but only
the rubber parts on the left and on the right). If this doesn’t help, one should train until they start
sweating. You will get the best contact by means of a special electrode-gel (available at your lo-
cal pharmacy).
Using the buttons
Using the buttons
The display of the HAC5 is separated into 3 areas: an upper, a middle and a lower. Each
area displays one function, so that there are three functions displayed simultaneously at all
times. This means that the possible functions can be combined to personal taste.
The buttons are termed as follows in the manual:
Upper Left button: UL-button
Upper Middle button: UM-button
Upper Right button: UR-button
Middle Right button: MR-button
Lower Left button: LL-button
Lower Right button: LR-button
The following applies:
The buttons on the right side access the main functions
(UR-, MR- and LR-buttons).
The sub-functions of the functions in the upper and lower display are accessed through the
depending button on the left side (UL- and LL-buttons).
The stopwatch and the countdown are started, stopped and paused by shortly pressing the
UM-button and reset by pressing the UM-button for three seconds (this also deletes all split-
and lap times).
Every press of the button makes a short sound, this sound can be turned off in the advanced
settings.
Transmitter search – digital system
In order for the HAC5 to display speed or heart rate or similar, the according transmitter has to
be found first.
The search begins automatically when a recording is started (UL- and LL-buttons pressed si-
multaneously for three seconds), and manually by pressing the LL-button for three seconds (in
both cases, the active profile is shown for 10 seconds).
During this display all transmitters are searched for which are active in this profile. Should no or
not all transmitters be found during this time, then this is displayed when selected, for example:
UL
MR
➔
LL
UR
LR
➔
➔
➔
➔
UM
➔
Mark