Radio Operation
Antenna: for FM reception, the unit is provided with
a FM WIRE ANTENNA (31) , move the wire until
the reception is clear and with no interferences. For
AM reception, the unit is provided with a directional
build-in ferrite antenna. Rotate the set to find the
position in which the best reception is obtained. Do
not connect the EXTERNAL FM ANTENNA (31) to
any outside antenna.
Antenna
Using the included software and cable, the USB
connection allows you record your records onto your
computer. Follow these instructions to use the USB.
1 Insert the enclosed software CD into your
computer.
2 Follow the instructions on the computer screen
to install the software. If the software does not
load automatically, browse the CD and open
the Read Me folder for further instructions.
3 Connect the small end of the USB cable to the
USB Jack (29) on the back of the unit.
4 Connect the other end to a USB port on your
computer.
5 On your computer, open the Record Recording
Software.
6 For instructions on operating the Record
Recording Software, browse the software CD
and open the Read Me folder.
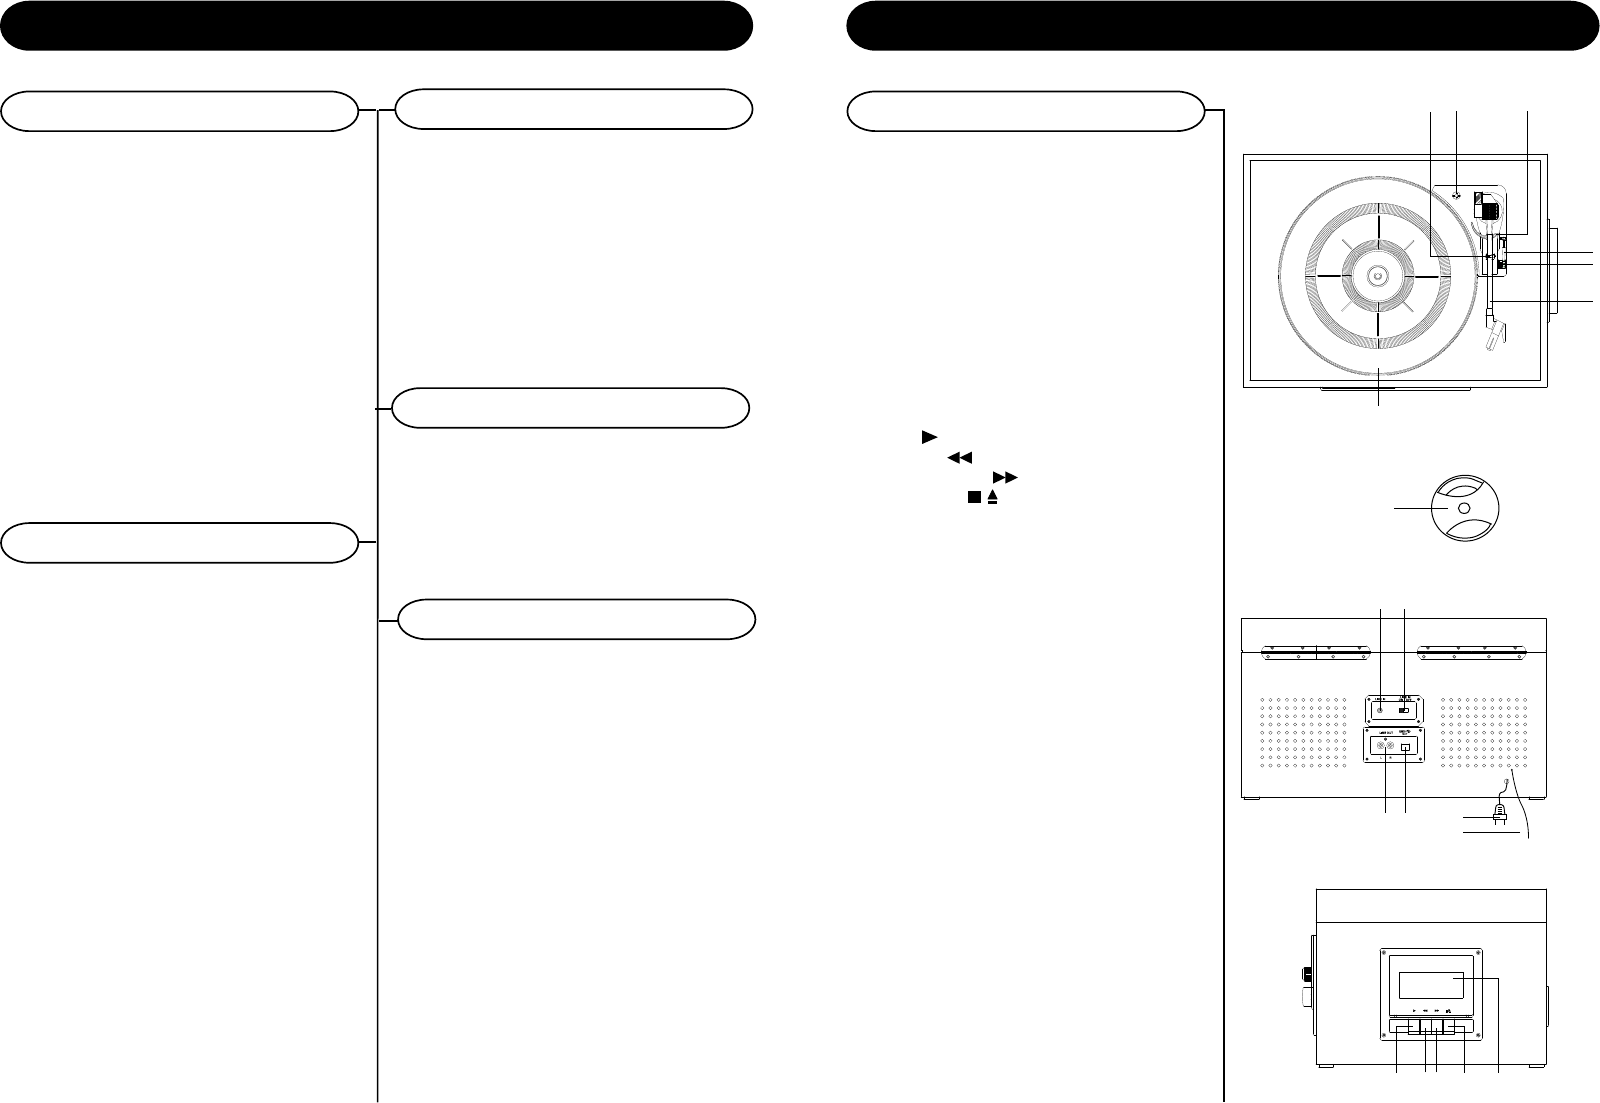
Control Locators
Unit Controls
18 Hold Down Clip
19 Turntable Suspension Screw
20 Cue Lever
21 Tone Arm Rest
22 Speed Control Switch
23 Tone Arm
24 Turntable
25 Adapter For 45 rpm Records
26 LINE IN Jack
27 LINE IN Switch
28 LINE OUT Jack
29 USB Jack
30 AC Power Cord
31 FM Wire Antenna
32 Play
33 Rewind
34 Fast Forward
35 Stop/Eject /
36 Cassette Door
Basic Operation
Cassette Operation
1 Rotate the Function Switch (2) to select
RADIO mode.
2 Set the Band Button(AM/FM) (7) to the
desired band (AM or FM).
3 Select the desired radio station by rotating
Tuning Knob (5)
4 Adjust the Volume Knob (12) to the desired
sound level.
8
1 Rotate the Function Switch (2) to TAPE mode.
2
While in TAPE mode,press the
Stop/Eject (35)
button on the cassette player to open the cassette
door.
3
Insert a prerecorded cassette tape into the
cassette door.
4
Press the Play button (32) to begin play.
5
To stop playback, press the Stop/Eject (35)
button.
6
Press the Stop/Eject (35) button again to
eject the cassette.
5
1
While in Phono mode,press the STOP/EJECT(28)
button on the cassette player to open the cassette
door.
2
Insert a prerecorded cassette tape into the
cassette door.
3
Press the PLAY button (25) to begin play.
4
To stop playback, press the STOP/EJECT (28)
button.
5
Press the STOP/EJECT (28) button again to
eject the cassette.
19
USB Operation
18 20
21
22
23
24
26 27
30
31
2928
32 33 3534 36
25
To Fast Forward or Rewind
1 While playback is stopped, press the Fast
Forward (34) or Rewind (33) button to fast
forward or rewind the cassette.
2 Once the desired position is reached on the
cassette, press the
Stop/Eject (35)
button
to stop the cassette.
3 Press the
Play button (32)
to begin play.
NOTE: The cassette player plays the side of the
cassette facing away from the unit. To
play the other side of the cassette, you
must eject the cassette and turn it over.