EDITING
5150
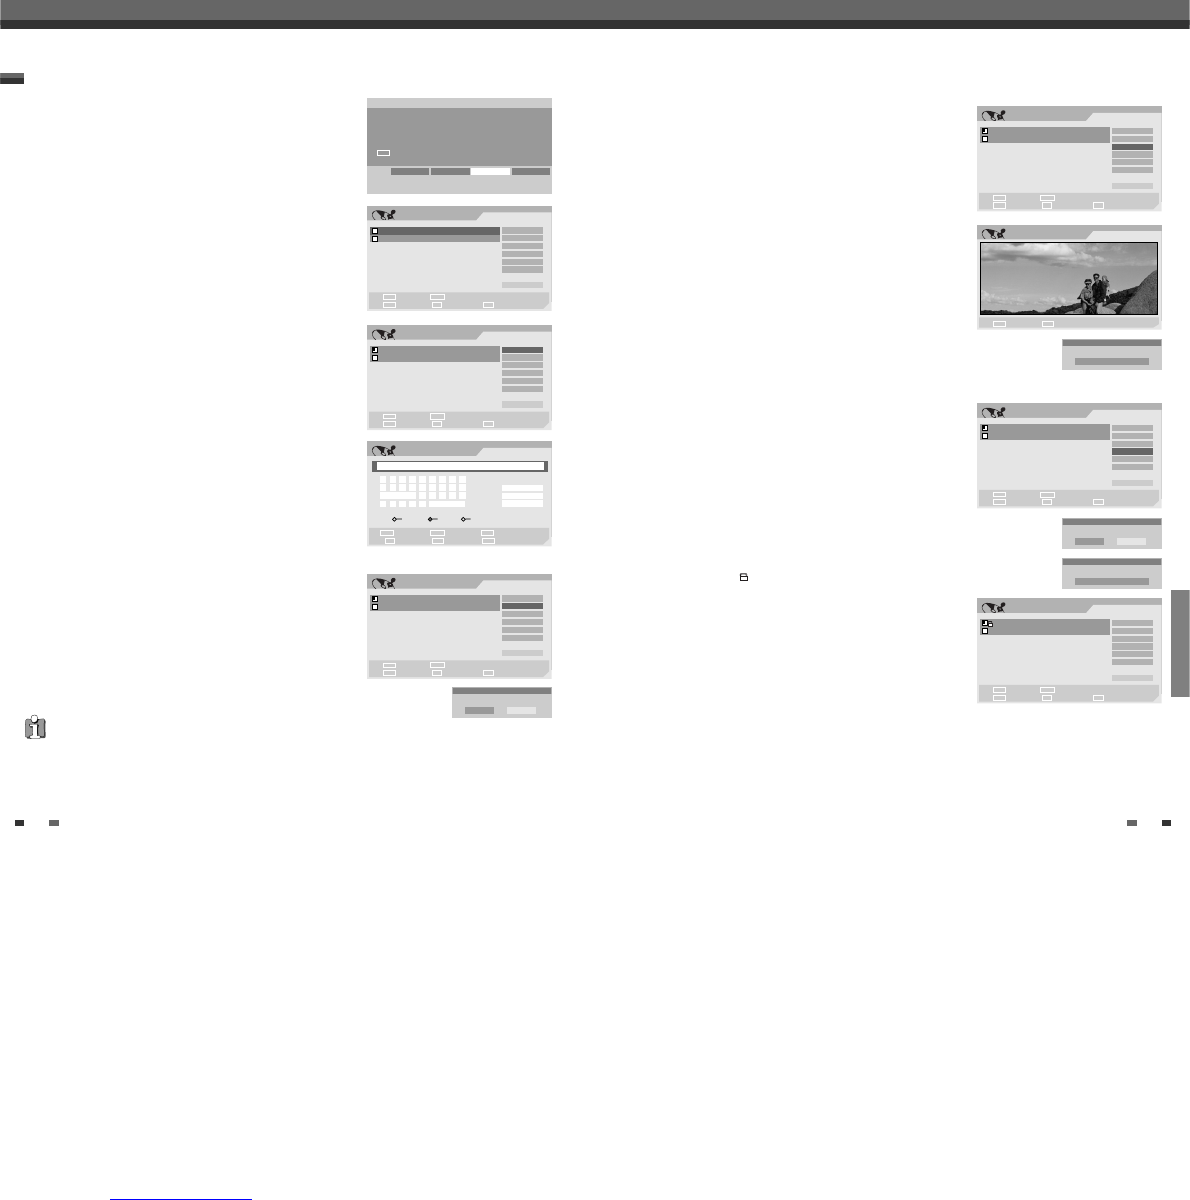
Disc Edit
Disc Edit
Disc Edit
You can manage the titles on your DVD±R/±RW discs using the Title
menu.
At first, go to Disc Edit mode.
1
Press [SETUP]. The Setup menu appears.
2
While ‘Disc Edit‘ is selected, press [ENTER] to go to the Disc Edit
page.
Label a Title
To change the name of a title:
2
Select the title to be labelled using [ENTER].
3
Select ‘Label’ using [
… †
] .
4
Press [ENTER] to change the title name.
5
The Keyboard Menu will be displayed. Use [
œ √…†
] to select a
character or function and press [ENTER].
6
After the new title name is complete, select ‘OK’ and press
[ENTER].
Erase a Title
2
Select the title to be erased using [ENTER].
3
Then select ‘Erase‘ using [
… †
].
4
Press [ENTER] to erase the title.
5
Select 'OK' and press [ENTER] to confirm.
6
The Erase Title progress bar will be displayed. This may take
several seconds.
7
After erasing is complete, the erased title remains as an empty title.
Title Menu
You can erase titles on DVD±RW discs only.
DVD Recorder
Init Setup ➞
Disc Edit
œ √
Select
Init Setup Disc Oper Disc Edit Timer REC
Edit
TITLE CH 10 10:20 am 12/21/04 SEP
Select Exit
Confirm Prev Page Next Page
§
ENTER
∞
SETUP
Label
Erase
Divide
Protect
Chap Edit
Index Pic
_ Exit
TITLE CH 10 10:34 am 12/21/04 HQ
œ √
…
†
Edit
TITLE CH 10 10:20 am 12/21/04 SEP
Select Exit
Confirm Prev Page Next Page
§
ENTER
∞
SETUP
Label
Erase
Divide
Protect
Chap Edit
Index Pic
_ Exit
TITLE CH 10 10:34 am 12/21/04 HQ
œ √
…
†
Label Title
Input digits Backspace Select
Prev Page Next Page Delete
§
■
∞
œœ
0-9
Clear
OK
Cancel
œ √
…
†
TITLE CH 10
a b c d e f g h i
j k l m n o p q r
Space s t u v w
x y z _ - Backspace
‘A’ ‘a’ Symbol
Edit
TITLE CH 10 10:20 am 12/21/04 SEP
Select Exit
Confirm Prev Page Next Page
§
ENTER
∞
SETUP
Label
Erase
Divide
Protect
Chap Edit
Index Pic
_ Exit
TITLE CH 10 10:34 am 12/21/04 HQ
œ √
…
†
Erase
Erase the title(s)?
OK Cancel
Divide (DVD±RW)
This feature allows you to divide a title into two titles.
2
Select the title to be divided using [ENTER].
3
Select ‘Divide’ using [
… †
] .
4
Press [ENTER] to divide the title.
5
Select 'OK' and press [ENTER] to confirm.
6
Press [ENTER] when the preferred picture is on your TV screen.
7
It may take a few minutes to divide the title.
Protect
If you want to protect a title from accidental recording, editing, or
erasing, you can lock the title. Later, if you change your mind, you can
unprotect the title.
2
Select the title to be protected using [ENTER].
3
Select ‘Protect’ using [
… †
] .
4
Press [ENTER] to protect the title.
5
Select 'OK' and press [ENTER] to confirm.
6
The Protect Title progress bar will be displayed. This may takes several seconds.
The Protect icon ‘ ’ will appear in front of Title name.
Edit
Stop Confirm
ENTER
■
Edit
TITLE CH 10 10:20 am 12/21/04 SEP
Select Exit
Confirm Prev Page Next Page
§
ENTER
∞
SETUP
Label
Erase
Divide
Protect
Chap Edit
Index Pic
_ Exit
TITLE CH 10 10:34 am 12/21/04 HQ
œ √
…
†
Edit
TITLE CH 10 10:20 am 12/21/04 SEP
Select Exit
Confirm Prev Page Next Page
§
ENTER
∞
SETUP
Label
Erase
Divide
Protect
Chap Edit
Index Pic
_ Exit
TITLE CH 10 10:34 am 12/21/04 HQ
œ √
…
†
Edit
TITLE CH 10 10:20 am 12/21/04 SEP
Select Exit
Confirm Prev Page Next Page
§
ENTER
∞
SETUP
Label
Erase
Divide
Protect
Chap Edit
Index Pic
_ Exit
TITLE CH 10 10:34 am 12/21/04 HQ
œ √
…
†
Protect
Protect the title(s)?
OK Cancel
Divide
Please wait....
Protect
Please wait....