1.Determine the type of wall (sheetrock, concrete, etc.)
and make sure it is strong enough to hold indoor unit.
Select an approximate position for the unit, taking the
required distances away from walls/AC outlet into con-
sideration.
INSTALLATION
6
INDOOR UNIT
• Do not install the unit in an area with direct sunlight,
near heat sources (radiator, etc.), or an area where
leakage of flammable gas may be expected.
• Select a position in the room, high on the wall, where
the whole room can be uniformly cooled.
• Select a location that can hold the weight of the unit and
where the copper tubing, drain hose and Indoor to
Outdoor Wire have the shortest distance to the Outdoor
unit.
• Make sure the Indoor unit is installed at least 10cm
(3.95in) away from the top and left side wall and at least
30cm (11.8in) from AC outlet and right side wall (see
Overview figure on previous page).
OUTDOOR UNIT
• Do not install the unit in an area near heat sources,
exhaust fans, or an area where leakage of flammable
gas may be expected.
• Do not install the unit in a humid, damp or uneven loca-
tion.
• Select a location that is well ventilated .
• Leave enough room around the unit for air intake,
exhaust and possible maintenance.
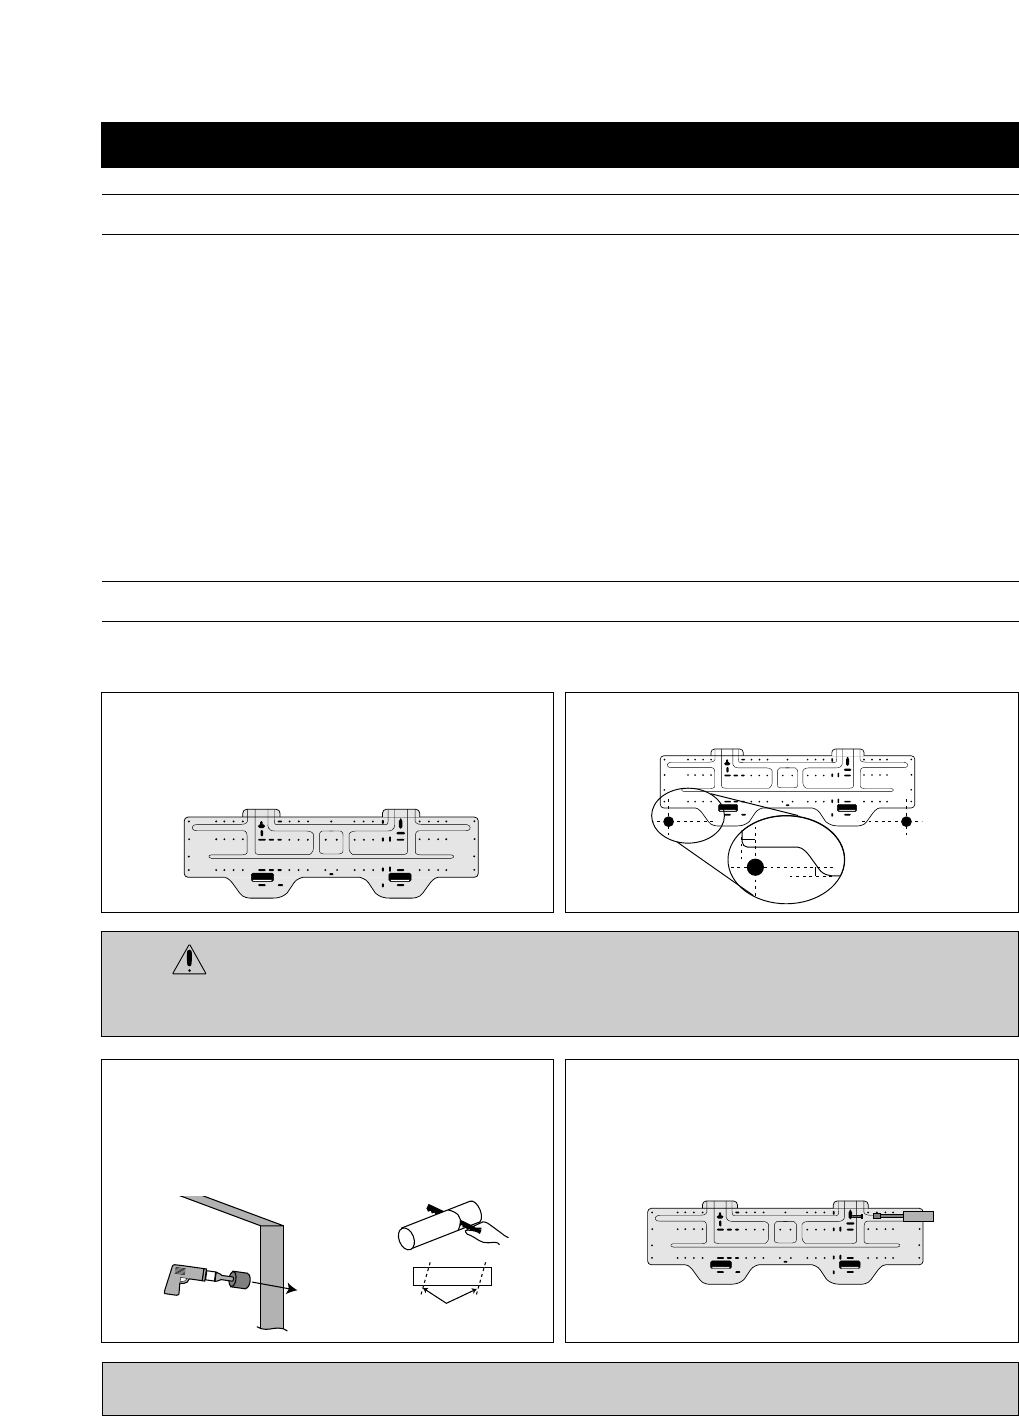
2. Determine if the hole is to be made at the left or right
hole location.
3. Using drill with hole-cutting attachment or equivalent, cut
a hole 65mm (2.56") in diameter. The hole should be
made at a slight downward slant to the outdoor side.
Measure the thickness from the inside to outside edges
and cut a PVC pipe at a slight angle 1/4" shorter than the
thickness of the wall and insert pipe in wall.
4. For sheetrock, wooden or similar wall, measure down
from the ceiling using a level or tape measure and
attach the wall bracket to the wall using 4 screws. If
you are not able to line up the holes with the beams,
use toggle bolts. Make sure the wall bracket is even
and flush against the wall.
CAUTION
• Before making hole, make sure there are no studs, pipes, electrical wiring or conduit directly behind the area to
be cut.
For Concrete, or similar type wall, make holes into the wall and insert concrete nails instead of screws.
INSTALLING THE WALL BRACKET:
To install the wall bracket, follow the procedures below. One hole is required for the tubing and may be either on the left
or right side.
SELECTING A SITE:
Indoor
Outdoor