5
AIR-CONDITIONING WITHOUT INSTALLATION
Just a few simple steps and your comfort is
ensured with your air conditioner:
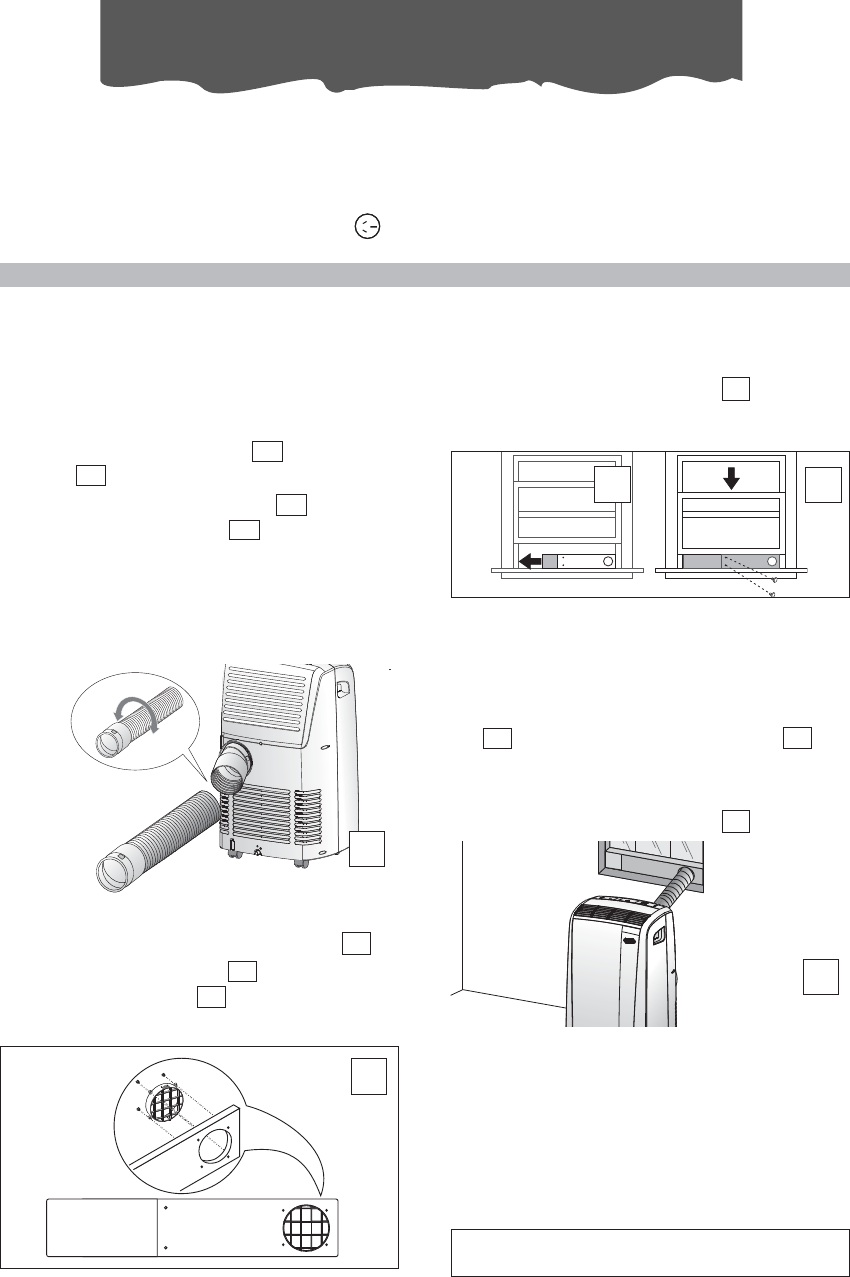
• Screw one hose adaptor to the hose’s
end .
• Fit the other hose adaptor in the air
exhaust hose housing at the back of
the appliance (see fig. A).
• Screw the other end of the hose to the
adaptor, that was already fitted to the appli-
ance (see fig. A).
12
7
13
13
A
Preparing for use
If you have a sash window
• Attach the window bracket grille to
the window bracket with the four
screws provided
(fig. B).
19
17
15
B
• Open the window.
• Place the window bracket in the win-
dow, extending it to fit the width of the
window
(fig. C).
17
C
D
• Once the bracket is extended, it can be
locked into his width by tightening the last
two screws provided.
• Close the window (fig. D).
• Place the air conditioner near the win-
dow. Insert the assembled exhaust hose
into the window bracket grille
(fig.
E). Make sure the air exhaust hose is unob-
structed.
• When not used, the window bracket can
be closed off with the cap provided.
16
17
12
Keep the air hoses as short and free of
curves as possible to avoid constrictions.
E
ELECTRICAL CONNECTIONS
Before plugging the appliance into the mains socket, check that:
• The outlet’s power supply corresponds to the value indicated on the rating label on the back
of the appliance;
• The outlet and electrical circuit are adequate for the appliance;
• The outlet is a 3-hole grounded outlet . If this is not the case, you must choose another outlet.
Failure to follow these important safety instructions absolves the manufacturer of all liability.
The instructions below will enable you to prepare your air conditioner for operation as efficiently
as possible. Before use, make sure the air intake and outlet grilles are unobstructed.
The power cable must be replaced by a qualified professional only.
If you have a very large window
• in order to cover your window aperture,
use the additional window bracket with-
out holes extending it to the desired
dimension, then fix the bracket by using
the pins provided. When extracting the
window bracket and joining the two
pieces pay attention you do not cover the
hole or holes (depending on the model).