ENGLISH
D
D
IN
LO
Se
For u
“
Ba
For u
el
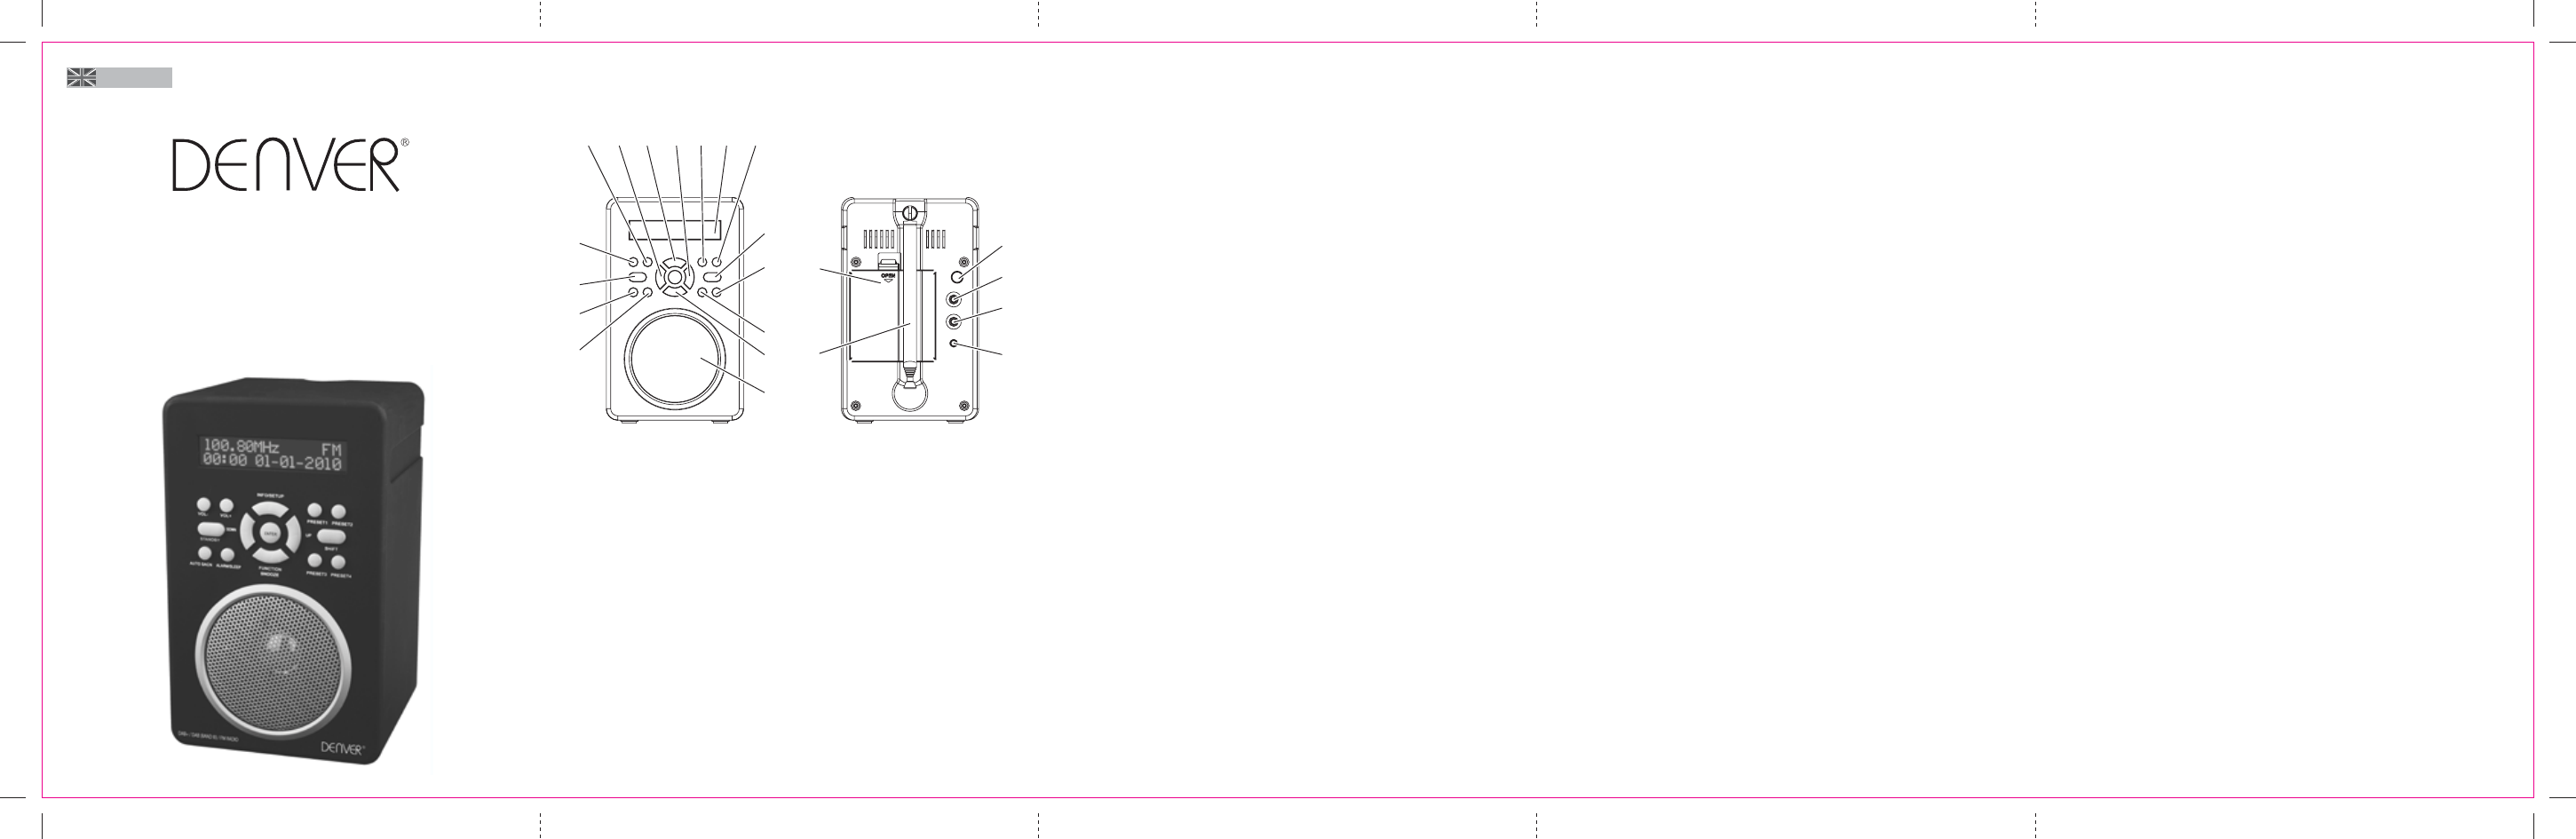
1. V
2. DOWN B
3. IN
4. UP
5. PR
6. LC
7. PR
8. SH
9. PR
10 SP
11 PR
12 FU
13 AL
14 AUTO SC
15 ST
16 V
17 POWER
18 AUX I
19 PH
20 DC
21 BA
22 FM
POWER
OP
In
un
Wh
on
OP
1.
2.
in
3.
No
Ch
is
ba
W
Un
Wh
th
BA
•K
•rt ba th pro F pr ali th
ba
•ove
pr
or
•ever
•ry
in com
wast
•F
FU
sh in sho and t key t act the
fu
lo
ac
vate
POWER
Pr it and pre act con
fu
V
Pr
Th
UP
Th
EN
Th
-c
-C
-C
IN
Shor
FU
Sh
PR
Th
AL
Sh
In
A
In
In
HE
A 3. s fo c a s of st he ( in in
lo
A
A
Th
TV
DC
Co
ST
1.
2.
3.
Time
Time
OP
A
1.
2.
3.
mo
it
Du sca sh the pr num th
na
4.
li
5.
th
to
No
DAB si
may be necce
cover
SE
1.
an
2.
selec
SE
So
se
BB
BB
PR
TO S
1.
2.
TO
Sh
No
No
PR
1 2 3 4 5 6 7
8
17
18
19
20
21
22
9
11
13
14
15
16
12
10
D