www.doro.com
Insert SD card (op
Locat
and gently slide the car
in the holder
Note! The cir
boards (met
the cards mus
scra
not to touch the cir
Use only compable memory car
this device. Compable car
microSDHC. Incompa
the card itself
data s
Insert the baery by
sliding it into the ba
compartment with the
circuits f
le. R
c
3. CALLS
Mak
1. Enter the phone numberClear .
2. Press to dial. Press Abort t
the call.
3. Press t
Note! F+
bef
Press * twice f+ .
Call from the phonebook
1. Press Name to open the phonebook.
2. Use / to scroll thr
phonebook, or quick search by pr
k
name.
3. Press â Call , alt
to dial the selected en
Back to re
4. PHONEBOOK
The Phonebook can st
phone numbers in each entry
Add a cont
1. Press Menu â Phonebook â
-New cont â OK.
2. Enter a Name for the cEnter
text. Delete with Clear .
3. Use / to select Number and
enter the phone number
4. When done, press Save .
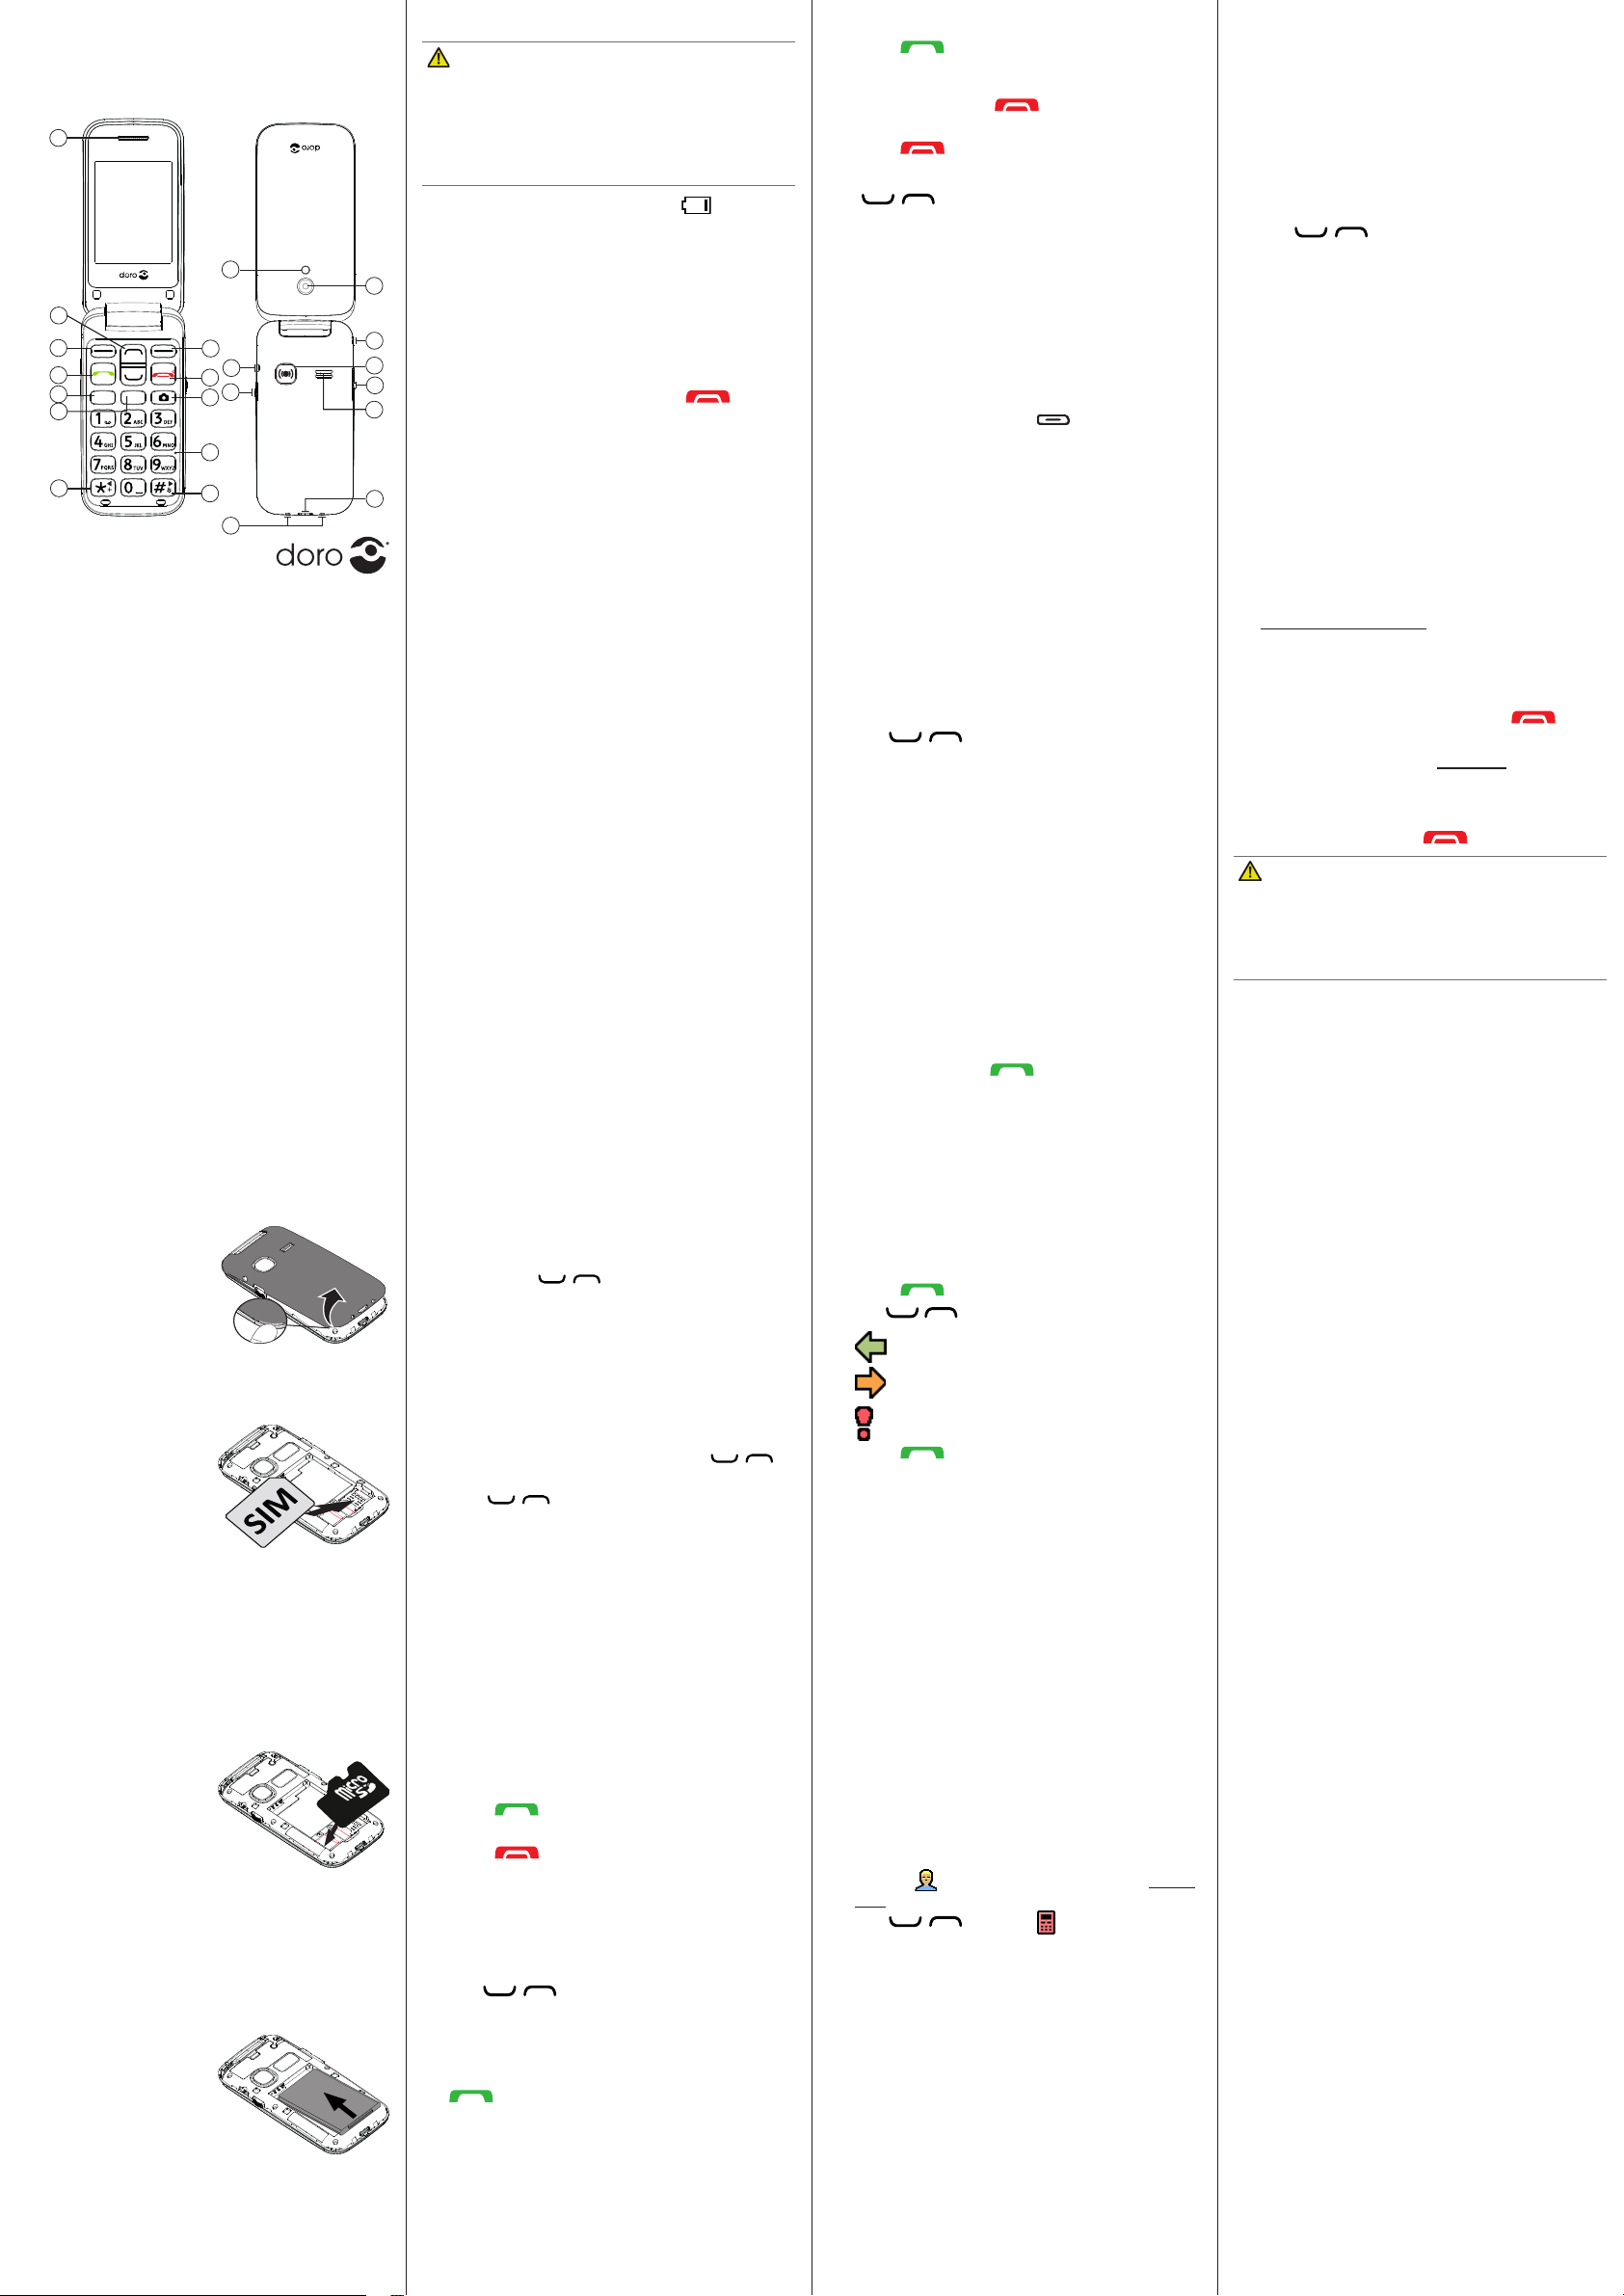
Dor
Quick Start Guide
1. Speak
2. Scroll buons
3. Le selecon buon
4. Call k
5. Speed dial A
6. Speed dial B
7. Interna
symbols/* / 8
8. Right selecon
buon
9. End call /
Power on/
10. Camera k
11. Microphone
12. Silent / Input
method/# / 9
13. T
14. Headset sock
15. T
16. Charging cr
connector
17. Camera lens
18. Lany
19. Assistance bu
20. V
21. Loudspeak
22. Charging sock
1. GET S
Be care
your ngernails when
you remo
cover
twist the ba
ex
damaged.
Insert SIM card (r
Remov
is already inst
the card under the me
part, with the gold-col-
oured cir
down. The cut
of the card help
place the card, c
in the compartment.
Note! This device accepts micr
SIM card. Use of inc
may damag
corrupt dat
Charg
CAUTION
Only use baeries, char
that ha
this parcular model. Connecng other
accessories may be dang
inv
guaran
When the baery is running low is
display
• Connect the mains adapter to the w
socky .
Tip: Don’t for
plasc lm fr
2. GET T
T
1. Press and hold the r on the
phone to turn it on/oYe to
power o
2. If the SIM card is v
PIN code (P
PIN is display
press OK . DeletClear .
Note! If PIN and PUK codes w
with your SIM car
service provider
show
le. When no more aPIN
block is display
be unlock
Unblocking Key).
1. Enter the PUK cOK.
2. Enter a neOK.
3. Re-en
with OK .
Start
When starng the t
you can use the s
basic sengs.
Tip: Y
you wan
In this document the arroâ ) indicat
acon in the step-by
TOK .
T
the item using / and then press OK .
T* (8 ) or # ( 9 ).
Ent
• Press a numerical k
desired char
seconds bef
• Press * f
Select the desired char /
and press OK to en
• Use / to move the cursor within the
text
• Press # to cy
numerals.
Change languag
The def
card.
Receiv
1. Press to answerSilent to
switch o the ring signal and then R
(busy signal).
Alternat to reject the c
directly
2. Press t
V
Use / to adjust the sound v
during a call. The volume lev
the display
Silent
Silent is a x
message tone and ring t
vibra
• Press and hold # to acv
deacvat
Call options
During a call the so k ) give access to
addional funcons.
Speed dial
Use 2 –9 to speed dial an entry fr
• Press and hold the corr
dial.
Add speed dial numbers
1. Press Menu â Phonebook â .
2. Use / to scroll thr
phonebook, or quick search by pr
k
name.
3. â â â
Speed dial â Set number.
4. Select 2 â Edit and select an entry fr
the phonebook.
5. Press OK to c
6. Repea
2– 9.
SOS calls
As long as the phone is switched on, it is alwa
possible to place an SOS call by en
main local emerg
locaon f .
Receiv
a combined call log. 20 calls of each type c
be stor
to the same number
is sav
1. Press .
2. Use / to scr
= Received c
= Dialled call
= Missed call
3. Press to dial, or .
In the event of a tr
this informa
the chances of survival. Add ICE cont
improv
can access addional inf
medicaon and ne
case of an emerg
but the more inf
Press Menu â Phonebook â ICE .
1. Use / to scroll the lis
2. Press E to add or edit inf
entryClear .
3. Press Save when done.
5. ASSIST
The assistance bu
cont
you need help. Mak
funcon is acvat
necessary congur
thoroughly
Mak
1. When help is needed, press and hold the
assistance bu
twice within 1 second.
The assistance c
5 seconds. In this me you c
possible false alarm by pr .
2. An assistance t
all recipients. The rrecipient in the list
is dialled. If the call is not answer
25 seconds, the next number is dialled.
Dialling is repeat
is answer is pr
CAUTION
When an assistance
is pre-set t
the device near your ear when the hands
mode is in use, because the volume ma
extr
Settings
• Press Menu â â Assis.
6. MESS
Creat
1. Press Menu â Messag â W
message.
2. W
3. Then press â To .
4. Select a recipient with Add from Phonebook .
AlternavEnter number to add
recipient manually and prOK .
5. Y
one and press â E/ Delet/
Delete all.
6. When done, press â Send.
Creat
Both you and the recipien-
scripons that support picture messag
sengs f
your service provider and c
automac
Press Menu â Messag â MMS.
1. WEnter text.
2. Press â Add pictur:
• to select a le.
Note! T
one picture per message.
YAdd sound, Add video, and
Preview MMS using the menu.
3. Press â Add subject and en
your subject, then press Done.
4. Press â To and select select a
recipient with Add fr.
AlternavEnter recipient t
recipient manually and prOK .
5. When done, press â Send.
Settings
• Press Menu â Messagâ Messages â
SMS / MMS.
English
Note! All illustr
purposes only and may not accur
the actual device. This guide is for r
only
device and the items supplied, including but
not limited to the c
lay
and accessories av
oer
accessories provide the bes
your phone. Y
addional accessories.
A B
1
8
9
10
6
11
12
19
21
22
16
3
4
5
7
2
15
14
18
20
13
17