Batter
Bat
of int
rec
the wa
Y
con
In com
cel
pro
pro
NotSet
chan
made via the
MiT
MiStat
Cur
+hr key: Press to add up
to 3 hours to the cur
per
1 to 3
of
key: Press
toggle
Comfor
set
(Room
only)
key: Press to
ca
home. (C
the
Sel Press
to open and save
edi
Cur
see t
Cur
Cal
This
when th
temp
the se
+ &
Pres
the cur
temp
tur
if cur
RF tra
The RF sy
vis
Shor
RF tra
Long flas
tr
Symb
dis
Func Des
Com
Sele
each tim
Eco set
Sele
time wh
Non Hom
Indi
via +/
Pres
Set
→
Feat Des Fac
Hel Des
Hol
of
In the pe
is dis
of holi
sui
end da
tog
Sta Enab Dis
Zon Ho
all zone
All zon
Hol
tim
Set th Cur
nea
Hol
dat
Set th T
Hol
(To
Set th Cur
nea
Hol
(To
Set th T
Ti
Set ti T Fac
Set da T Fac
Dayl T Enab
Clo T 1
Feat Des Fac
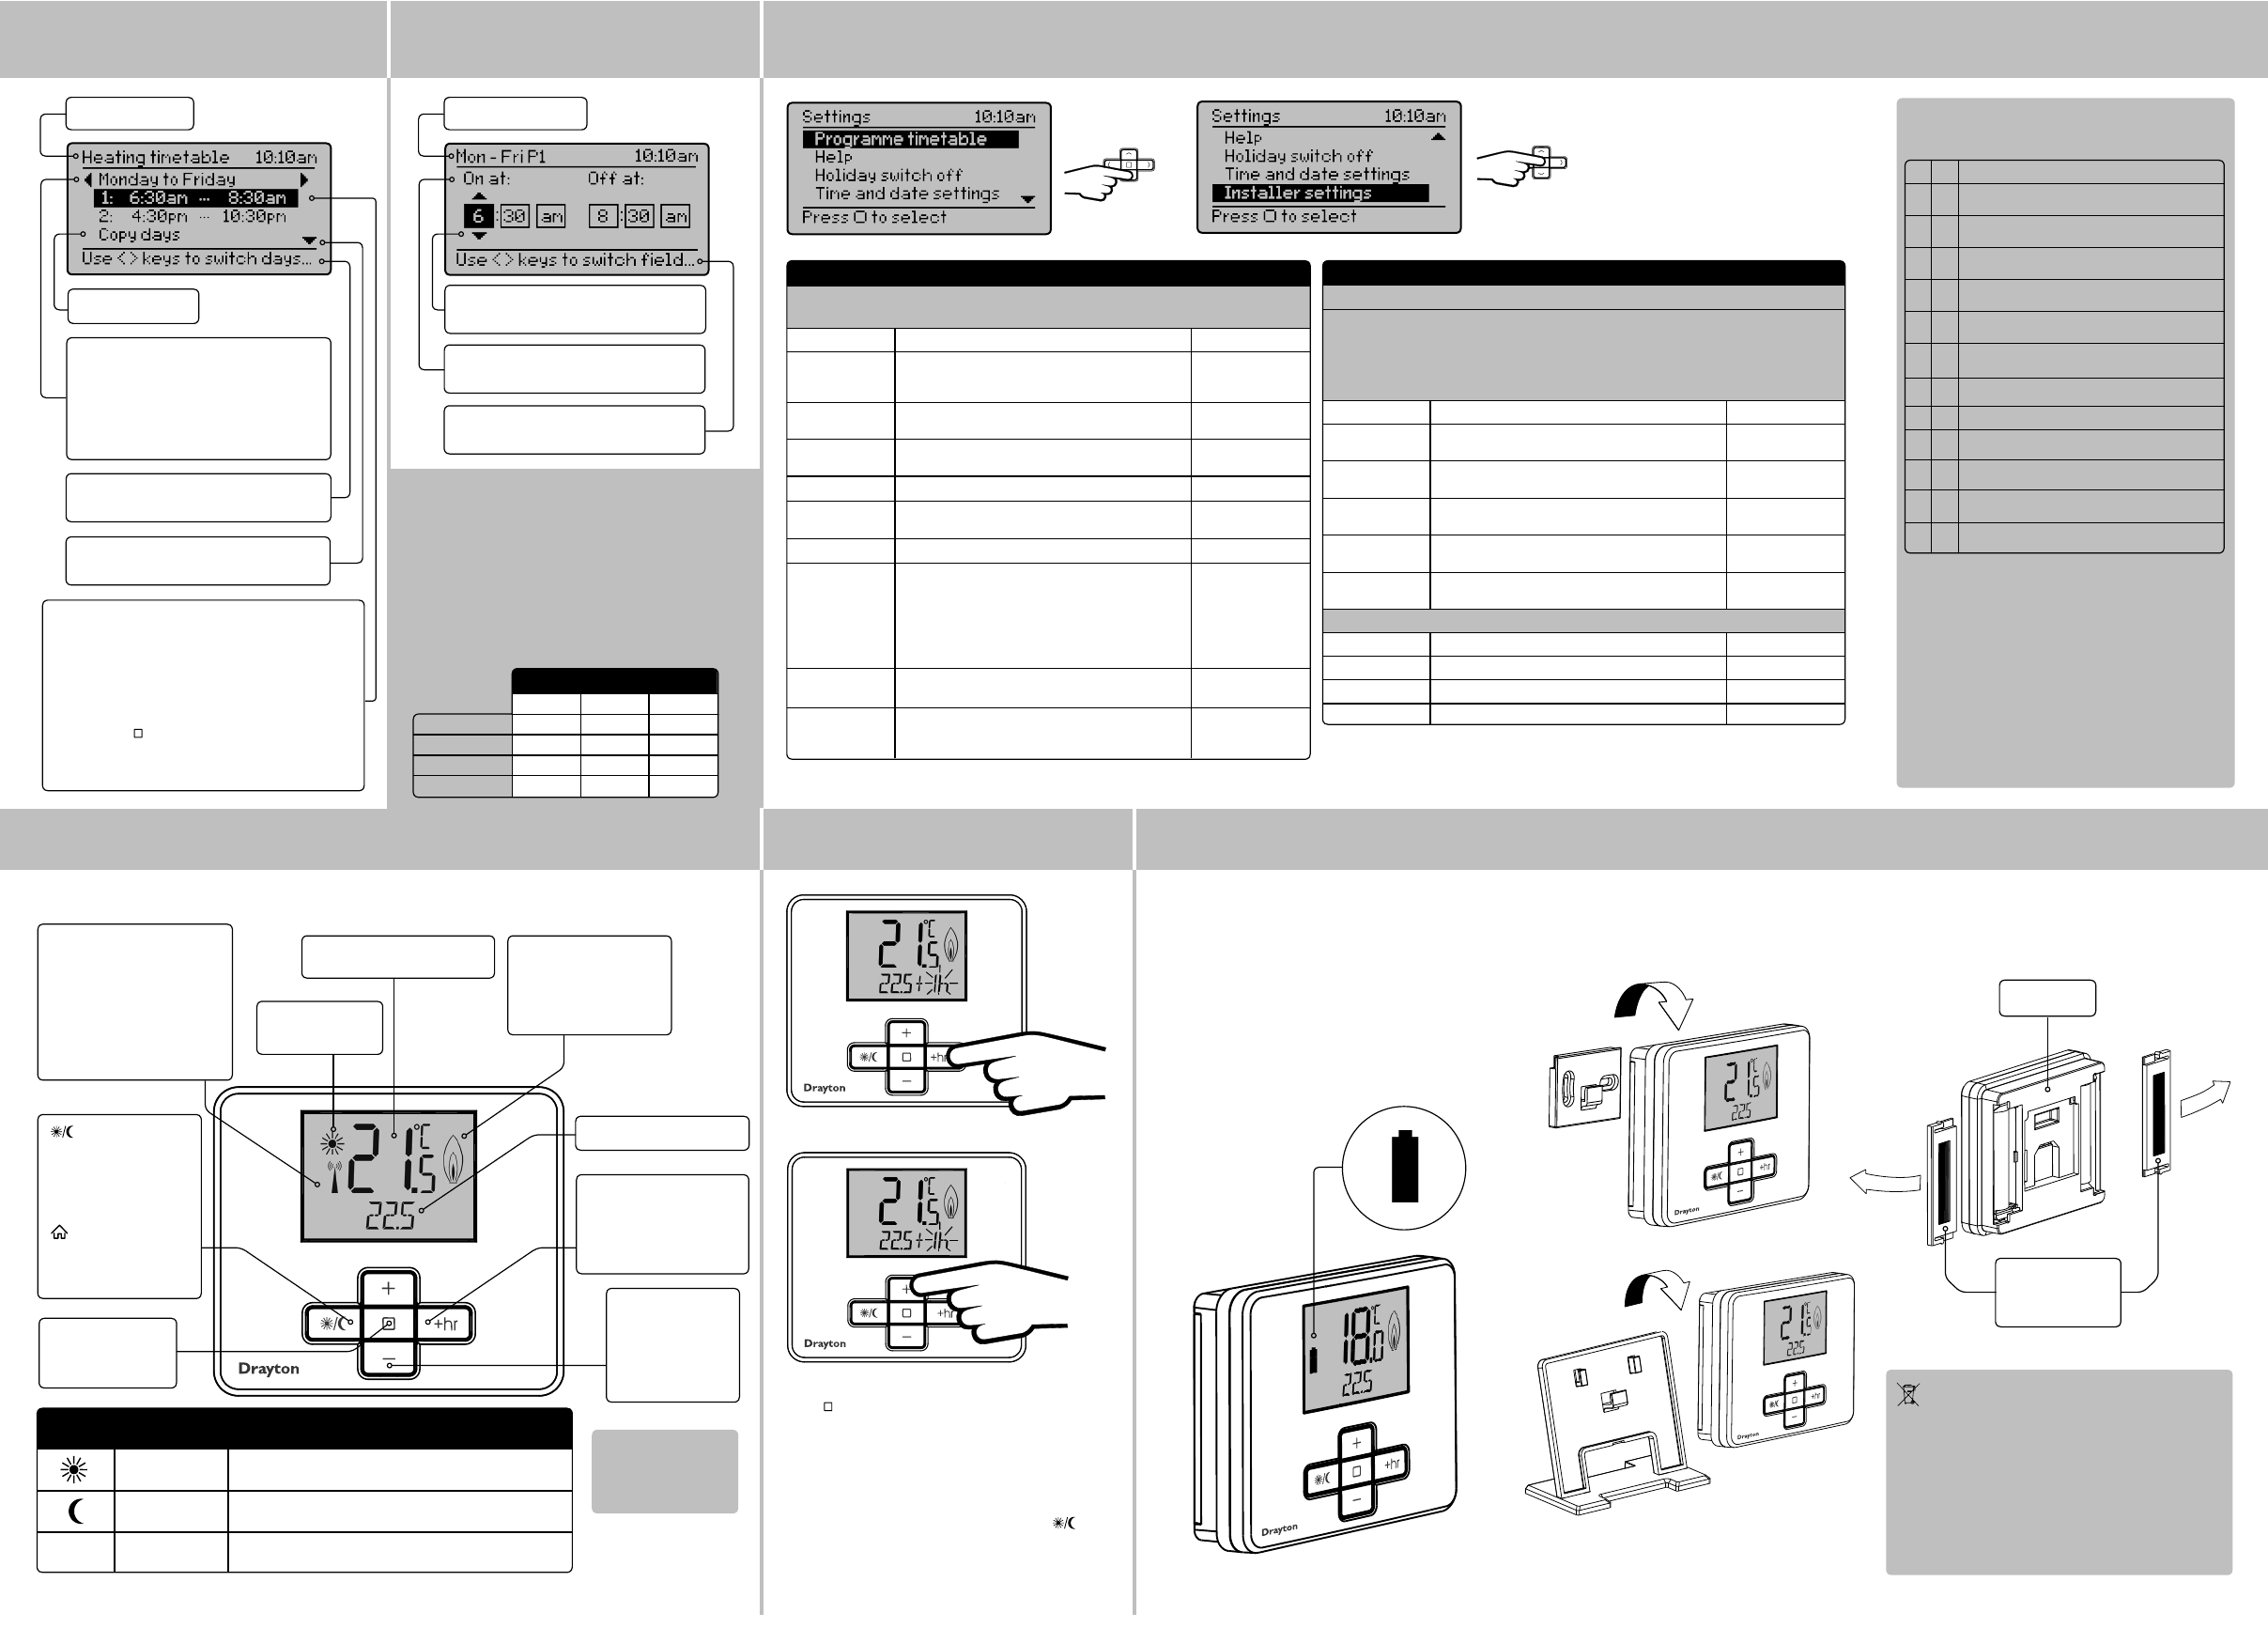
Pro
Ti
On & Of
mod
Cop Wil
Add Per Add
pos
per
Rem Remo
lea
Cha
Ti
The vi
tim
Ind Eac
Week and
wee
Mon… Fri an
blo
Def
All we Mon…S
Sto
pro
Mi
pro
nee
nam
has be
lon
see In
Prog
Loa
pro
A pre
Save cu
pro
The cu
pre
wee
S
S S + S
RF
How
the
Whe
flash in the dis
this tim
bat
bat
ceas
the bat
How
Remove the ba
cor
Bat
Slide ou
to remove
MiSt
MiStat
MiStat
→
→
✎ T
Pres+hr to Bo
Pres+ to0 and 3
Pres ) to confi
Now the Boo
down eac
Onc
pri
The Boo
) key
or by set
1 Set
a
Are Min
see In
2
NO SIG
key pres
a
Is the re
be vis
b
Is the ro
Guid
3 LOCKE
a see In
4 Is the ba
a Repl
5
START
reac
a
Is the re
be vis
6
WAIT is vis
on key pres
a
Is the re
be vis
S
Stored program
MiT3. An
examp
be modi
ca
also cOnce a prog
bee
lon
cur
the fa
1 6:30am 6:30am 7
1 8:30am 8: 9:00am
2nd On 4 4 4:00pm
2nd Of 1 1 1
All wee W
Mon Mon Sat-Su
Prog
Ex
S
→
→
→
Zone = Heat
HelUse le
sel
Period describes
set
turn On
Period describes
set
turn On
Pres
) when highli
set
Up to 4
Ar
availa
TimMonday to
Friday (We
Opt
we Al
av
in
Lin
Day rang
HelUse le
chan
PerioOn at 6
at 8:30am
High
Use up/down but