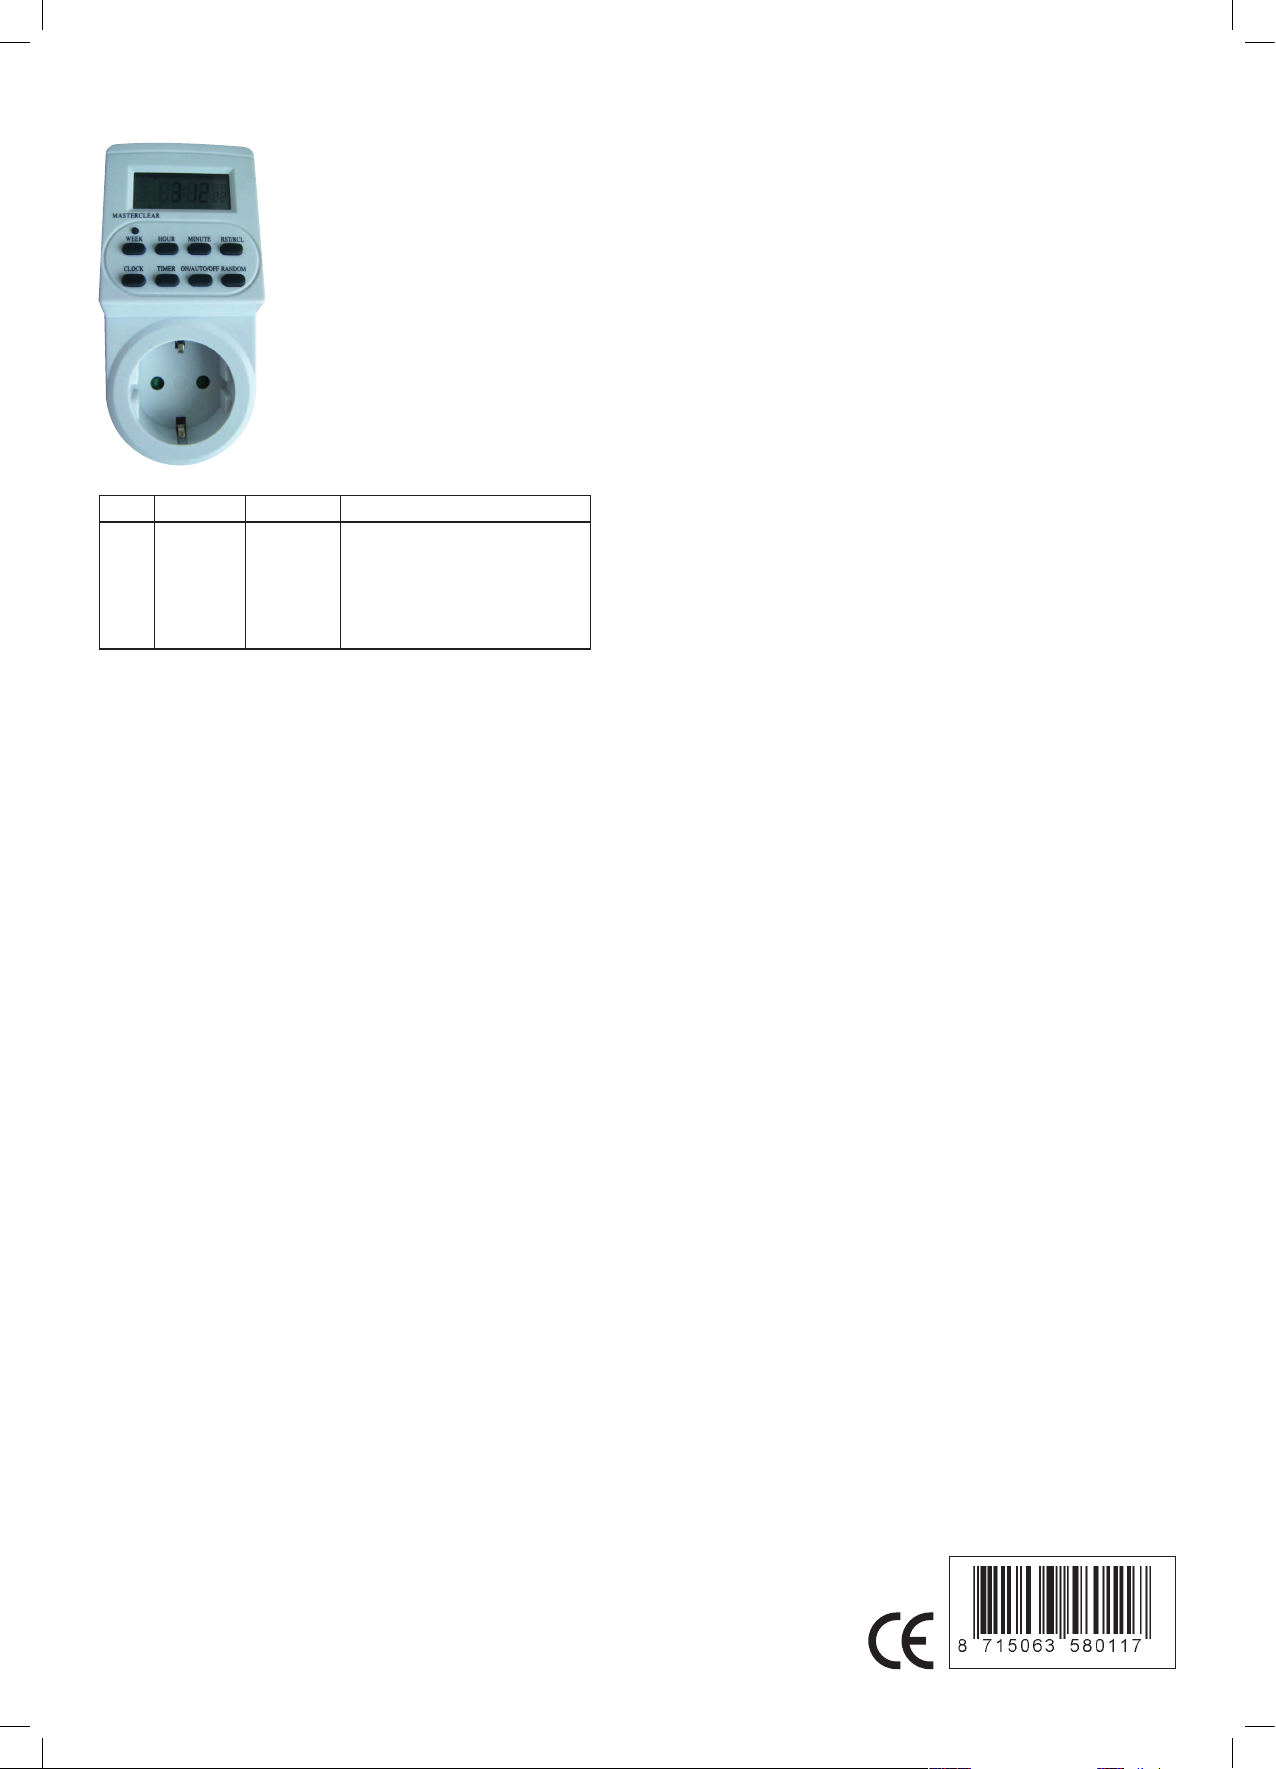
1. MASTER CLEAR: Clear all data in memory including current time and all programs.
2. RANDOM: Set or cancel random function.
3. CLOCK: Set current time with buttons WEEK, HOUR, MIN.
Select 12 or 24 hour mode using the TIMER button.
Activate summertime function with button ON/AUTO/OFF.
4. TIMER: Set programs combined with buttons WEEK, HOUR, MIN.
Select 12 or 24 hour mode combined with button CLOCK.
5. ON/AUTO/OFF: Select operating modes for the timer.
6. WEEK: Set week combined with button CLOCK or TIMER.
7. HOUR: Set hour combined with button CLOCK or TIMER.
8. MIN: Set minute combined with button CLOCK or TIMER.
9. RST/RCL: Override programs or recall the overridden programs.
GENERAL FEATURES
1. 10 ON/OFF programs with 1 minute step.
2. MANUAL ON/AUTO/MANUAL OFF selectable.
3. 12/24 hour mode selectable.
4. Large LCD display with second.
5. Summer time function available.
6. Random function with a randomly on 10-31minutes between 6:00 PM and 6:00 AM.
7. 16 combinations of day or blocks of days available as follows:
MO
TU
WE
TH
FR
SA
SU
MO, TU, WE, TH, FR, SA, SU
MO, TU, WE, TH, FR
SA, SU
MO, TU, WE, TH, FR, SA
MO, WE, FR
TU, TH, SA
MO, TU, WE
TH, FR, SA
MO, WE, FR, SU
INITIAL OPERATION
1. Plug the timer into a regular 230 Volts power outlet and turn the power on. Leave for
approximately 14 hours to charge the Memory Back-up battery.
2. Clear all current information by pressing MASTER CLEAR button with a sharp object
such as a pen or pencil after charging.
3. The timer is now ready to be set up for use.
SETTING CURRENT TIME
1. Press the CLOCK button and hold, simultaneously press WEEK button until the actual
day is displayed. Continue by pressing HOUR or MIN button until the current hour or
minute is displayed. When setting, the buttons WEEK, HOUR or MIN can
be held down for rapid forward counting.
2. Release both buttons. The week and time will be set.
3. To reset incorrect time, repeat above steps.
SETTING PROGRAMS
TIP: When verifying your programs ensure that the settings do not overlap,
especially when using the block option. If there are program settings overlapping,
the timer ON or OFF will be executed according to program time, not by program number.
Program OFF has the priority over program ON.
Thank you for buying this multifunctional Digital Timer!
Attention!!! Please read the manual / instructions carefully before installing the meter and connect electrical
appliances to it. Keep the manual on a safe place for future reference.
Warning!
Do not immerse the timer in water or any other liquid! Resistive devices are devices who uses, for the entire duration, the same amount of power, such
as lamps. Inductive devices consume at the start much more power than normal use / working. This includes washing machines, dryers, water heaters,
heaters, etc. If the inductive device, which you want to connect to this timer, exceeds the value of the inductive (max. Load) power of this timer, do not
connect the device to this timer. If you do, the timer contact will prematurely fail and cause damage to the timer which will be outside the warranty. It
also may cause re or create other accidents caused by improper use of the timer. Do not connect Heaters or similar appliances to this timer, because
these appliances should never be left unattended during operation. For indoor use only!
Important!
Don’t plug in any appliance where the maximum rated power exceeds 16 Amp. Always ensure the plug of any appliance is fully inserted into the Timer
socket. Before cleaning, remove the Timer from the wall socket or turn of the powersupply. Use a dry cloth to clean the Timer.
1. Press TIMER button and release. LCD shows ON_1. The rst ON setting can be made now.
2. Press WEEK button to set the day or block of days. Set the time by pressing HOUR and
MIN button.
3. Press TIMER button again to nish the rst ON setting and enter into the rst OFF setting.
LCD shows OFF_1. By repeating 2 to make the rst OFF setting.
4. Press TIMER button again to nish the rst OFF setting and enter into the 2nd ON setting.
Repeat 2 and 3 to program remaining settings.
Press TIMER button and hold for 2 seconds to enter fast advance.
5. After completing settings, press CLOCK button. The timer is ready to operate.
EXAMPLE: Timer ON at 17:15 and OFF at 22:30 everyday
a. Press TIMER once and release. LCD displays ON_1
b. Press WEEK till LCD displays “MO,TU,WE,TH,FR,SA,SU”
c. Press HOUR till LCD displays 5:00PM or 17:00
d. Press MIN till LCD displays 5:15PM or 17:15
e. Press TIMER again and release. LCD displays OFF_1
f. Repeat the above b,c and d till LCD displays “MO,TU,WE,TH,FR,SA,SU”,10:30PM or 22:30
MANUAL ON/AUTO/MANUAL OFF SETTING
Operating modes can’t be changed during program settings.
1. Press ON/AUTO/OFF button to revert the three modes in turn.
2. The programs can only be executed in AUTO mode. When AUTO is selected, the timer
operates as the programs. In MANUAL ON or MANUAL OFF mode all programs are ignored
and the timer doesn’t operate. When MANUAL ON mode is selected, power output is
always ON. When MANUAL OFF mode is selected, power output is permanently o.
3. When the mode is turned from MANUAL ON to AUTO, the timer will keep the setting of
MANUAL ON until to the next timer setting.
RANDOM FUNCTION
1. Press RANDOM button. LCD displays R(RANDOM). RANDOM function is activated.
2. When RANDOM is activated,the timer will be in On position randomly for 10-31 minutes
during the time gap----from 6:00PM to 6:00AM.
3. Press the RANDOM button again to cancel this function. Random function can’t be set
during program settings.
4. The RANDOM function can only be executed in AUTO mode between 6:00PM and 6:00AM.
12/24 HOUR MODE
Press CLOCK and TIMER simultaneously to turn the time display between 12 and 24 hour
mode.
SUMMERTIME FUNCTION
1. Press CLOCK and ON/AUTO/OFF simultaneously. LCD shows S(Summer time).
Clock advances 1 hour.
2. To revert to winter setting, press the two buttons again. Clock moves backward 1 hour.
Libble nimmt den Missbrauch seiner Dienste sehr ernst. Wir setzen uns dafür ein, derartige Missbrauchsfälle gemäß den Gesetzen Ihres Heimatlandes zu behandeln. Wenn Sie eine Meldung übermitteln, überprüfen wir Ihre Informationen und ergreifen entsprechende Maßnahmen. Wir melden uns nur dann wieder bei Ihnen, wenn wir weitere Einzelheiten wissen müssen oder weitere Informationen für Sie haben.
Art des Missbrauchs:
Forenregeln
Um zu sinnvolle Fragen zu kommen halten Sie sich bitte an folgende Spielregeln:
Lesen Sie zuerst die Anleitung;
Schauen Sie nach, ob die Frage bereits gestellt wurde;
Stellen Sie die Frage so deutlich wie nur einigermaßen möglich;
Erwähnen Sie was Sie bereits versucht haben um das Problem zu lösen;
Ist Ihr Problem von einem Besucher gelöst dann lassen Sie ihn / sie wissen in diesem Forum;
Falls Sie reagieren möchten, so verwenden Sie bitte das Antworten- Formular;
Da ihre Frage für alle Besucher sichtbar ist, sollten Sie lieber keine persönliche Daten erwähnen.
Neu registrieren
Registrieren auf E - Mails für Duro 20-A DE 3655 wenn:
neue Frage gestellt werden
neue Handbücher vorhanden sind
Sie erhalten eine E-Mail, um sich für eine oder beide Optionen anzumelden.
Das Handbuch wird per E-Mail gesendet. Überprüfen Sie ihre E-Mail.
Wenn Sie innerhalb von 15 Minuten keine E-Mail mit dem Handbuch erhalten haben, kann es sein, dass Sie eine falsche E-Mail-Adresse eingegeben haben oder dass Ihr ISP eine maximale Größe eingestellt hat, um E-Mails zu erhalten, die kleiner als die Größe des Handbuchs sind.
Ihre Frage wurde zu diesem Forum hinzugefügt
Möchten Sie eine E-Mail erhalten, wenn neue Antworten und Fragen veröffentlicht werden? Geben Sie bitte Ihre Email-Adresse ein.