5.3 Formatting the SD memory card
If your SD card is new
card, see simple steps below, save all needed images & video first.
1. mode, Press LEFT or RIGHT button to enter basic set up mode.
2. pressing the DOWN button and press Shutter / OK button
to confirm, select YES by pressing the LEFT button .
3.
Note: During formatting of the SD card
make sure you save your valuable records before formatting the memory
Remember
5.4 Setting the resolution
VIDEO recording mode
1. Press the MENU button in video mode to enter options.
2. Select the RESOLUTION by pressing the UP ▲ or DOWN ▼ buttons, then press Shutter /
OK button to enter resolution selection.
3. Select desired resolution using the UP ▲ or DOWN ▼ buttons;
720P30 (1280 x 720), WVGA
button to confirm setting.
PICTURE taking mode
1.
2. DOWN ▼ button, press Shutter / OK button to confirm.
3. ▲ or DOWN ▼ buttons;
3.0M (2048 x 1536), 5.0M (2592 x 1944), 8.0M (3200 x 2400),
then press shutter / OK button to confirm the setting.
5.5 T
1. Open screen / turn on your camera.
2. Press the MODE button to select PICTURES or VIDEO recording mode .
3. Depending on the distance to the object being photographed, use the Macro / Normal Lens
switch to adjust the focus.
Use NORMAL
0.5m to infinity), or set Lens to Macro (flower symbol) if you wish to take a close-up
photograph ( 4 to 7 inches / 1
4. Use the LCD screen as a viewfinder composing the scene.
5. Press the Shutter / OK button for taking a PICTURE, or press this button to start / stop
VIDEO recording.
Note: 1. Keep camera and the object steady when making records to avoid blurry images.
2. Max video file size is 4GB.The unit will stop recording automatically.
5.6 Zoom IN and OUT
Y
Push UP ▲ , DOWN ▼ button to select desired scene / view
Note the Zoom bar (on top of the LCD screen to control zooming range).
5.7 Playback PICTURES and VIDEO clips
1. button once to enter PICTURES Playback mode, press it again
to enter VIDEO Playback mode (note Playback camera / video icons on top of LCD
screen).
2.
3.
4. ▲ or ▼ buttons to zoom in or out.
5.
press again to pause.
6.
5.8 Delete photographs and video clips
1. Press the PLA button once to enter the PHOTO playback mode, or press
again to enter VIDEO clip playback mode.
Select the photo or video to delete.
2. Press the MENU button to enter the delete mode.
3. Press the ▲ or ▼ button to select delete one or delete all and press the Shutter / OK
button to confirm.
4. If you select File protection, your current file or images can not be deleted.
5. Press the MODE button to exit.
6. Connecting the HD DV camera
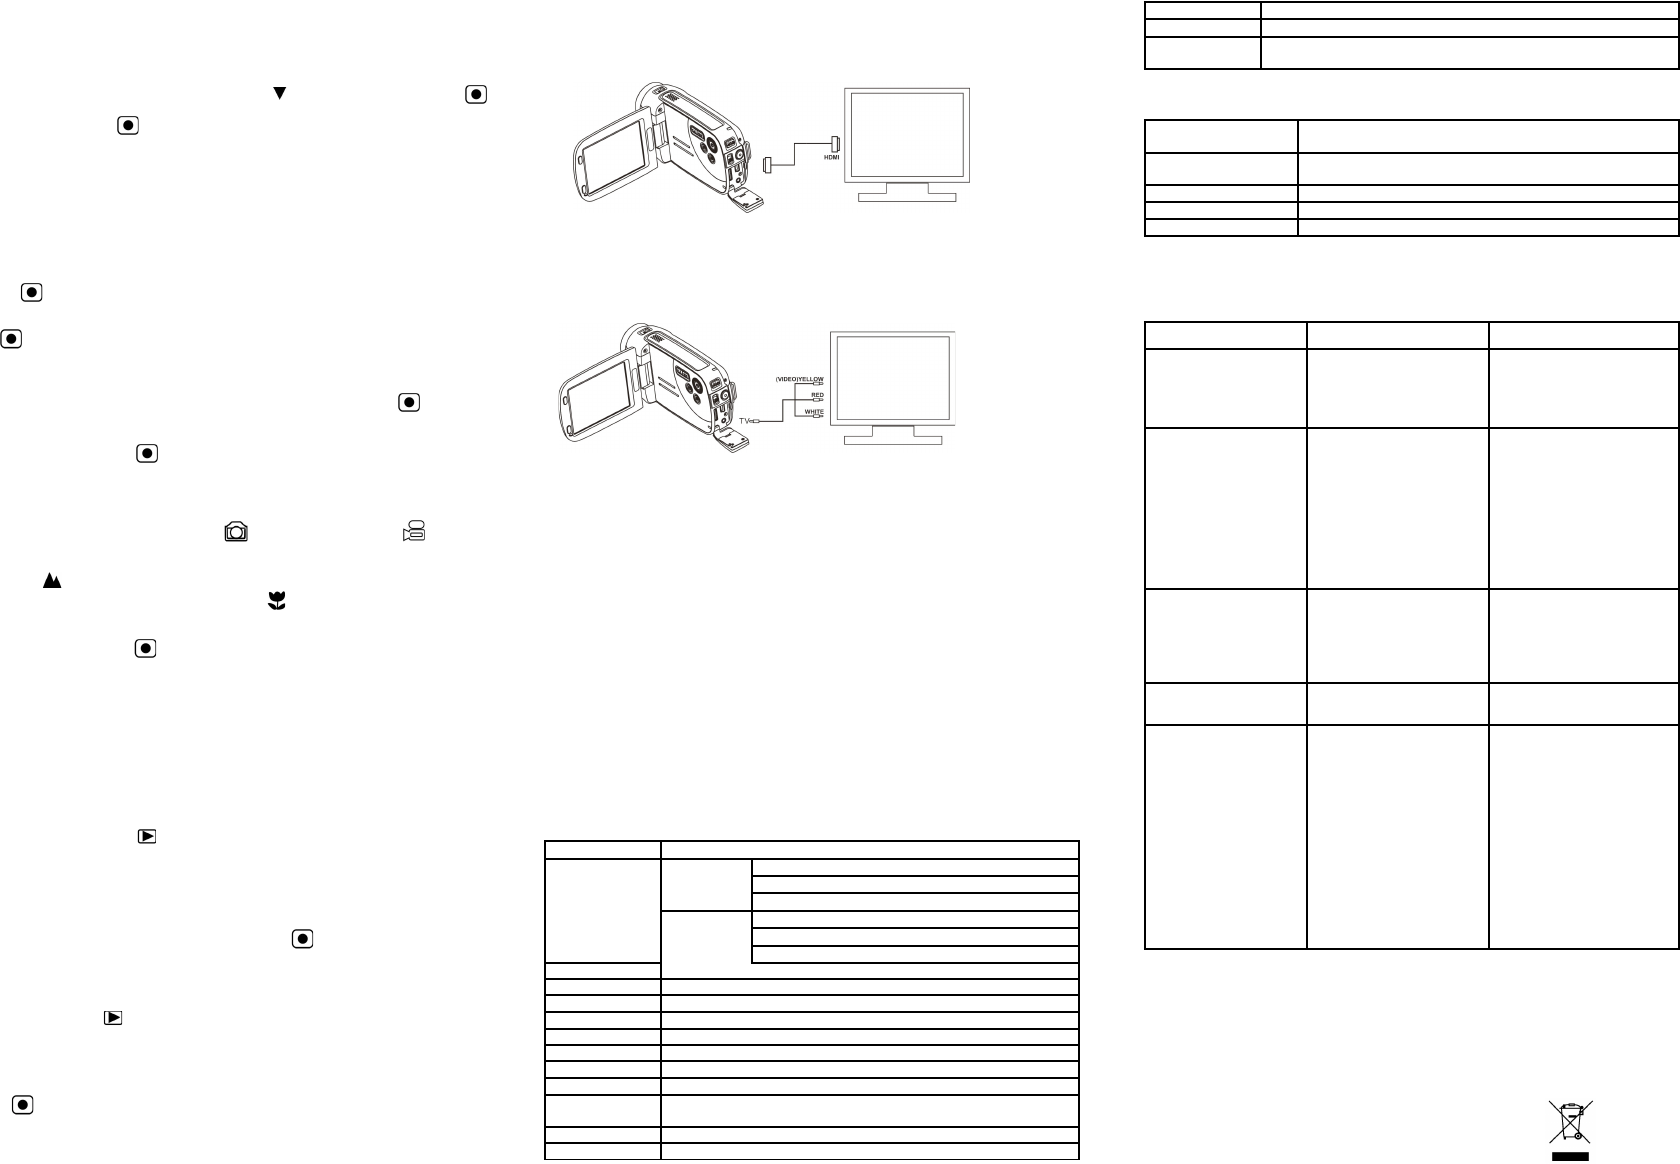
6.1 Connect to TV
When you wish to view on High Definition (HD) TV please use supplied HDMI cable and
connect as shown below:
Set your HDTV to corresponding HDMI INPUT (review TV Manual if needed) and use camera
buttons in the same way as you use camera during PLA
Enjoy watching pictures and HD VIDEO on large HDTV screen!
Ystandard TV set . Make
connection as shown below:
6.2 Connect to Personal computer
Y
computer monitor as well as expanding your system to enjoy a wide range of functions. Y
edit your videos and images and send them to friends over the Internet or even post your own
VIDEOS on Y
Upload to Y
Please install MEDIAIMPRESSION. This software enables upload to Y
directly to Y
Installing DirectX and
1. Please insert provided CD into computer
DirectX and MediaImpression in your computer
2. Use USB cable to connect HD camcorder to computer
3. Open My Computer> Removable Disk and select image or video file
4. Click to open and watch High definition video played back.
Y
best video playback.
HD Video data is very complex; use Win XP
slower computers may not play your HD Video clips so well.
7. Specification
Image Sensor 5.0 Mega pixel CMOS sensor
Image resolution
VIDEO
HD 1280x720pixels, up to 30fps
WVGA
QVGA
PICTURE
8.0 Mega pixel (3200x2400)
5.0 Mega pixel (2592x1944)
3.0 Mega pixel (2048x1536)
2 feet (0.6m) to Infinity
4 to 7 inches (1
Digital zoom 3x range
3.0” fine grade L
Auto / Sunny / Cloudy / Fluorescent / Incandescent
Built-in memory F
External memory
card
SD card up to 32GB memory card ( card is required to store video &
pictures)
VIDEO: MOV ; PICTURE: JPEG
PC interface USB 2.0 port
Power source 4x AA
TV
High Definition VIDEO: HDMI
Standard TV (NTSC or P
8. PC system min requirement
Operating System
Windows XP(SP2), Vista or above
Mac 10.4.9 or above
CPU
Pentium III/ 1GHz (minimum)
Pentium 4 / 3.0GHz or above processor (recommended)
At least 256MB (minimum) 1GB (recommended)
nVidia Geforce 7600 or
9. T
Problem Cause Solution
Cannot turn ON the
camcorder
Low battery power
Battery not inserted
properly
Replace with new 4x
alkaline batteries.
Check that battery correctly
aligned when installed
VIDEO or PICTURES
cannot be saved when
you are taking them.
1. SD card has not been
installed
2. The SD card has not
been formatted properly
3. Memory is full. Display
shows ‘MEMORY FULL
1. Install SD card
2.Format the SD card at
SETUP mode of the camera.
Please refer to section 5.3.
3. Download the pictures
and videos from the camera
to the computer to create
storage space.
Computer does not
recognize your camcorder
when connected. (Y
cannot find removable
disk)
Connection failure.
Make sure all cable
connections are secured.
Restart the computer if
necessary
The battery life is very
short.
Incorrect or old, used up,
battery
Replace with new 4x
alkaline batteries
Blurry images
1. The HD camera is not
held steady during
recording
2. The lens of HD DV
camera is dirty
3. Incorrect Lens focus
setting
1. Hold the HD DV camera
steady when taking
pictures, wait to hear the
beep sound
2. Clean the lens with soft
dry cloth.
3. Set the Macro / Normal
lens focus according to
the proper camera to
subject distance. Use
“Normal” setting as
appropriate for typical
situations.
For EU only