4. Using The Camera
4.1 Charging up Your Camera
Charge your camera with either the USB cable or AC/DC adapter. The red LED lights up to
indicate the camera is charging and turns off as soon as the camera has been fully
charged. It takes about 3 hours to fully charge the camera.
4.2 Inserting a Memory Card
Insert a MicroSD card (not included) before using your camera. Assure that the camera
power is turned OFF before inserting the card to the slot.
Notes
1. There is only one correct direction to insert the MicroSD
card into the slot. Do not force the card into the card slot as it
may damage both the camera and the MicroSD card.
2. A new MicroSD card should be formatted before using.
For more information, please see section 5.3
4.3 Set up Date and Time
You can set the camera’s clock with the software to ensure that your video and photo files
are saved with the correct date/ time information.
To set up the camera clock
1. Connect your camera to a computer with the USB cable. Run actionplus.exe at your
MicroSD card folder.
2. Find the “Date and Time” and click “SET”.
3. Adjust the date and time or click “ Sync with PC” to set with your PC clock.
4. Click “Ok” to save the settings.
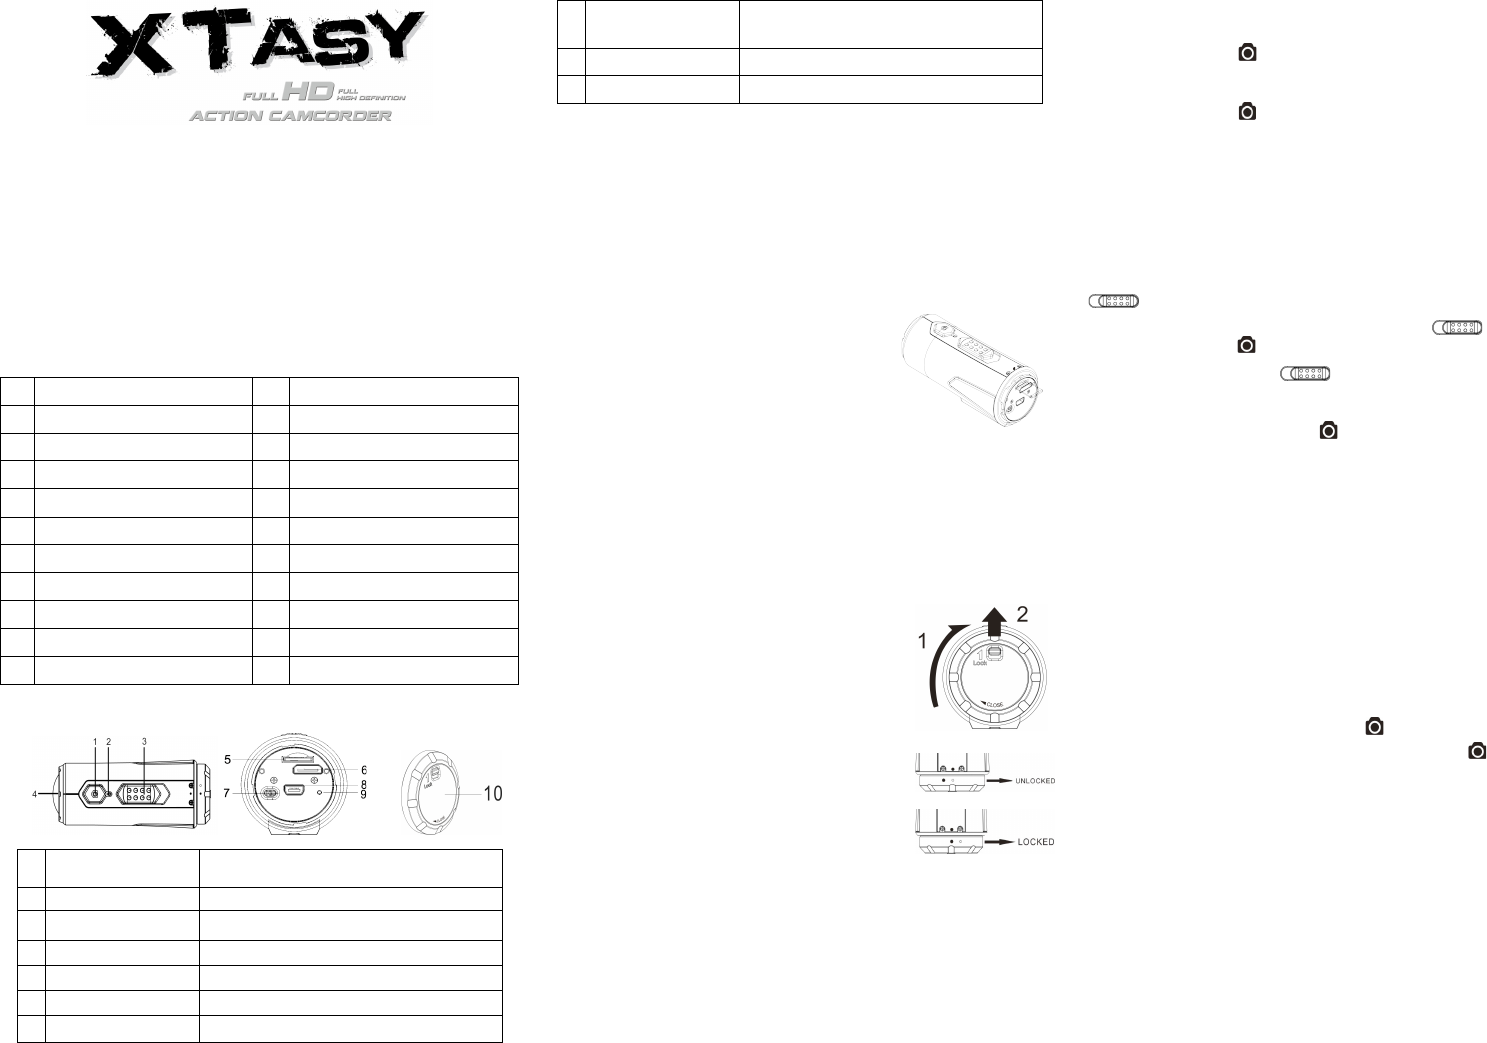
4.4 Sealing Your Camera
The Waterproof Housing lets the camera perform up to 10
meters or 30 feet under water. You must seal the camera with
BACK COVER in order to protect the camera when using it in
wet or moist conditions.
To secure the BACK COVER
1. Attach the BACK COVER to the back of the camera and
rotate clockwise until the two black dots are aligned.
2.Slide the latch on the BACK COVER to lock it.
To open the back cover, slide the latch on the back cover to
loosen it. Rotate the cover counterclockwise until the white and
black dots are aligned.
Notes
1. Failure to properly seal your camera can result in leaks that
damage or destroy your camera. Your warranty does not cover water damage resulting
from user damage.
2. The rubber seal on the BACK COVER forms the waterproof barrier to protect the
camera in wet and underwater conditions. You must keep this seal clean as a single strain
of hair or grain of sand can cause a leak into the product.
3. After every use in salt water, you will need to rinse the outside of the product and the
seal with non-salt water and dry. Not doing this can cause corrosion in the product or
failure in the seal, in turn, damaging the product.
4.5 Power On & Power Off
To power ON the camera:
Press and hold the Power button. The camera will vibrate and the Green LED will turn
on.
To power OFF the camera:
Press and hold the Power button. The camera will vibrate two seconds and the Green
LED will turn off.
4.6 Recording Video
Before starting recording, select the video resolution by switching the Video Resolution
Switch
There are two methods available for starting the video record function. When starting a
video recording, a short vibration indicates recording started. The LED indicator illuminates
RED throughout the recording.
1. Whether the camera power is ON or OFF, simply slide the Recording Slide Switch
from STOP to REC to start recording.
2. When your camera is OFF and the Recording Slide Switch is at REC location,
press and hold the Power button to turn the camera ON and it will start recording.
Move the Recording Slide Switch from REC to STOP to stop recording. The
camera will vibrate and the LED indicator will illuminate GREEN to indicate the recording
has stopped. The camera will then enter Standby mode.
An additional option is to hold the Power button to stop the recording and turn the
camera off. The camera will vibrate two seconds and the Red LED light will turn off.
Notes
1. An additional 432x240 (w/ 1080p/720p) or 320x240 (w/ 960p) video file in the file name
ACTPXXXX_thm.mov (XXXX is 4 numeric digit) will be created simultaneously with the
recording of an HD/FHD video file. The smaller video file size allows for more efficient
uploading of content to social media sites and email.
2. Changing video resolution is disabled during video recording.
3. There will be around 1-2 seconds delay before the camera starts recording.
4. The various video resolution options for HD and FHD can be changed under the
“Settings” selection in the software.
5. Assure there is sufficient memory available on the MicroSD card. If the card is full, the
camera will vibrate for five seconds and the Green LED will flash continuously.
4.7 Taking Photos
1. Turn on the camera by pressing the Power button.
2. After the camera power has been turned on, press the Power button to take a
photo. A short vibration and a flash of Green LED indicate the action was successful.
Notes
1. The Still Photo function is disabled during video recording.
2. The default photo mode is “single photo”. Burst mode gives you a continuous 10
photo shots to capture that “can’t miss” moment. Interval shooting mode can be
utilized to take a series of photos at 5, 10, 30 or 60-second intervals. To change the
mode, please refer to the section “Run the software / Change the camera settings”
3. If the card is full, the camera will vibrate for five seconds and the Green LED will flash
continuously.
4.8 Auto Rotation
The camera has a built-in G-sensor which is able to detect the camera orientation. By
rotating your camera to 90
o
, 180
o
or 270
o
from the default position (refer to the picture), the
recorded view will be rotated in the same angle. This allows the user to mount the camera
in different orientation without recording a rotated or inverted view. The video resolution
will be adjusted for 90
o
and 270
o
.