1.
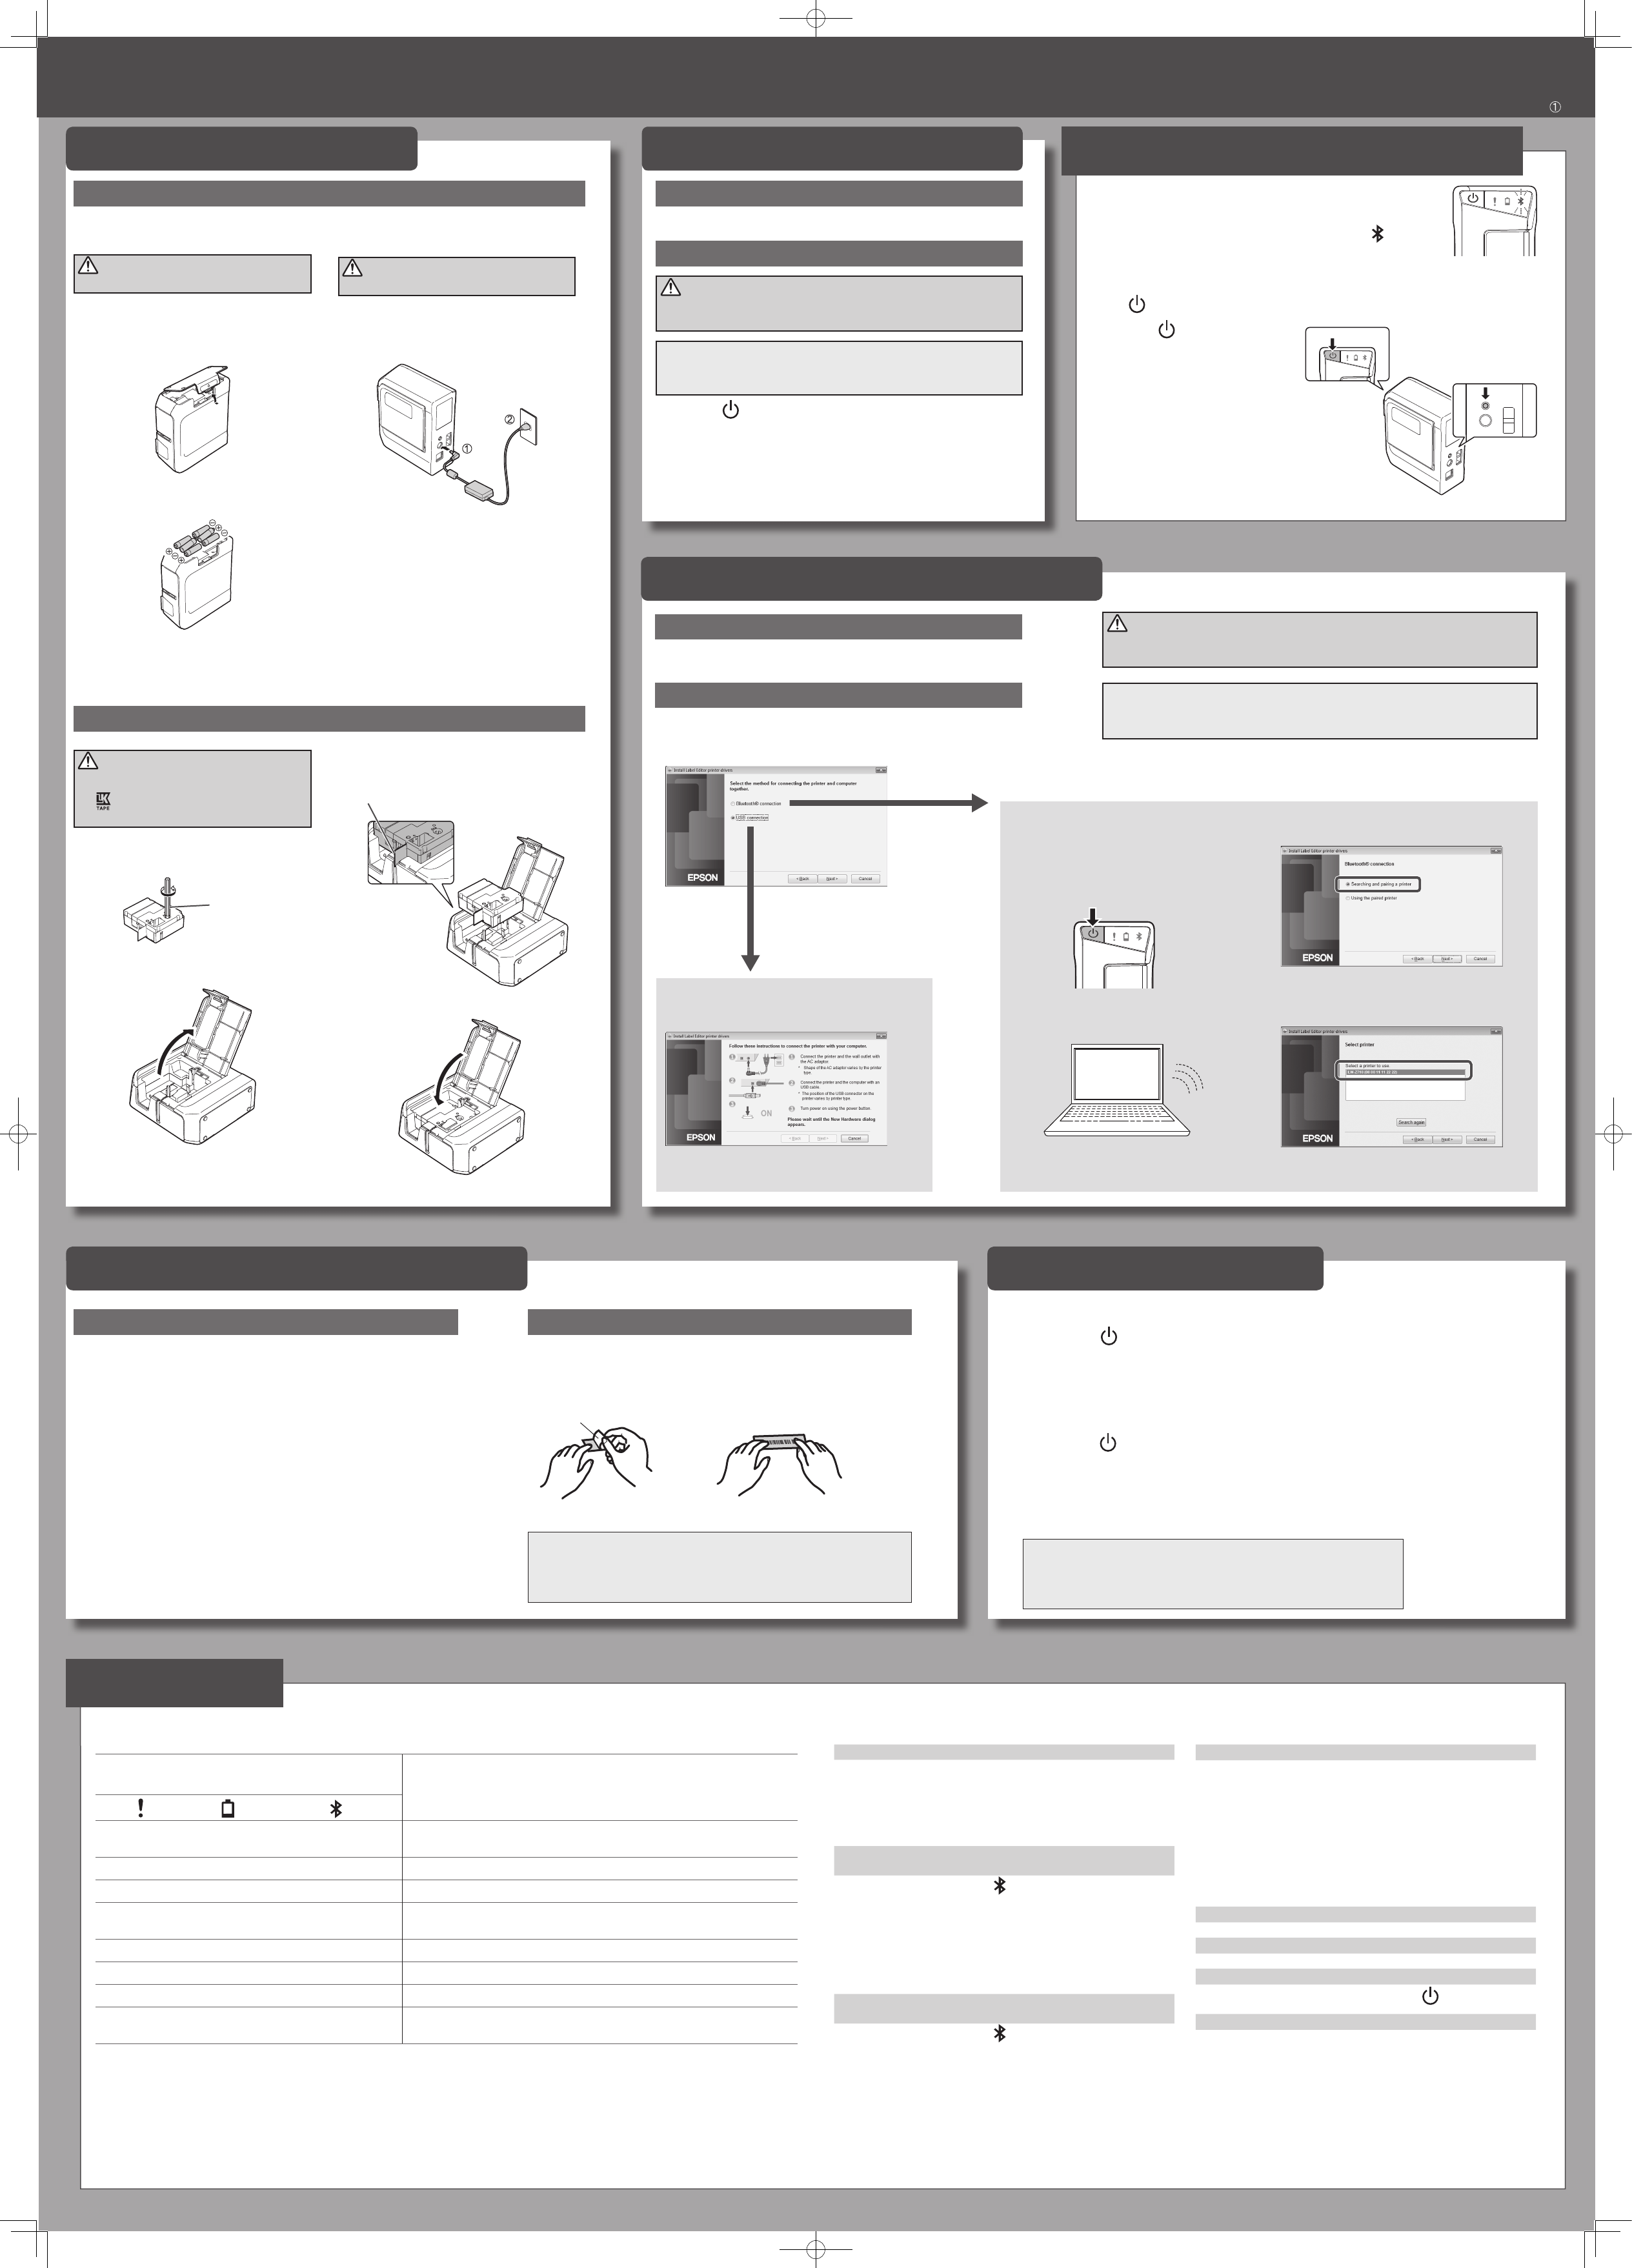
2 Install "Label Editor" and printer driv
U
3.
Place a tape cartridge in the printer as shown.
Pass the end of the tape
through the gap
4.
Close the printer co
CAUTION
Always use dedicat
the
symbol. Alway
operation after inserting a tape car
1.
Remove an
tape car
Use a pen or
a pencil.
2.
Pull the tab to open the printer c
Using the A
CAUTION
Always use the included A
1.
Connect the included A
(AST1116Z2-1) to the prin
power plug int
Peel o
1.
Peel o the backing paper
Backing paper
Print
Printer pow
• Check that the power cable is connected pr
batteries have been pr
turn ON, contact your place of purchase or the Epson C
Support Center
• If a message is displayed on your comput
screen, check the message information.
Unable to perform Bluetooth connection (pairing) with the
printer
• Check to see if the printer's
lamp is fading in and out. If not,
enable Bluetooth on the printer and then try per
operation. See "Enabling and Disabling the Bluetooth F
• Check that the printer communicating with another device
If the printer is already communicating with one device
unable to communicate with another devic
• If a message is displayed on your device scr
message information.
Connection was interrupt
printer
• Check to see if the printer's
lamp is fading in and out. If not,
enable Bluetooth on the printer and then try per
operation. See "Enabling and Disabling the Bluetooth F
• If the printer is connected to a computer with a USB cable
while the printer is communicating with a mobile device
communication with the mobile device is terminat
the printer's connection to the computer
setting.
• If a message is displayed on your comput
screen, check the message information.
T
Crea
C
1. Prepar
2. Inser
This section describes all the procedures fr
CAUTION
Do not connect the printer and computer befor
printer as directed in the installation screen.
When connecting the printer using Bluetooth
1.
Press the button to turn the printer pow
2.
T Bluetooth on your de
3.
When using the A
the AC adapt
Using batt
CAUTION
Always use AA-siz
1.
Remove the rubber guar
2.
Open the battery cover a
the printer
3.
Insert batteries.
Batteries: AA alkaline battery x 6
4.
Close the battery cov
5.
Attach the rubber guar
Y
Meanings of lamps
The lamps indicate printer statuses
Lamp's condition
Printer sta
*
: Depends on printer operation status
--: Unlit
--
*
F
Bluetooth enabled.
Or connected to an Android device or
* *
Lit Bluetooth connection completed. (when connecting to an iOS device)
--
*
Flashing quickly Performing operation such as printing or label cutting
--
*
Flashing
(once every 5 seconds)
Bluetooth disabled.
-- -- -- Pow
*
Lit
*
Low batt
*
Flashing quickly
*
Replace batteries.
Flashing quickly
* *
Printer err
mobile device.
When connecting the printer using a USB cable
1.
Press the button to turn the printer pow
2.
Disconnect the USB cable.
3.
Unplug the power cable from the outlet
4.
When using the A
the AC adapt
When F
Printer does not print when prin
• If a message is displayed on your comput
screen, check the message information.
• Check that connection cables are connected properly
tape cartr
properly
• Have y
done properly if another printer is selected.
• Did you restart the computer after installing the printer driver?
The printer driver may not be installed c
was not restarted. Reinstall the printer driver
T
Check that the tape cartridge is properly mounted.
Lines appear on printed labels.
The print head is dirty. Clean the print head. See "Cleaning"
Canceling a print job
Check the printer's power in ON, then pr
button on the front
of the printer brie
Labels are not cut automatically
Is the cutter blade worn? P
down and dull the blade. C
Center
Problems not indica
USB
F
When the printer driver installation scr
Select the connection method on the screen shown below
Connect the printer and the computer with a USB
cable following the instructions.
The printer driver f
installed.
The printer driver fBluetooth connection is
installed.
1.
T
Auto pow
The printer turns o
• 8 hours on AC pow
• 20 minutes on battery power
The shortest label you can create with this printer is appr
long.
When creating a label shorter than 22 mm long, cut the marg
MEMO
FBluetooth f
documentation for the comput
2.
Attach the label and rub it
See "Downloading Printer Driv" on the front side.
Bluetooth
®
1. Creating and prin
Using mobile devic
Use the Epson application to crea
See the Epson website for mor
U
http://www.epson.com
Using W
Create labels with the label editing software "Label Editor" and print
See the following manual for the pr
Label Editor User's Guide
2. Attaching a label
2.
TBluetooth feature of
your comput
3.
Select the check
4.
Select the printer as shown below
Bluetooth F
1.
C
2. Bluetooth connection
setup (pairing)
CAUTION
Place your mobile device no mor
when making the settings.
1.
Press the button to turn the printer pow
.
If the Bluetooth function of the printer is disabled, enable it.
See "Enabling and Disabling the Bluetooth F
2.
On your mobile devicBluetooth fea
printer
When pairing is complete, start the Epson application on the mobile device
to create labels
See "Downloading Printer Driv" on the front side.
MEMO
FBluetooth pairing instructions, consult the documentation for y
mobile device.
At the time of purchaseBluetooth function is set to be enabled when
you turn on the power of the print
enable and disable by button operation.
YBluetooth function with the
lamp.
See "Meanings of lamps"
1.
If the power of the printer is on, pr
the button to turn o the power
.
2.
Press the
button and Bluetooth
button at the same time to turn on
the power of the print
Y
and disable by repeating the opera
steps 1 and 2.
If the Bluetooth function of the printer is
disabled, enable it.
See "Enabling and Disabling the Bluetooth
F