Inserting Your Memory Card
See below to install your memory card:
When you insert the card, you see a message
indicating that you have inserted a memory card.
The printer reads and counts the images on
your card.
NOTE: The printer recognizes the first 999 files
only. If your photos aren’t recognized, see your
User’s Guide for troubleshooting information.
CompactFlash
TM
or
Microdrive
TM
(left)
Memory Stick
®
(middle)
SD (Secure Digital) Card
or MMC (MultiMediaCard)
(middle)
SmartMedia
TM
card
(right)
xD Picture Card
TM
(right)
Loading 4 x 6 " Premium
Glossy Photo Paper
In Basic mode, you can print 4 x 6" photos on
EPSON
®
Premium Glossy Photo Paper.
1 Place the paper against the
right side of the feeder.
2 Slide the left
edge guide
against the
paper.
Printing an Index
If you don’t have the preview monitor, you’ll need to
print an index of your images to choose the photo
you want to print.
1 Press the mode button to choose Basic mode.
2 Press the or button to highlight Select
Photo and press OK.
3 Press the button to choose Index.
NOTE: If you have a large number of photos and
you only want to print a range of a few to choose
from, select Range and press OK. Then use the
or button to choose a photo to start the
range under From and press OK, then choose a
photo to stop at under To.
4 Press OK.
5 Make sure Copies is highlighted and press OK.
6 Choose 1 each and press OK.
7 Press the Print button.
Previewing Your Photos
If your printer includes the preview monitor,
you can use it to preview and select your photos.
1 Press the mode button to choose Basic mode.
2 Press the or button to highlight
Select Photo and press OK.
3 Use the and buttons to scroll through
your photos. (Press and hold one of the
buttons to scroll quickly.)
4 When the photo you want to print is shown on
the left and highlighted in yellow on the right,
press OK to select it.
To print, continue with step 5 under “Printing a
4 x 6" Photo.”
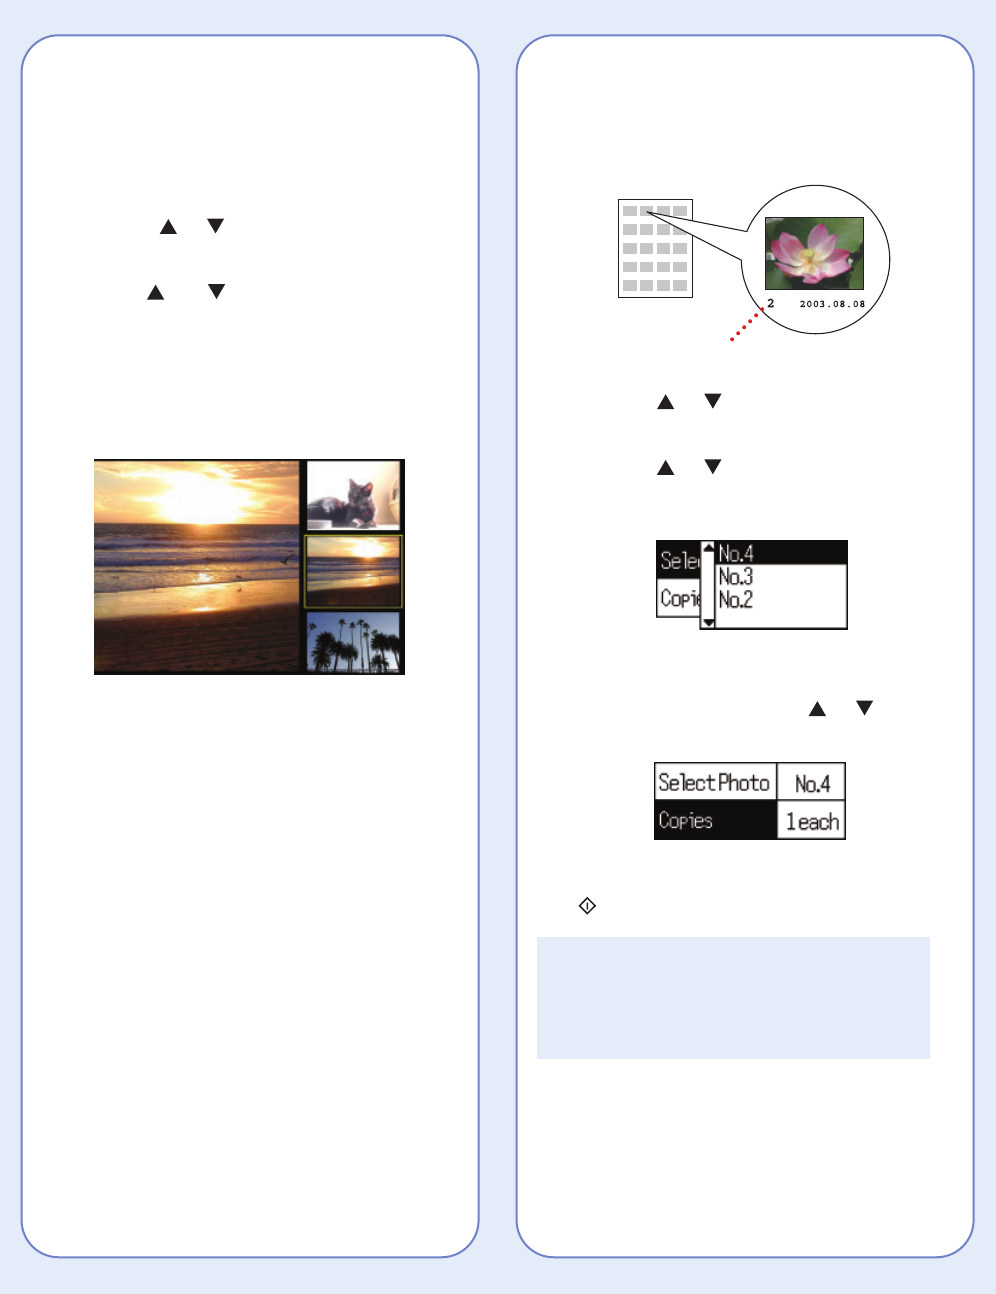
Printing a 4 x 6" Photo
1 If you printed an index, look at your index and
find the photo you want to print. The number is
below the photo.
2 Press the or button to highlight
Select Photo, then press OK.
3 Press the or button and scroll until
the number of your photo is highlighted. (Press
and hold one of the buttons to scroll quickly.)
4 Press OK.
5 Press OK again and use the or buttons
to choose a number of copies (1-100).
6 Press OK, check your settings, then press the
Print button to print your photo.
NOTE: If you see unexpected results and you
have made settings in Advanced mode, see
your User’s Guide to go back to the default
print settings.
Photo number