Operating manual
eQ-3 BLUETOOTH
®
Smart Radiator Thermostat
1st English edition 04/2015
Do
Al
CC-
1. Information about this manual
Ple
Th
Esp
han
Symbols used:
At
Note. This section contains impor
2. Package contents
1x radia
1x cylin
German
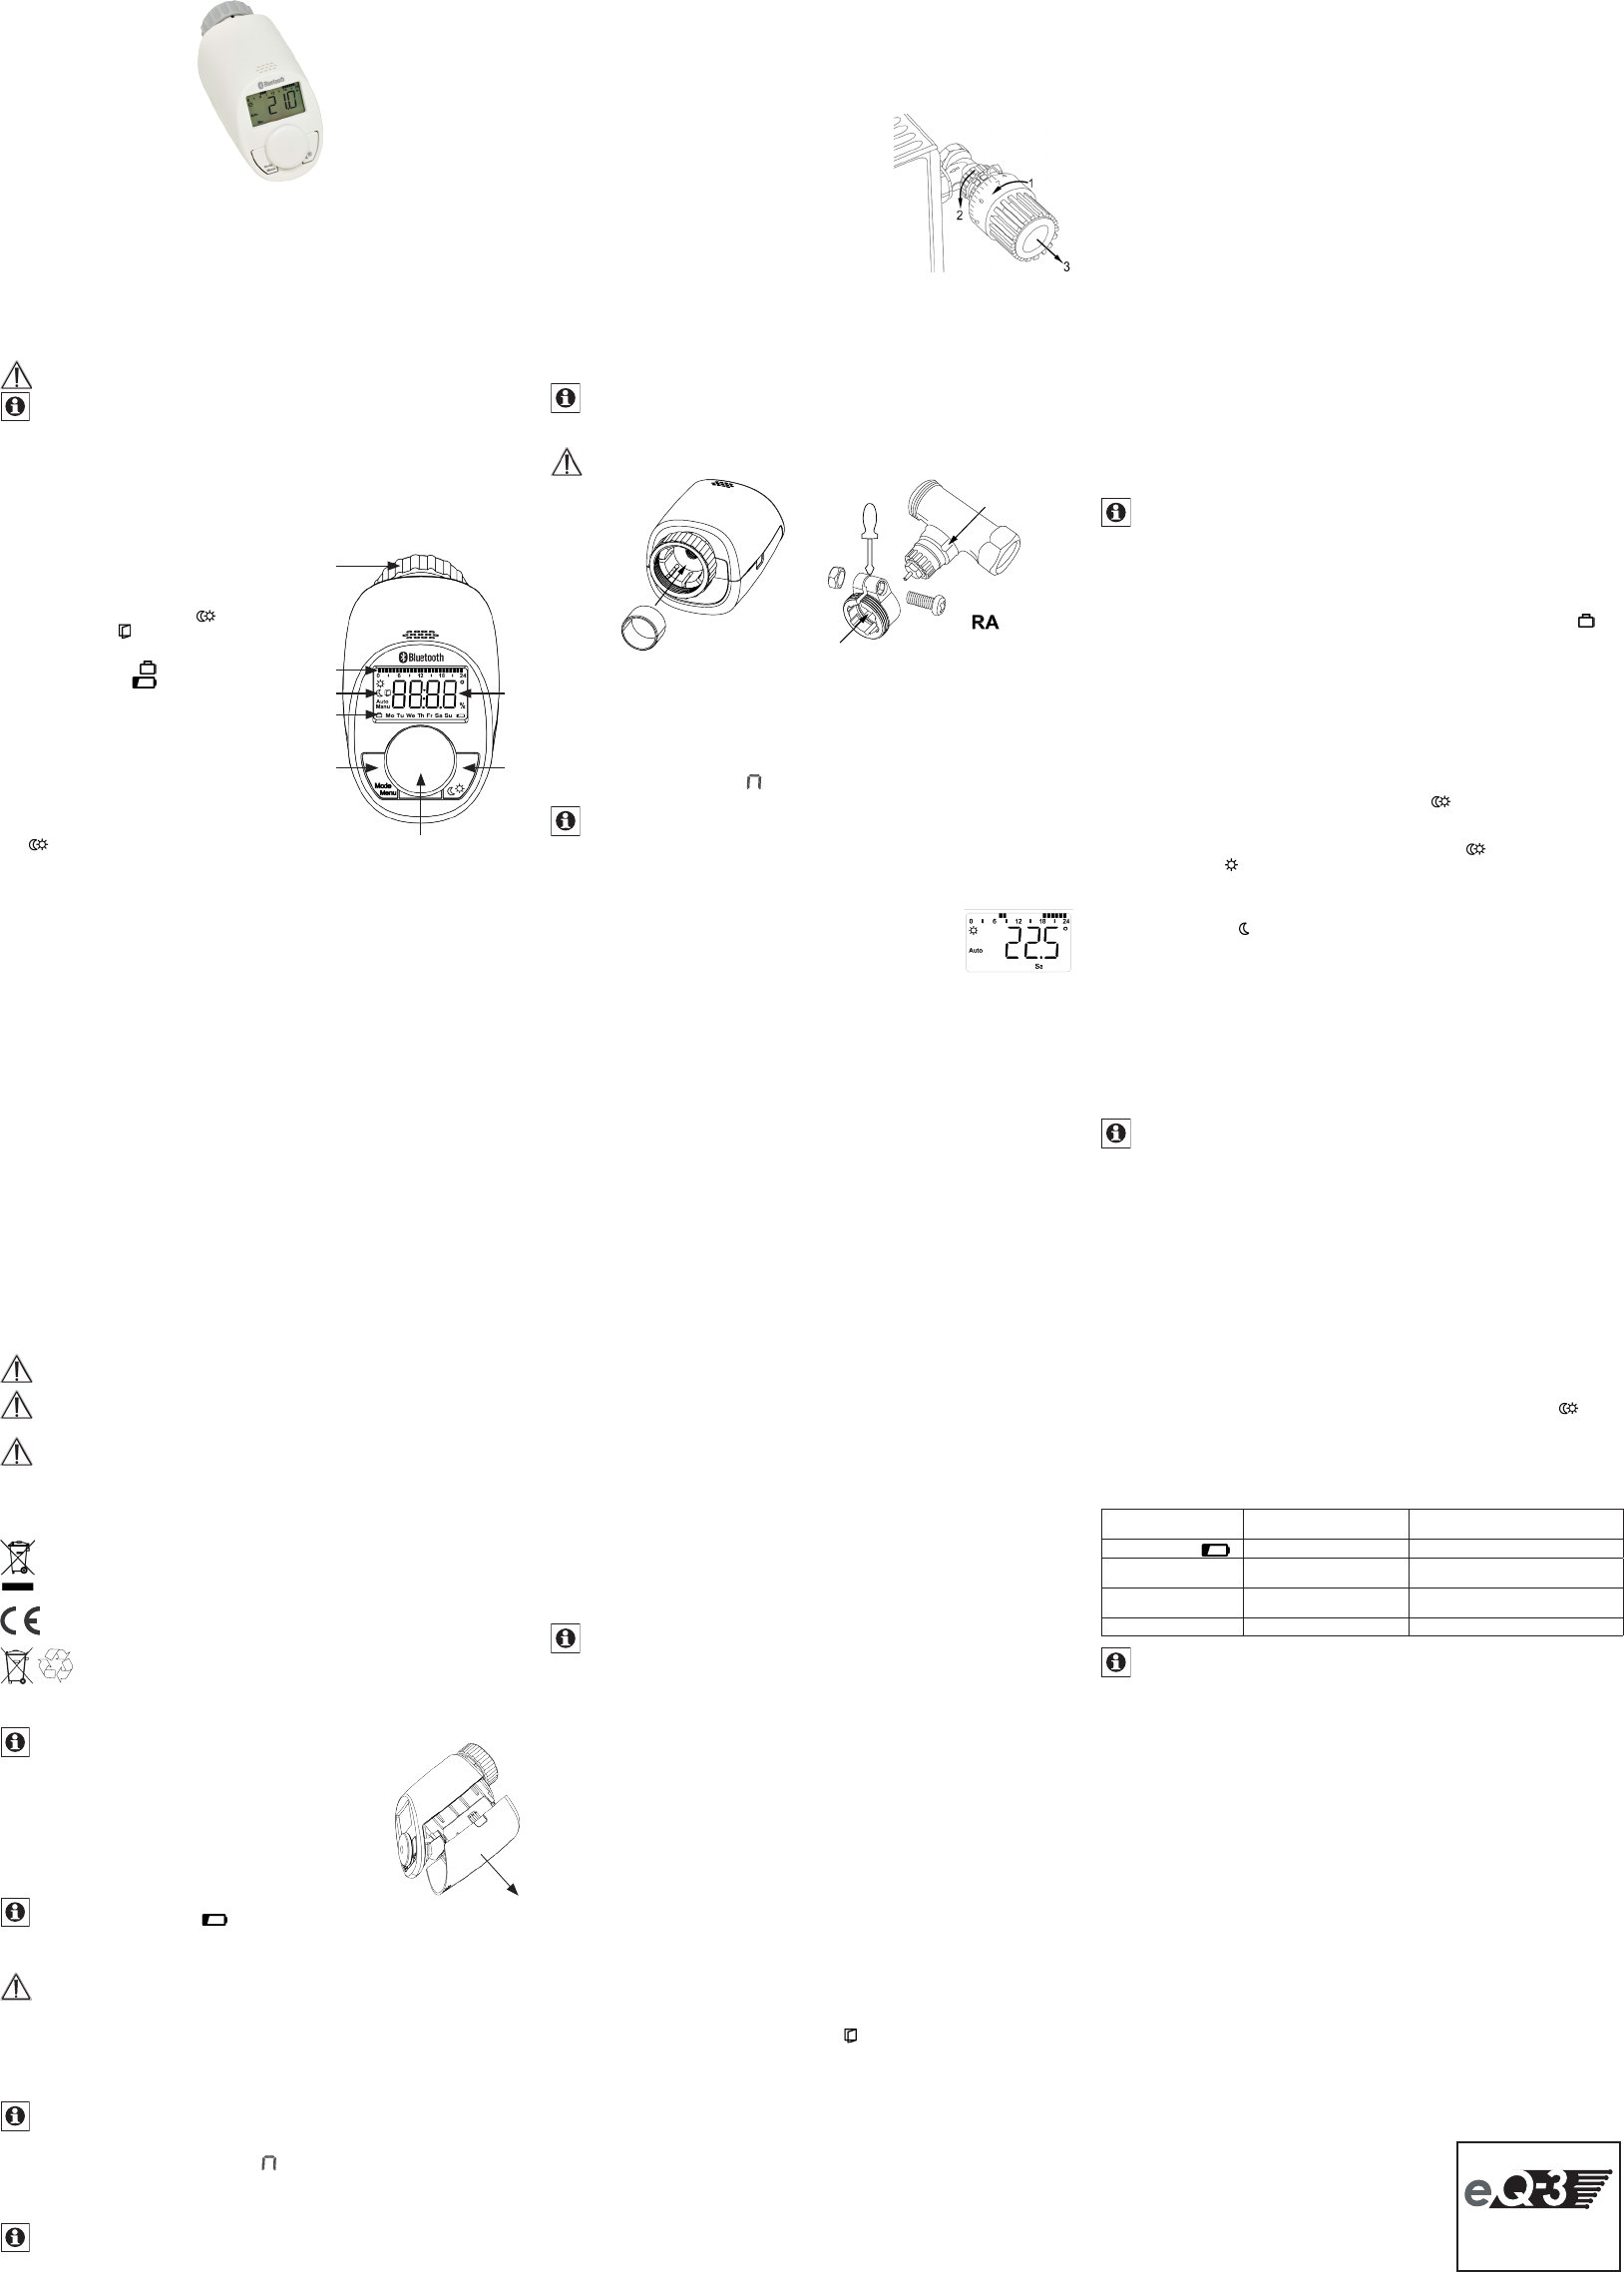
3. Dev
A
C
D
B
E
F
G
H
A Unio
B Den
week program
C
Eco/comfort temperatu ), open-win-
dow f ), maManu),
autoAut)
D
Holiday ), weekd
battery symbol )
E M
mo
(pr
(pr
F C-
per
the b-
tin
sh
G
but
for
H
T
menu items
, fun
4. F
ThB
®
Sma
the r
Th-
tor t
Tha
desired temperature can be
Th
wit
fun
Tha
during ventilation.
5. Intended use
The radia
the d
ext
in this operating manual does not-
vali
wor
eQ
an-
ti
6. Safety instr
Th
Do n
of a ch
Do n
ser
by an exp
7. Disposal instructions
Do n
Ele
electronic equipment
Equip
Th
do
Use
Ins
8. Inser
In th-
lat
T
• Pre
yo
• Ins
co
• Reat
plac
Th
2 year ) on t
to be r
ins
Neve
Do n
9. Se
Af
dis
• Set
preF ).
Y
Th
• If “ ” are di
Wh
on t
Th
the Mo
fu
• Af
and installation can take place.
10. I
Th
wate
the h-
st
man
• Rot
(
presses against the valve-
ier t
• Rem-
qui-
er
• At
1S
If reI)
rad
Th
valve bK ) around their circumference,-
sur
DurJ ) are lin
up wiK ) o
on.
T
halves of
11 Adaption run
Af-
for
• As s-
tr
“AdA” and th ) ar
in the meantime.
If t-
tr-
sag-
siti
12Display con
Swsetpo
and w
Th
dis
13Op
Af-
dividually
either via BLUE
®
wit
1O
T
• Dow
your smartphone.
• Foll
Af
13Op
Op co per the devi The
ple
13 Week pr
In th
ca
tem
• Pre
Co
• “dAy
of th
• Co
• Th
hea
• Co
• Set t
• Co
• The next switching time point
• Fin
• Y
per
• If
swi
In au
whe
at wh
1 Se
Date a
• Pre
• Se
• Set
pre
13 S
An a-
ac
• Pre
• Se
• Co
• Th
• Co
13 O
Wi
tha
the
fun ) appe
• Pre
• Se
control wheel shortly
• Th
dea
13 Set
As t
thr
If a no
an of
• Pre
• Se
co
• T
• Co
13 Activate/deactivate BLUE
®
(bLE)
ThBLU
®
fun-
vated manually
• Pre
• Se
co
• Th
• Co
13 Restore facto
Th
thi
• Pre
• Se
control wheel shortly
• “C
• Co
13 Boost function
If, fo
to he
imm
5 min
• Pre
• Th
• Af
previously a
• Th
wheel again.
Th
or c
the b
13 S
I-
days o
• B ) a-
pears in the display
• Cha
and c
• Th
• Set t
The set-
mo
13Comfort and
Vi ) you ca
the
and t
• Press and ) for a
• Th ) and the c
display
• Change t -
trol wheel shortly
• The moon ) an
the display
• Change t -
trol wheel shortly
Even in au
wil
13Act
Bat
the v
In orB
®
fun
T
• Tmanu) to t
the display
• Tmanu) o
13Set f
If a ro
the
• Tman) to the l
the display
• Tmanu) o
13Child
Th
• T but
at th
• Af
• T
14T
Er
disp
Problem Solution
Bat )
Bat Replace bat
F1 Val
Check installation,
check the heating
F2 Actuating range too wide
Please check
mounting
F3 Adjustment range too small Check the heating
Th-
urd
appears in the display
15T
Dev CC
Sup 2x 1.5 V L
Cur 100 m
Bat 2 year
De IP
De 2
Am 5 to 3
Sur 9
Display: LCD
Co M3
Method of T
Lin 4.3 m
Di 5
Weig 162 g (in
Rad 2.
Op 10 m (typ.)
Subject to technical
Th
®
wor
and a
those of
Bevollmächtigter des Herstellers:
Manufacturer’s authorised representative:
eQ-3 AG
Maiburger Straße 29
26789 Leer / GERMANY
www.eQ-3.de
K
J