A
C
Assembly of Lower Handles to Deck
1. Insert lower handle into holes in the deck (A).
2. Release the grassbox catch and lift the grassbox lid (B).
3. Rest the grassbox lid against the lower handle and
remove the grassbox.
4. Push the lower handle into place ensuring that the
holes in the lower handle are correctly located behind
the holes in the deck.
5. Secure the lower handles to the inside of the deck
with the lower handle fixing pins (C).
6. Ensure the fixing pins are securely located.
7. Should a problem occur when securing lower handle to deck,
carefully lever fixing pins out of location and repeat steps 4 to 6.
8. Replace the grassbox and close the grassbox lid.
Assembly of Upper Handles to Lower Handles.
• Ensure the upper handle is located correctly with the
lock-off button on the switchbox uppermost
1. Insert the nut into the handle knob (D1).
2. Ensure the upper handle and the lower handle are
aligned correctly. (D2)
3. Fit the bolts, washers and handle knobs.(D)
4. Fit the cable to the handles with the clips provided.
Make sure the cable is not trapped between the
upper and lower handles.
Assembly Instructions
B
lower
handle
fixing
pins
grassbox lid
D
washer
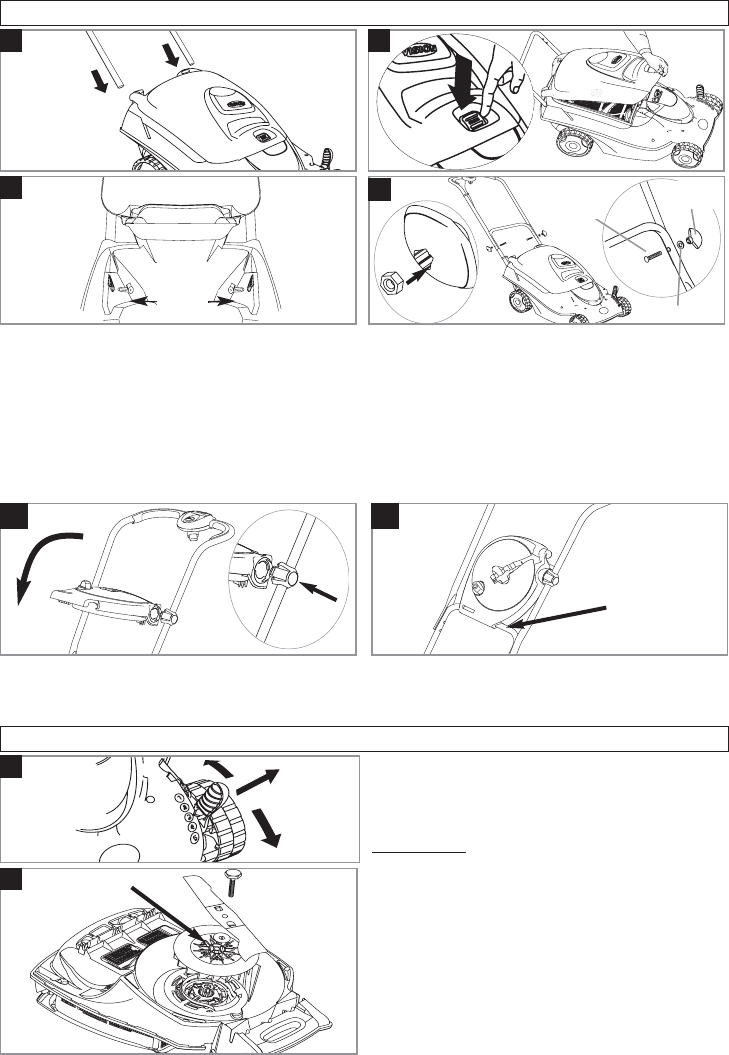
Adjusting the cutting height
1. Lift the lever out of location and rotate to the desired
position. (G)
Heights of cut
:-
1 & 2 - low, 3 - medium, 4 & 5 - high
The height of cut can be reduced further by
the addition of the spacer provided (H)
Always handle blade with care - sharp edges could cause
injury. USE GLOVES.
1. Remove the blade bolt and blade as described in Re-
moving the Blade and Fan
2. Place the spacer between the fan and the blade (H)
3. Replace the blade as described in Fitting the Blade
and Fan
Cutting Height Adjustment
G
1
2
bolt
H
spacer
Cable Winder Assembly (E & F) RC3400 only
1. Insert cable winder attachment onto left upper
handle as viewed from rear of product (E1).
2. Insert cable winder onto attachment and turn
downward to secure. (E2).
3. Continue turning the cable winder downward until it
can be located onto the top of the lower handle (F1).
E F
1
2
1
handle
knob