Care
To Clean
Unplug
Buttons
Check
to
For
®
included
Antibacterial Drip
Empty
Sensors
This .
Full
(K),
liquid,
then
Food will
Clean
by
Tray.
Bag
®
Appliance
hands
©2008 Sunbeam
All rights
Consumer Solutions,
Printed in
P.N.128166
T180-00460
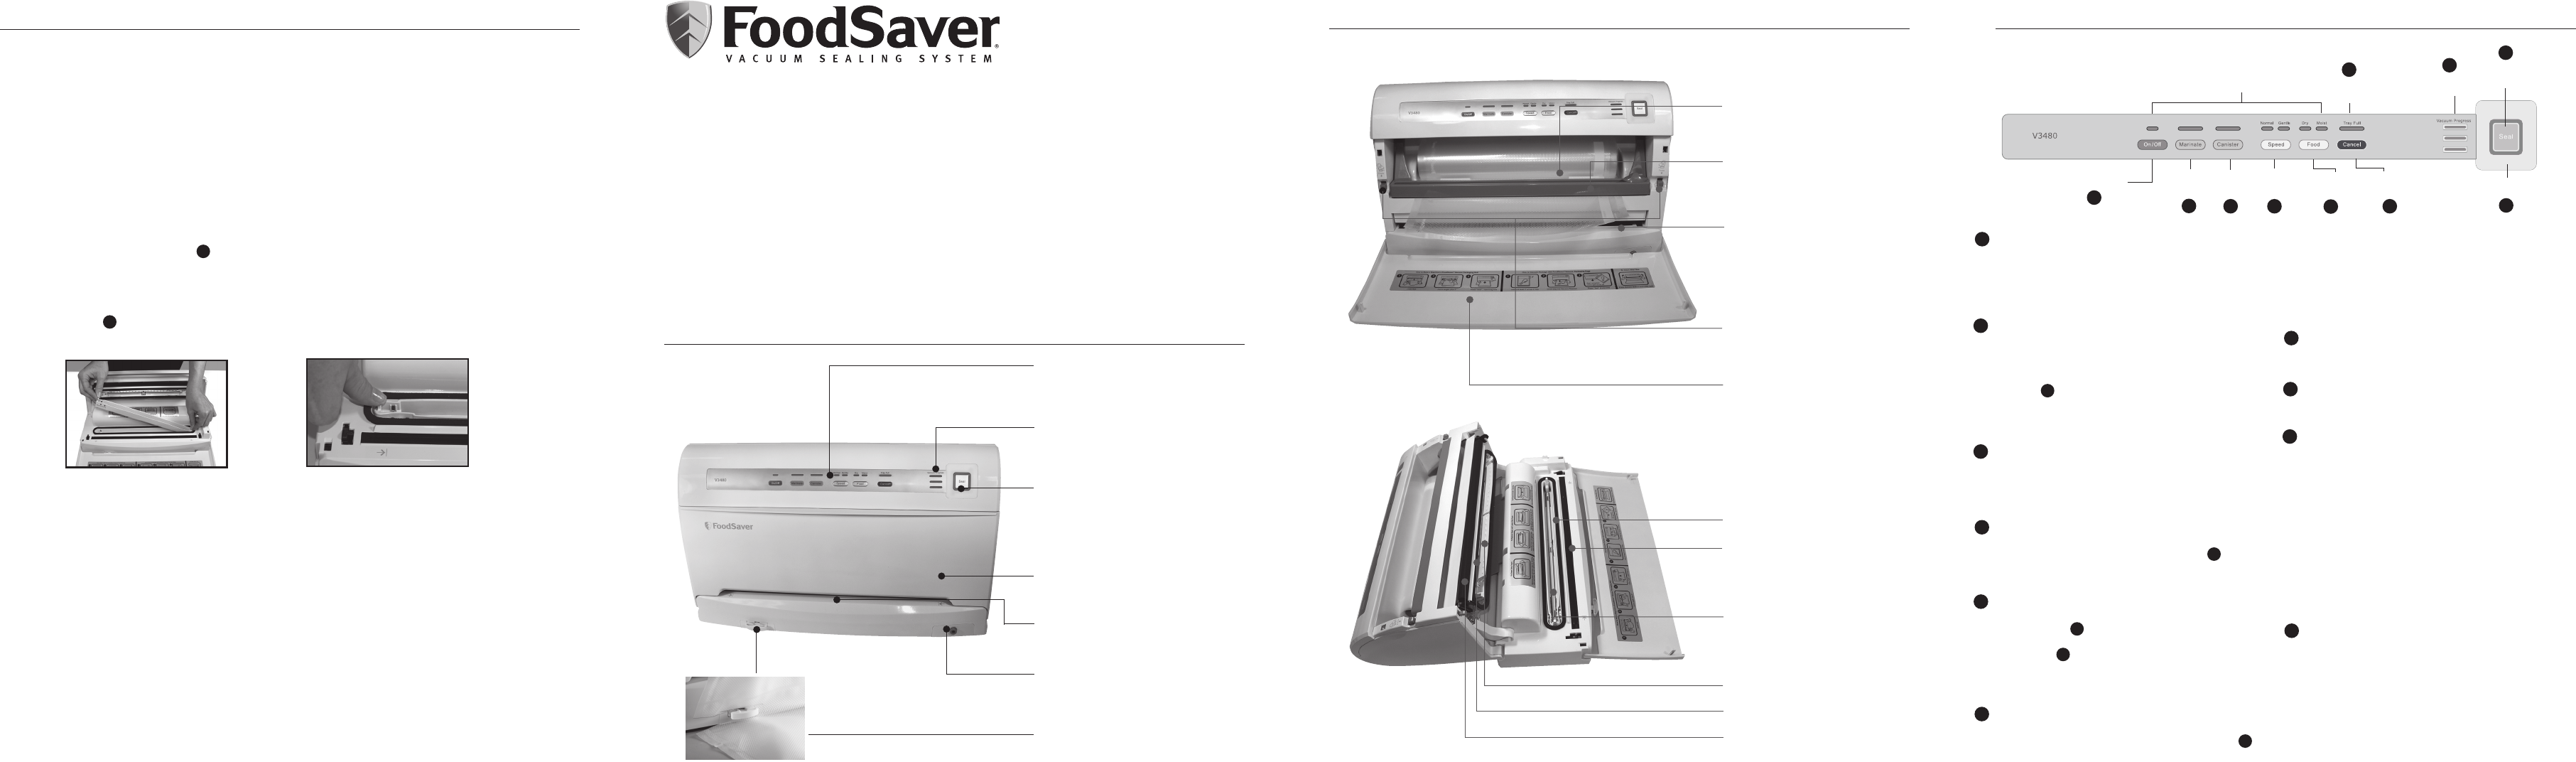
Features
®
(Note
Quic
&
for V3400
A.
To
progress
B.
Lights
vacuuming.
when
C.
Red
function
time
the
™
Prevents
D.
Opens
and
E.
Simply
®
appliance
F.
Accessory
Accessory
FoodSaver
®
G.
Quick
bags
M. Foam
N.
Non-stick Coating
Provides
seal
O.
Catc
and
to
P. Upper
Q. Upper
R. Rubber
For
the
®
Questions?
order
®
H.
F
®
Vacu
I.
Simp
custom-sized
J.
Simpl
into
machine
bag,
automatically
K.
T
for
L.
Opens to
Roll
Power Button
Tray Full
Indicator
Marinate
Mode
Canister
Mode
Speed
Settings
Adjustable
Food Settings
Cancel
Button
Seal Indicator
Seal
Button
Vacuum
Progress Lights
Indicator
LEDs
Features
®
Features
®
4
8
10
Registering your
you will
in the
For more
®
Reference
www.foodsaver.com.
1
2
3
5
6
9
7
1
2
3
4
5
6
7
8
9
10
POWER BUTTON
Press
Speed
illuminated.
to
appliance
TRAY FULL
During
liquids,
pulled
the
Indicator 2
remove
soapy
replace
MARINATE MODE
A ten minu
to
infu
with
®
”
CANISTER MODE
Press
accessories. 4
vacuum
Process
SPEED SETTINGS
When
Setting 5
light
Seal 9
automatic Note:
to
when
ADJUSTABLE FOOD
For
foods, 6
until
dry
The
Sealing
liquid Note: Appl
to Dry set
powe
in
Quick
CANCEL BUTTON
Immediately
Vacuum
VACUUM PROGRESS
Displays
evacuated.
SEAL BUTTON
CrushFree
™
Instant
This button
1.
and
delicate
2.
FoodSaver
®
3.
potato
4. PulseVac
™
SEAL INDICATOR
Constant
engaged. (Flashing light
Fig. 7
Remove For
Firmly Snap
Fig. 8
* not
* not
2
3