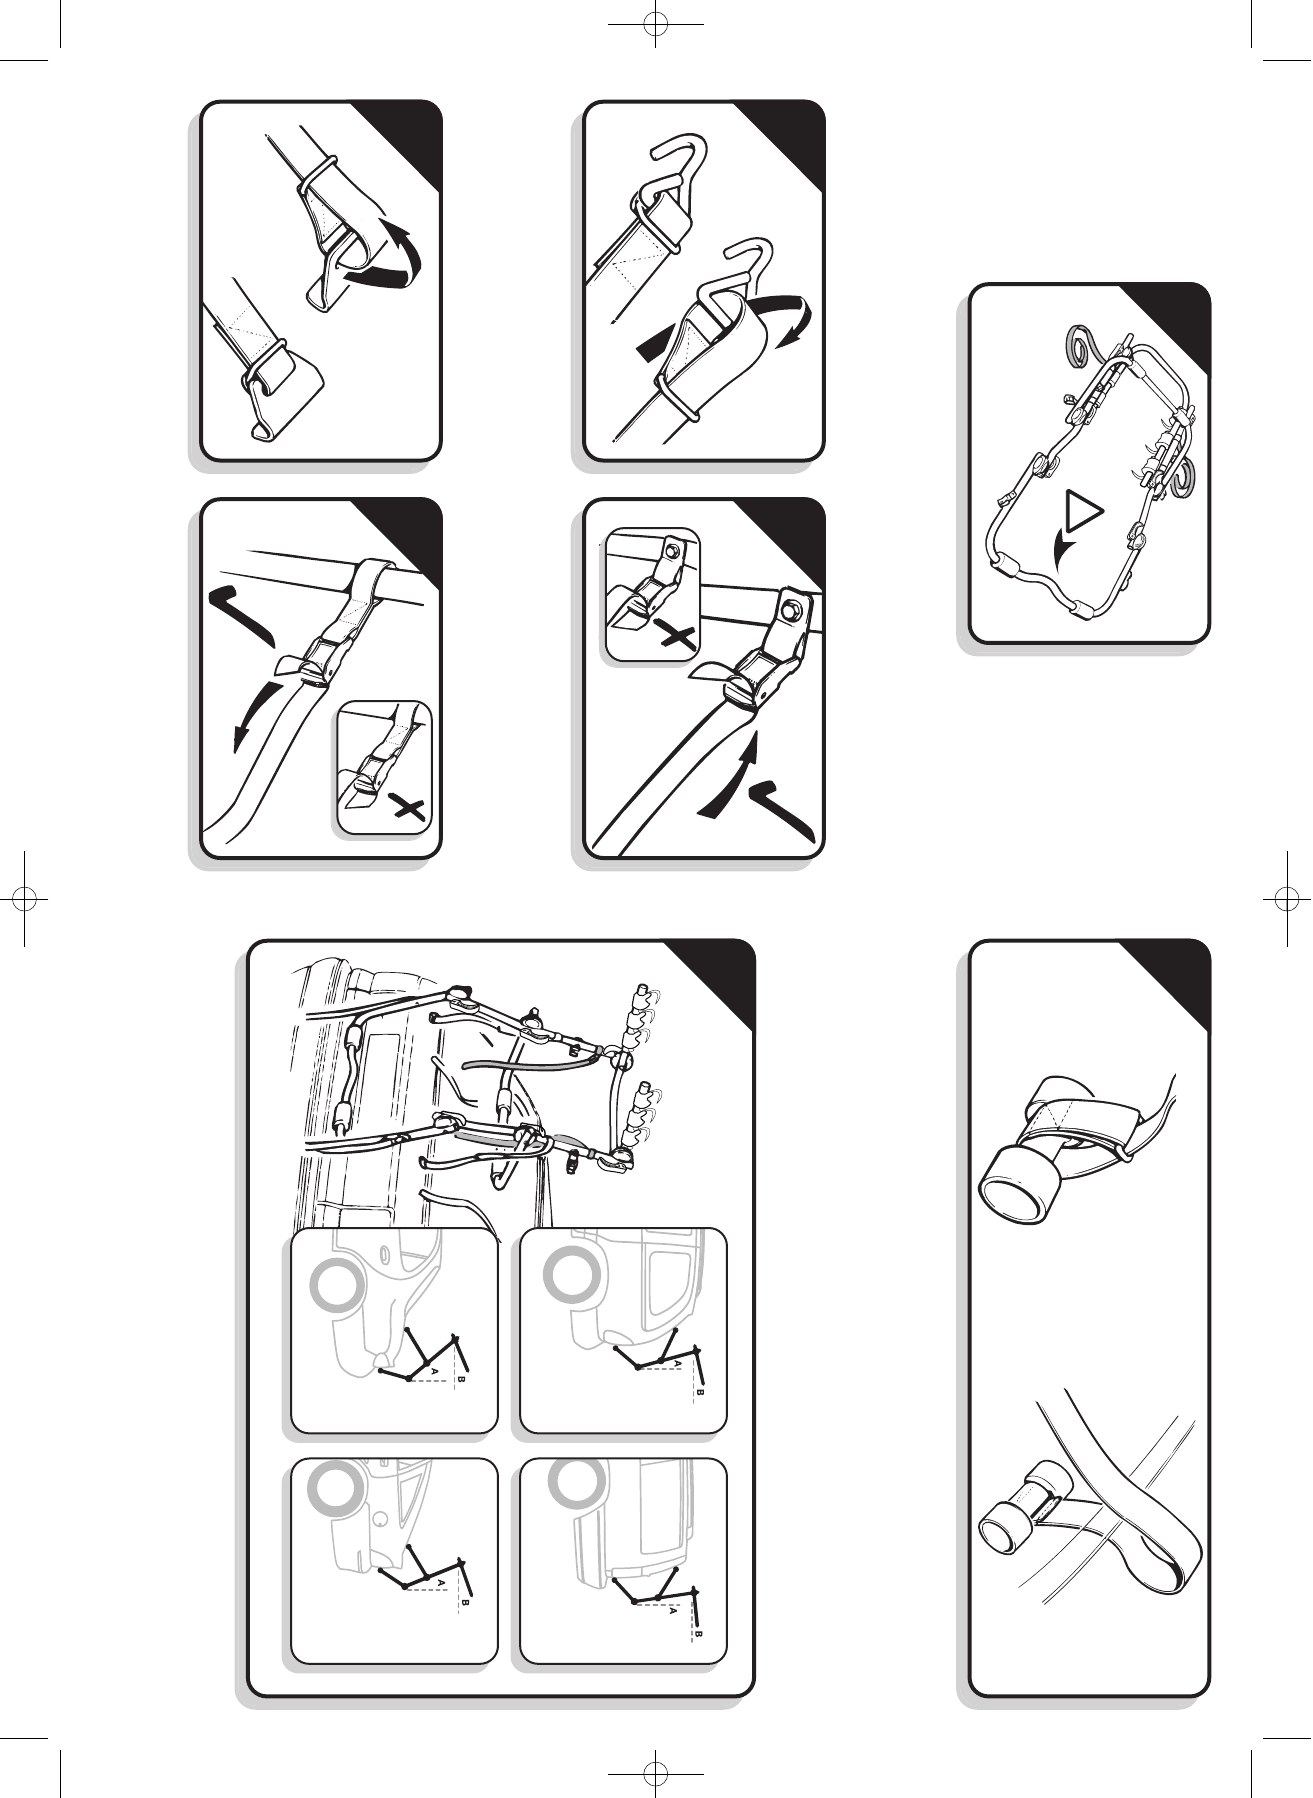
1
2 3
6
7
Release the bottom 2 adjuster levers and position the
carrier as illustrated.
There are indicator marks on the ratchet adjusters. Using
these as a guide, lift the bottom support tube counting 5
teeth spacing, then lock in position.
The quick release action should be firm for both opening
and closing. The tension may be set by releasing the
handle and turning clockwise.
Note: It is important that indicator marks on the ratchet
adjusters are in the same positions on both sides.
Lower strap assembly
Select 2 x 95cm straps and assemble the chassis hooks
as illustrated.
Warning: Ensure that the straps are fully tightened on
the chassis hooks.
Feed the strap through the lower set of cambuckles.
WARNING: ENSURE THAT THE STRAPS ARE
INSERTED THROUGH THE CAMBUCKLES IN THE
CORRECT DIRECTION.
4 5
Side strap assembly
Select 2 x 95cm straps and assemble panel hooks
as illustrated.
Note: Ensure that the straps are fully tightened on the
panel hooks.
Feed the strap through the middle set of cambuckles.
WARNING: ENSURE THAT THE STRAPS ARE
INSERTED THROUGH THE CAMBUCKLES IN THE
CORRECT DIRECTION.
Top edge fittings
Attachment of the upper
straps to the vehicle
Offer the carrier to the vehicle with the lower tube
approximately 50mm above the upper face of the
bumper. Adjust the upper arm to sit against the tailgate of
your vehicle. The carrier upper support arm should not
rest in the middle of any body panel or glass panel; it
should be positioned in the upper or lower third of the
panel. The carrier main frame should be leaning towards
your vehicle (A) maintaining reasonable clearance,
typically approximately 8cm (3 inches) from the car
bodywork. This will reduce as the straps are tightened.
Ensure that the cycle support arms are adjusted to be
above horizontal (B). Once the carrier is set in the correct
position fully tighten all quick release adjusters.
Top edge fittings Select 2 x 160cm straps and assemble
dumbbells as illustrated. Open the tailgate, and from
inside your vehicle thread the straps over the top edge
leaving the dumbbells hanging free. Carefully close the
tailgate then gently pull the straps until the dumbbells sit
firmly against the interior trim.
NOTE: Panel hooks, as shown in step 4, should not be
fitted to a glass edge. In the absence of any glass edges
to the vehicle tailgate, always use the dumbbells to the
top and panel hooks to the side. If your vehicle has glass
edges to the side and a metal top edge the dumbbells
must be fitted to the glass edge position. If your vehicle
has both glass edges to the top and to the sides then
dumbbells should be fitted in all positions replacing the
panel hooks. Dumbbells (Also known as Glass Edge
Fittings) are available separately as an accessory.