2.2 Installing the Room Thermostat
2.2.1 Power Up
Installing the Batteries:
a. Lift up the front cover of the thermostat to reveal the battery cover and product controls.
b. Remove the battery cover by pressing down and sliding out.
c. Insert the 2 x AA LR6 Alkaline Batteries supplied with the thermostat, ensuring the correct orientation
(see ‘Controls Layout’ on page 2).
d.
After a short pause the thermostat will display information on the screen and is now ready for use.
e. Replace the battery cover by sliding it firmly back into the front of the thermostat.
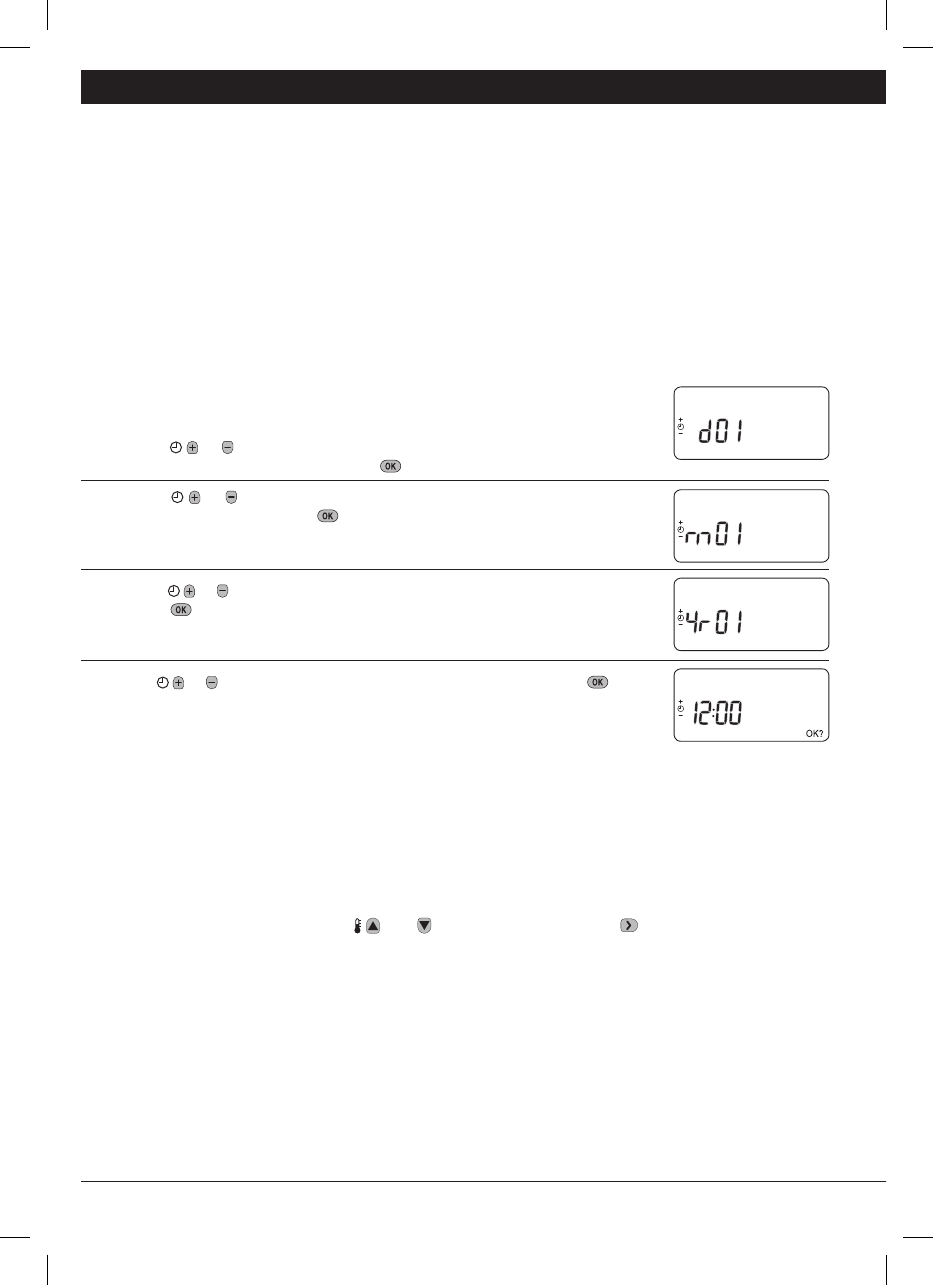
Setting the Date and Time:
a. Press the DATE button to begin setting the date. When you set the date for the
first time after the batteries are inserted, the display will show:
Press the or buttons to set the current day of the month (e.g. d 01 = 1
st
day of the month) then press the green button to confirm.
b.
Press the or buttons to set the current month of the year (e.g. m 01 =
January) then press the green button to confirm.
c. Press the or buttons to set the current year (e.g. yr 07 = 2007) then press
the green button to confirm.
The date is now stored.
d. Use the or buttons to set the correct time then press the green button
to confirm. Each press of the buttons will change the time by one minute and
holding them down will change the time slowly at first and get progressively
quicker.
Note: If this mode is entered accidentally then press the AUTO, MAN or OFF buttons to exit.
2.2.2 RF Communication Check (Test Mode)
To check the RF communication, hold the room thermostat about 2-3 metres from the installed relay box.
Press the OFF button, then press the and buttons together with the button for 3 seconds. The
unit will display ‘TEST TRANSMIT’ and it will send test signals to the relay box, flashing the green LED on
every 6 seconds (relay output will remain off) for a maximum of 10 minutes. When the green LED flashes
on every 6 seconds proceed to the next step.
NOTE: If the green LED is not switched at specified intervals, the red LED is flashing or if you are installing
a replacement relay box or room thermostat, follow the procedures described in section 5.1 Binding /
Rebinding Procedure.
AM