2 CM900 - Programmable Room Thermostat Installation Guide 3
Setting-up the Thermostat
Please follow the illustrations detailed on page 1 in sequence to install the thermostat correctly, then refer to the steps below:
NOTE: For gas boiler applications, the factory system settings will not need to be changed (for other applications see section ‘Using the
Thermostat for Specic Applications’ below).
To set-up the thermostat:
1. Remove the battery cover and insert the batteries supplied with the unit (2 x AA LR6 Alkaline Batteries).
2. Move the slider switch to the DATE position.
3. Use the
or
buttons to set the correct day / month / year, pressing the green
button to conrm.
4. Use the
or
buttons to set the correct time, pressing the green
button to conrm.
5. Move the slider switch to the required operating mode (AUTO, MAN or OFF) to begin operating at the default factory settings, or move to
PROG and modify the built-in heating program accordingly (see User Guide).
You can now use the ‘User Guide’ supplied with the thermostat to demonstrate how it works to the home owner.
Using the Thermostat for Specic Applications
The CM900 thermostat is a versatile controller that can be used to control many different applications. For most typical applications, like ‘wall-hung
gas red combination boiler control’ or ‘zone valve control’, no adjustments from the factory settings are required.
For other applications, like controlling an oil burner, the best system performance can be achieved by modifying selected parameters of the
thermostat in installer’s mode. The table below lists the most common settings used for a specic application:
Removing the Cover
Specic Application:
HEATING
AIR-CONDITIONING
Setting: What to change:
Gas Boiler (<30kW)
Oil Boiler
Thermal Actuator
Zone Valve
Electric Heating
(resistive load <8A)
Heat Pump / Air-
Conditioner
Fan Coil
Note: All parameters listed below belong to category 2
- System Parameters (see Installer Parameters Table)
No changes required
Set 1:Ot parameter to 4
Set 2:Cr parameter to 3
Set 2:Cr parameter to 12
No changes required
Set 2:Cr parameter to 12
Set 3:EH parameter to 1
To enable switching between cooling and heating modes
adjust parameter 4:HC in category 2 (0 = disabled, 1 =
enabled). Now you can switch between these modes by
pressing the
and
buttons together for 5 seconds in
any of the product operating modes (AUTO, MAN or OFF).
Explain to the end user how to switch between these modes
using the
and
buttons and ensure the cooling program
is modied as required.
Set 1:Ot parameter to 4
Set 2:Cr parameter to 3
No changes required
Cycle/Hour
6
3
12
6
12
3
6
Minimum
ON Time
1
4
1
1
1
4
1
Special Feature: Description: To Enable/Disable This Feature:
Optimisation (Variable
Start Time)
Heating or Cooling
Operation
Summer/Winter Auto
time change
Temperature Offset
Upper/Lower
Temperature Limit
To enable: Set parameter 8:OP
(category 1) to 1.
To enable: Set parameter 4:HC
(category 2) to 1.
To enable: Set parameter 3:tC
(category 1) to 1.
Set parameter 12:tO (category 1) to
the required offset value.
Set parameter 6:uL (category 1) to the
desired upper limit.
Set parameter 7:LL (category 1) to the
desired lower limit.
The thermostat will adjust the start time in the morning/afternoon so the
desired temperature is reached by the start of the program period. The
system will restrict the start time to a max of 2 hours.
This product can be used for heating or cooling applications. If you select
cooling mode the control algorithm and factory default program will be
modied. You can independently modify the heating and cooling prole.
This feature moves time automatically on the last Sunday of March and the
last Sunday of October. The feature is factory enabled.
If the thermostat is located in a particularly hot/cold location and cannot
be moved because of wiring restrictions then the measured/displayed
temperature can be adjusted by +/- 3°C. This is useful if the homeowner
wants the reading to match another appliance temperature display.
The normal upper temperature limit of 35°C can be reduced to 21°C to save
the homeowner energy. The normal lower limit of 5°C can be increased up
to 21°C to protect inhabitants from cold.
Using the Special Features of the Thermostat
Accessory: Description: To Enable/Disable This Feature:
Outside Temperature
Sensor
Remote Temperature
Sensor
1. Fit the sensor (instructions are
included in the sensor package).
2. Set 10:SS parameter (category 1)
to 1.
1. Fit the sensor (instructions included
in the sensor package)
2. Set 10:SS parameter (category 1)
to 2.
An Outside Temperature Sensor can be tted to the thermostat, allowing the
homeowner to display the outside temperature on the display by pressing
the
button.
A Remote Temperature Sensor can be tted to the thermostat, allowing it
to control the temperature from another room e.g. in commercial premises
where the public may adjust keys.
Optional Accessories
1
2
3
1 2
3 4
5 6
7
COPIE
JOUR
JOUR
1..6
CM907
JOUR
PROG
AUTO
MAN
OFF
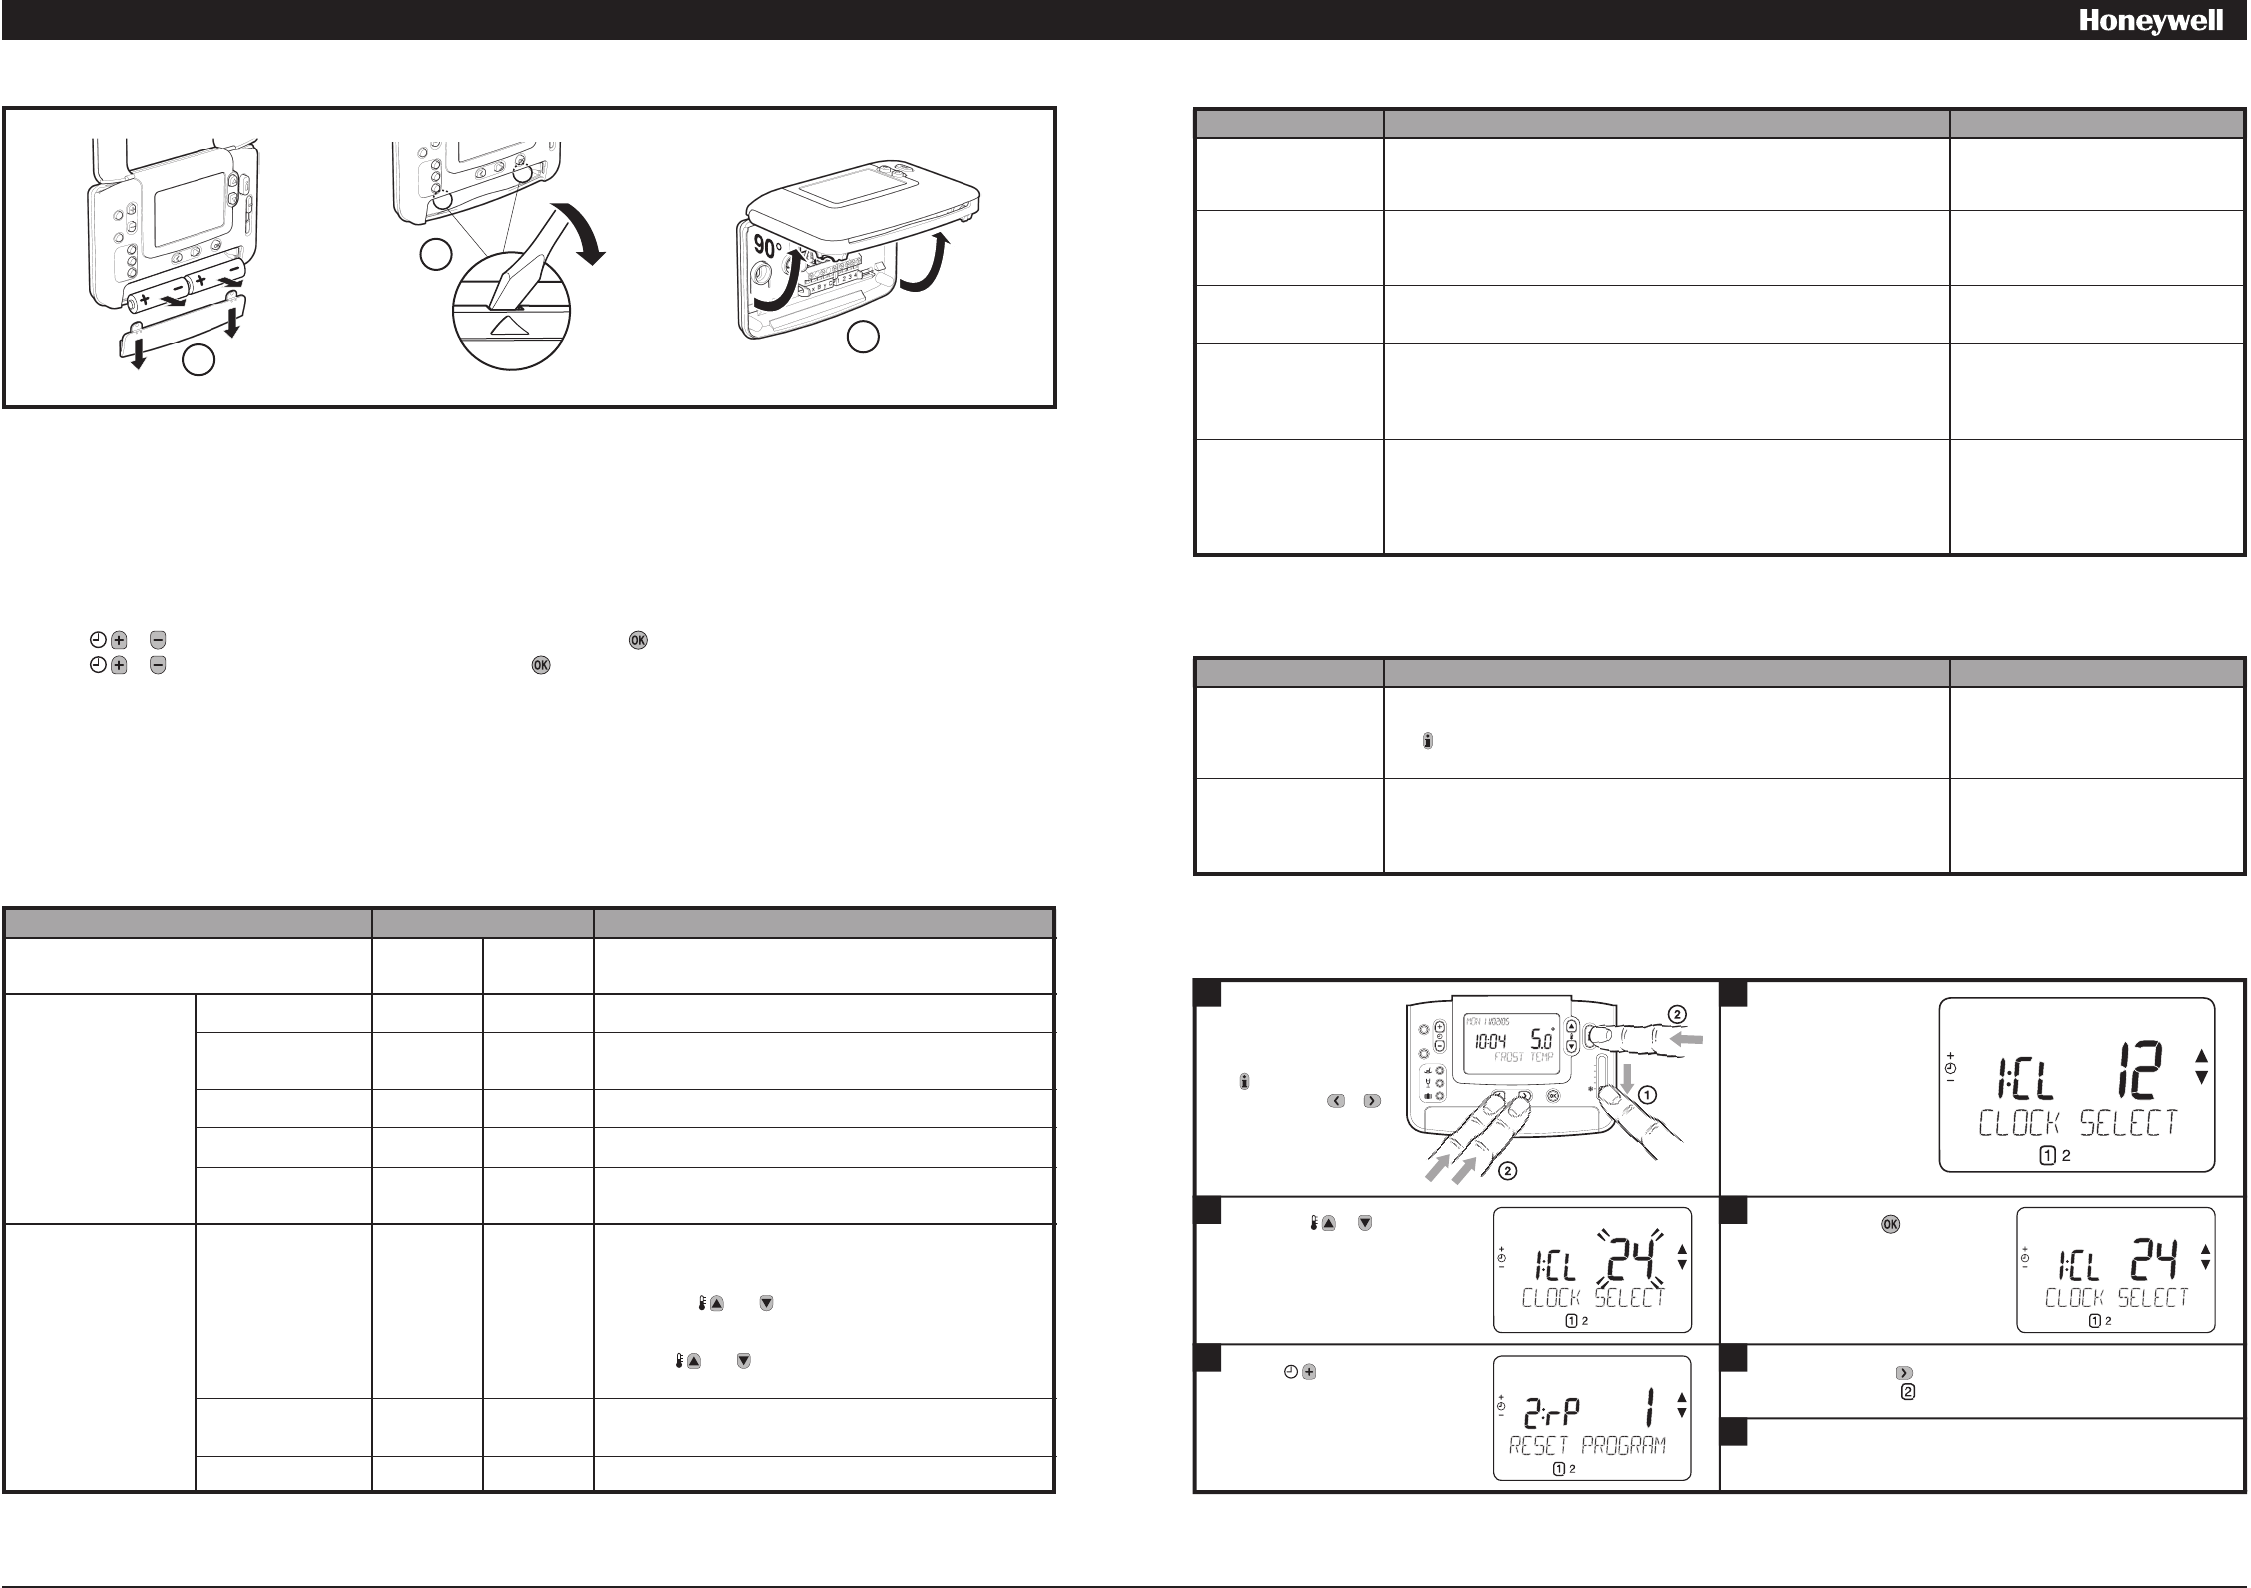
Move the slider to
the OFF position.
Press and hold the
button and the two
PROGRAM
&
buttons together.
Press the
or
to
change factory setting.
The display will ash
indicating that a change
has been made.
Press the green
button
to conrm the change.
The display will stop
ashing.
Press PROGRAM
button to go to Installer parameter
group category 2 (
) (from Parameter n.1 to n.5).
To exit the installer mode, move the slider switch to the
AUTO or MAN positions.
Press
button to go to
the next parameter.
Entering the Installer Mode
The unit will display
the rst parameter of
installer parameter
group category 1
(from Parameter n.1
to n.19) as shown