Size: 700 x 160 mm (unfold), 140 x 160 mm (folded)
Color: 1C + 1C
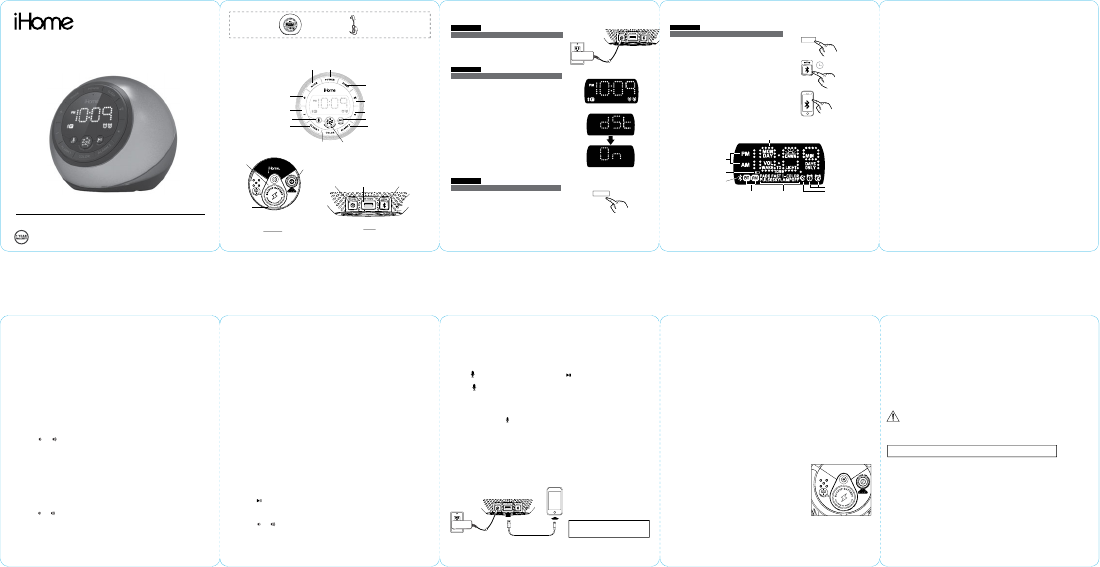
Front Cover
Model: iBT297v2
Color Changing
Dual Alarm Clock
Speaker System
with USB Charging and FM Radio
Questions? Contact Customer Service at 1-800-288-2792
Quick Start Guide
What’s
Included:
Meet Your iBT297v2
Bottom
100V-240V universal
AC adapter
iBT297v2 unit
Back
DC Jack
(7.5V/2000mA)
USB Charging Port
(5V/1A)
FM Antenna
Bluetooth Pairing
Button
Time Set/DST
Button
Backup Battery
Compartment
Remove the pull tab before initial use to
activate the Sure Alarm battery backup system
Pull Tab
iBT297v2
Plus Settings Button
Mode Button
Color Mode ButtonSnooze/Display Dimmer Button
Volume Down Button
Play/Pause/Presets Button (End Calls)
Volume Up Button
Voice Control Button
Alarm 1 Button
Alarm 2 Button
Power Button
Minus Settings Button
Sleep Button
Connect the included AC adapter to the DC
jack located on the back of the unit and
connect the other end to a working wall outlet.
RESET
RESET
TEST
TEST
Quick Set-Up:
Connecting the Unit
Step One
Setting Your Clock
Step Two
• Press and hold the Time Set Button until the
display flashes.
• Press the – or + Buttons to adjust selections
and tap Time Set to confirm.
• Do this for time, year, month and date.
• All done!
Automatic DST:
This product can automatically change your
clock in March and November for daylight
savings time! To enable, hold the Time Set
Button for 5 full seconds. You’ll notice the
display indicates “DST O”. Now press the +
Button to turn DST on. The display will read
“DST On”.
Bluetooth Pairing
Step Four
• Turn on your Bluetooth device and make it
‘discoverable’ by turning on Bluetooth mode.
• Press the Mode Button on the iBT297v2 as
needed until the ‘BT’ indicator icon appears
on the display.
• Press and hold the Bluetooth Pairing Button
on the back of the unit for 2 seconds. A voice
prompt will confirm pairing mode is active.
•
Select ‘iHome iBT297v2’ on your device’s
Bluetooth menu to connect!
Quick Set-Up:
2s
MODE
iHome
iBT297v2
Adjusting Color Modes
Step Three
Press and release the Color Mode Button as
needed to cycle to the desired color mode
light setting. Indicators on the display show
the current light mode for 5 seconds.
COLOR
Alarm Active Indicator
Sleep Mode Indicator
Bluetooth/Pairing Indicator
PM/AM Indicators
Color Mode:
Fade, Fast,
1 Color, Pulse,
Sky, Lamp, O
Time/Alarm Time/Radio Frequency Display
Low Backup Battery Indicator
Current Mode:
Bluetooth,
FM Radio
The Display
This unit features dual alarms which can be set to dierent times and alarm sources. Each is
set in the same way. Instructions are given as “Alarm Button”; use Alarm 1 Button or Alarm 2
Button to set respective alarms. Note: Each step must be completed while display is flashing
or setting will time-out with any changes saved.
1. Press and hold the Alarm Button for 2 seconds until the alarm time display and alarm icon flash.
A beep sounds.
2. Press the – or + Buttons to adjust the alarm time to the desired time (hold for rapid setting).
Make sure you set the correct AM/PM alarm time. The AM and PM indicators appear to the left of the
display.
3. Pres
s the Alarm Button to confirm the alarm time setting. The alarm schedule will flash:
7 (every day), 5 (weekdays) or 2 (weekend only). Press the – or + Buttons to select the desired
alarm schedule.
4. Press the Alarm Button to confirm the alarm schedule. The wake-to source will flash.
5. Press the – or + Buttons to select the desired wake-to alarm source: Bluetooth, FM radio, Tone
or Light Only (no alarm sound).
Wake to Bluetooth: You will wake to the currently linked Bluetooth device. If no device is
detected, the alarm will default to the last tone selected.
Wake to FM radio: Press the Alarm Button to confirm. Press the Presets Button to select an FM
preset to wake to, or press the– or + Buttons to tune in a desired wake to station.
Wake to Tone: Press the Alarm Button to confirm. Press the– or + Buttons to select the desired
tone to wake to (Tone 1 -Tone 4).
Wake to Light Only: Press the Alarm Button to confirm. Select this mode to wake to silent light
only alarm. (You will then skip volume setting and advance to step 9 Wake to Light setting.)
6. Press the Alarm Button to confirm wake-to source. The alarm volume will flash (unless Wake
to Light is set wake to choice, then volume setting is skipped and you are done).
7. Press the– or + Buttons to adjust the alarm volume.
8. Press the Alarm Button to confirm alarm volume. The current Wake to Light mode will flash.
9. Press the – or + Buttons to select the desired light mode to wake to (Slow Fade, Fast, One
Color, Pulse, Sky Gradient, Lamp, O or Dawn).
10. Press the Alarm Button to confirm the alarm settings and exit alarm setting mode. 2 beeps will
confirm alarm setting is complete. The alarm icon will remain on the display, indicating the alarm is
armed.
11. To turn o a sounding alarm and reset it to come on the next day at the same time, press the
Power Button or the associated alarm button (Alarm 1 Button or Alarm 2 Button) to reset
alarm.
Previewing the Alarm and Turning the Alarm On/O
Press and release the desired Alarm Button as needed to preview the alarm and to toggle the
alarm ON (indicated by the alarm icon) or OFF (no alarm icon).
Setting and Using the Alarms
Snooze/Display Dimmer
1. To program Snooze, press and hold the Snooze/Display Dimmer Button for2 seconds
during normal operation (when no alarm is sounding).
2. Press the
– or + Buttons to select the desired snooze time (between 01 and 29 minutes).
3. Press the Snooze/Display Dimmer Button to confirm Snooze setting. 2 beeps will sound.
• While the alarm is sounding, press the Snooze/Display Dimmer Button to temporarily
silence the alarm for the set duration (9 minutes is the default). Snooze can be used
several times during the one hour alarm cycle.
• To adjust the brightness of the display, press the Snooze/Display Dimmer Button during
normal operation (when no alarm is sounding) to cycle through the brightness display
settings, including OFF.
This unit allows you to sleep to the current sound source for a set time before turning the unit
o.
1. To set Sleep time, press and release the Sleep Button as needed to cycle to the desired
sleep duration: 120, 90, 60, 30 or 15 minutes or OFF (turns the unit o). The sleep icon will
appear on the display.
2. Press the or Buttons to adjust the sleep volume on the unit. Note that the sleep
volume setting is stored separately from other volume settings.
When Sleep mode is active, press and release the Sleep Button to display remaining sleep
time.
FM Radio
-
Extend the FM antenna for best reception.
1. Press and release the Mode Button as needed until the FM indicator icon and current FM
radio frequency appear on the display.
2. Press the – or + Buttons to tune the radio to the desired station (hold to scan for the next
clear station).
3. Press the
or
Buttons to adjust the volume on the unit.
4.
When you are through listening, press the Power Button to turn the unit o.
Sleep Mode
The unit allows you to store up to 6 FM radio station presets
1. Press and release the Mode Button as needed until the FM indicator icon appears on the
display.
2. Press the – or + Buttons to tune the radio to the desired station (hold to scan).
3. Press and hold the Play/Pause Presets Button to enter Preset setting mode. The display and
button will flash.
4. Press and release the– or + Buttons until the preset number (P1- P6) you wish to set is
displayed.
5. Press and release the Play/Pause Presets Button. 2 beeps will sound to confirm the preset
has been assigned. Repeat steps 2 - 5 until you have set up to 6 preset stations.
6. To listen to a preset FM station at any time, turn on FM radio mode and press the Play/Pause
Presets Button to cycle to the desired preset.
Using FM Radio in Other Countries
By default, this unit is set to USA frequency steps. To use the radio outside the USA:
1.
Make sure unit is OFF.
2. Press and hold the Mode Button for 10 seconds until “USA” appears in the display.
3. Press and release – or + Buttons to cycle to your location: Europe, Japan, Australia, China or
USA.
4. Press and release the Mode Button to exit frequency setting mode. 2 beeps will confirm
setting.
Playing Audio via Bluetooth
1. Press and release the Mode Button as needed until the “BT” indicator icon appears on the
display.
2. Press the
Play/Pause/Presets Button
on the unit to play, pause and resume play of audio
from your linked Bluetooth device.
3. Press the – Button to go to the previous track (or start of current track).
Press the +Button to advance to the next track.
4. Press the or Buttons to adjust the volume on the unit. You may need to adjust the
volume on your device, too.
5. When done listening, press the Power Button to turn the unit o.
NOTE: Bluetooth audio is only available when unit is in Bluetooth mode.
Setting And Using FM Presets
Using the Speakerphone feature
NOTE: The unit must be powered on and linked to a Bluetooth phone to receive a call.
When a call is received, playing music is muted to hear the ring tone and the cabinet flashes
green.
“CALL” will flash on the display. Adjust call volume on your device and/or on the unit as
needed.
Press the Voice Button to answer the call; press the
Play/Pause/Presets Button
to ignore
the call or to end an active call.
Press the Voice Button to answer a second call and place the first on hold (press again to
switch between calls).
Using the Voice Control feature
NOTE: The unit must be powered on and linked to an iOS or Android Bluetooth device to use
Voice Control. Press the Voice Button and wait for beep to activate voice control with Siri
or Google Assistant. “CALL” will flash on the display.
Voice control requires an active internet connection on connected Bluetooth device with iOS 10 and Android 5.0 and later.
When activated, the speaker microphone acts as an extension of the microphone in your smartphone to make/take calls,
enable you to ask Siri®/Google Assistant™ to play music and more.
Connect a USB cable (not included) to the USB port on the back of the unit and connect the
other end to the charging port on your device. It is often best to use the charging cable
supplied with your device.
Charging Devices Via USB Port
NOTE: Unit must be plugged into
working outlet to charge devices.
Color Change Mode
Press and release the Color Mode Button as needed to cycle to the desired color mode light
setting. Indicators on the display show the current light mode for 5 seconds:
SLOW FADE: Gradually f
ades from one color into the next
FAS T: Fades quickly from color to color
1-COLOR:Pauses on the last color shown in Fast Change mode
PULSE: Pulses to the beat of playing music if volume is up
SKY: Matches the color of the sky at the current time of day
LAMP: Changes colors to warm white light for maximum illumination
OFF: Turns cabinet lights OFF
Note: 1 CR2450 battery is included with the unit. Pull battery tab before using the unit.
A battery backup circuit will maintain the time and alarm time settings in the event of a
temporary power interruption (the display is NOT maintained). The battery backup circuit will
also operate the buzzer alarm to wake you up at the selected wake up time even if the power is
out. When the Low Backup Battery Indicator flashes in the display, you should replace the
backup battery as soon as possible.
To install/replace the backup battery:
IMPORTANT: When replacing the backup battery be sure to
have the unit connected to the AC outlet to maintain all of your
settings, otherwise it will be necessary to reset the time and
alarm time after the batteries are replaced.
1. Use a Phillips screwdriver to unscrew the battery door
located on the bottom of the unit. Remove the battery door.
If replacing battery, remove the exhausted battery.
2. Insert 1 fresh CR2450 battery in the backup battery
compartment. Make sure the “+” side of the battery is facing
you (see illustration).
3. Replace the battery door and screw shut. Do not over-tighten. Confirm that the backup
battery indicator is not flashing in the display.
Note: Make sure you dispose of batteries properly (see your local regulations)
Attention should be drawn to the environmental aspects of battery disposal
Do not dispose of batteries in the household trash or fire
Replacing and Installing Clock Backup Battery
iBT297V2-032719-A Printed in China
•
Do not use this apparatus near water
•
Clean only with dry cloth
•
Do not block any ventilation opening
•
Unplug this apparatus during lightning storm or when unused for long periods of time
Warning: To reduce the risk of fire or electric shock, do not expose this appliance to rain or moisture
Damage Requiring Service - This product should be serviced by qualified service personnel when:
- Plug has been damaged.
- objects have fallen into or liquid has been spilled into the enclosure.
- the unit has been exposed to rain.
- the unit has been dropped or the enclosure damaged.
- the unit exhibits a marked change in performance or does not operate normally
CAUTION – Danger of explosion if battery is incorrectly replaced. Replace only with the same or equivalent type
The mains plug of power adaptor is used as the disconnect device, it shall remain readily operable.
IMPORTANT SAFETY INSTRUCTIONS
Please heed all warnings, read and follow all instructions and keep these instructions handy for future reference.
Heat – The unit should be situated away from heat sources such as radiators, heat registers, stoves or other appliances
(including amplifiers) that produce heat.
Only use attachments/accessories specified by the manufacturer. This product is suitable for use in tropical and/or moderate
climates. The unit should be serviced by qualified service personnel when the enclosure damaged or does not operate normally. No
naked flame sources, such as lighted candles, should be placed on the apparatus.
WARNING
Do not ingest the battery, Chemical Burn Hazard. This product contains a coin/button cell battery. If the coin/button cell battery
is swallowed, it can cause severe internal burns in just 2 hours and can lead to death. Keep new and used batteries away from
children. If the battery compartment does not close securely, stop using the product and keep it away from children. If you think
batteries might have been swallowed or placed inside any part of the body, seek immediate medical attention.
iBT297V2
FCC ID: EMOIBT297V2
IC: 986B-IBT297V2
This device complies with Part 15 of the FCC Rules, operation is subject to the following two
conditions: (1) This device may not cause harmful interference, and (2) this device must accept any
interference received, including interference that may cause undesired operation.
FCC INFORMATION
FCC Radiation Exposure Statement
This equipment complies with FCC radiation exposure limits set forth for an uncontrolled environment.
• Warning: Changes or modifications to this unit not expressly approved by the party responsible for compliance could void the
user’s authority to operate the equipment.
• NOTE: This equipment has been tested and found to comply with the limits for a Class B digital device, pursuant to Part 15 of the
FCC Rules.
These limits are designed to provide reasonable protection against harmful interference in a residential installation. This equipment
generates, uses and can radiate radio frequency energy and, if not installed and used in accordance with the instructions, may
cause harmful interference to radio communications. However, there is no guarantee that interference will not occur in a particular
installation. If this equipment does cause harmful interference to radio or television reception, which can be determined by turning
the equipment o and on, the user is encouraged to try to correct the interference by one or more of the following measures:
• Reorient or relocate the receiving antenna.
• Increase the separation between the equipment and receiver.
• Connect the equipment into an outlet on a circuit dierent from that to which the receiver is connected.
• Consult the dealer or an experienced radio/TV technician for help.
CAN ICES-3 (B)/NMB-3(B)
Canada IC statement
This device contains licence-exempt transmitter(s)/receiver(s) that comply with Innovation, Science and Economic Development
Canada’s licence-exempt RSS(s). Operation is subject to the following two conditions:
1. This device may not cause interference.
2. This device must accept any interference, including interference that may cause undesired operation of the device.
L’émetteur/récepteur exempt de licence contenu dans le présent appareil est conforme aux CNR d’Innovation, Sciences et
Développement économique Canada applicables aux appareils radio exempts de licence. L’exploitation est autorisée aux deux
conditions suivantes :
(1) L’appareil ne doit pas produire de brouillage;
(2) L’appareil doit accepter tout brouillage radioélectrique subi, même si le brouillage est susceptible d’en compromettre le
fonctionnement.
For warranty visit:
www.ihome.com/support
Brauchen Sie Hilfe? Stellen Sie Ihre Frage.
Missbrauch melden von Frage und/oder Antwort
Libble nimmt den Missbrauch seiner Dienste sehr ernst. Wir setzen uns dafür ein, derartige Missbrauchsfälle gemäß den Gesetzen Ihres Heimatlandes zu behandeln. Wenn Sie eine Meldung übermitteln, überprüfen wir Ihre Informationen und ergreifen entsprechende Maßnahmen. Wir melden uns nur dann wieder bei Ihnen, wenn wir weitere Einzelheiten wissen müssen oder weitere Informationen für Sie haben.
Art des Missbrauchs:
Forenregeln
Um zu sinnvolle Fragen zu kommen halten Sie sich bitte an folgende Spielregeln:
Lesen Sie zuerst die Anleitung;
Schauen Sie nach, ob die Frage bereits gestellt wurde;
Stellen Sie die Frage so deutlich wie nur einigermaßen möglich;
Erwähnen Sie was Sie bereits versucht haben um das Problem zu lösen;
Ist Ihr Problem von einem Besucher gelöst dann lassen Sie ihn / sie wissen in diesem Forum;
Falls Sie reagieren möchten, so verwenden Sie bitte das Antworten- Formular;
Da ihre Frage für alle Besucher sichtbar ist, sollten Sie lieber keine persönliche Daten erwähnen.
Neu registrieren
Registrieren auf E - Mails für IHome iBT297v2 wenn:
neue Frage gestellt werden
neue Handbücher vorhanden sind
Sie erhalten eine E-Mail, um sich für eine oder beide Optionen anzumelden.
Das Handbuch wird per E-Mail gesendet. Überprüfen Sie ihre E-Mail.
Wenn Sie innerhalb von 15 Minuten keine E-Mail mit dem Handbuch erhalten haben, kann es sein, dass Sie eine falsche E-Mail-Adresse eingegeben haben oder dass Ihr ISP eine maximale Größe eingestellt hat, um E-Mails zu erhalten, die kleiner als die Größe des Handbuchs sind.
Ihre Frage wurde zu diesem Forum hinzugefügt
Möchten Sie eine E-Mail erhalten, wenn neue Antworten und Fragen veröffentlicht werden? Geben Sie bitte Ihre Email-Adresse ein.