Placement of sensor and main unit
• Place the remote sensor so that it faces the main unit (receiver), minimizing obstructions
such as doors, walls and furniture.
• Though the remote sensors are weather
sunlight, rain or snow
the north side of a building with free air circulation.
• The remote sensor can be placed on the flat surface or mounted on the wall in vertical
position by using the included stand. For fixing the stand, use a screw
• Ideally
correct measurement.
•
elements
•
concrete structures, paving, and patios
• The international standard for the valid air temperature measurements is 1.25meters
(4 feet) above the ground
• Make sure that the main unit is locating within the operating range of all remote sensors.
• Ideally the main unit should be placed within line of sight of remote sensors.
placing the main unit where surfaces emitting and radiating heat (e.g. heating ducts or air
conditioners) and areas with interference from wireless devices (e.g. cordless phones,
radio headsets, baby monitoring devices and other electronics).
Important notice about batteries
• The HBR553 is delivered with batteries to make the start-up easy for you.
batteries may not last as long as fully new batteries may
batteries on the outside sensoralkaline batteries. Advantage
this is a better performance in case the outside temperature falls below 0° (32°F). For
optimum performance, we recommend even lithium batteries.
•
power requirements.)
• AL install batteries in the remote sensor before the main unit.
• Insert batteries before first use, matching the polarity in the battery compartment.
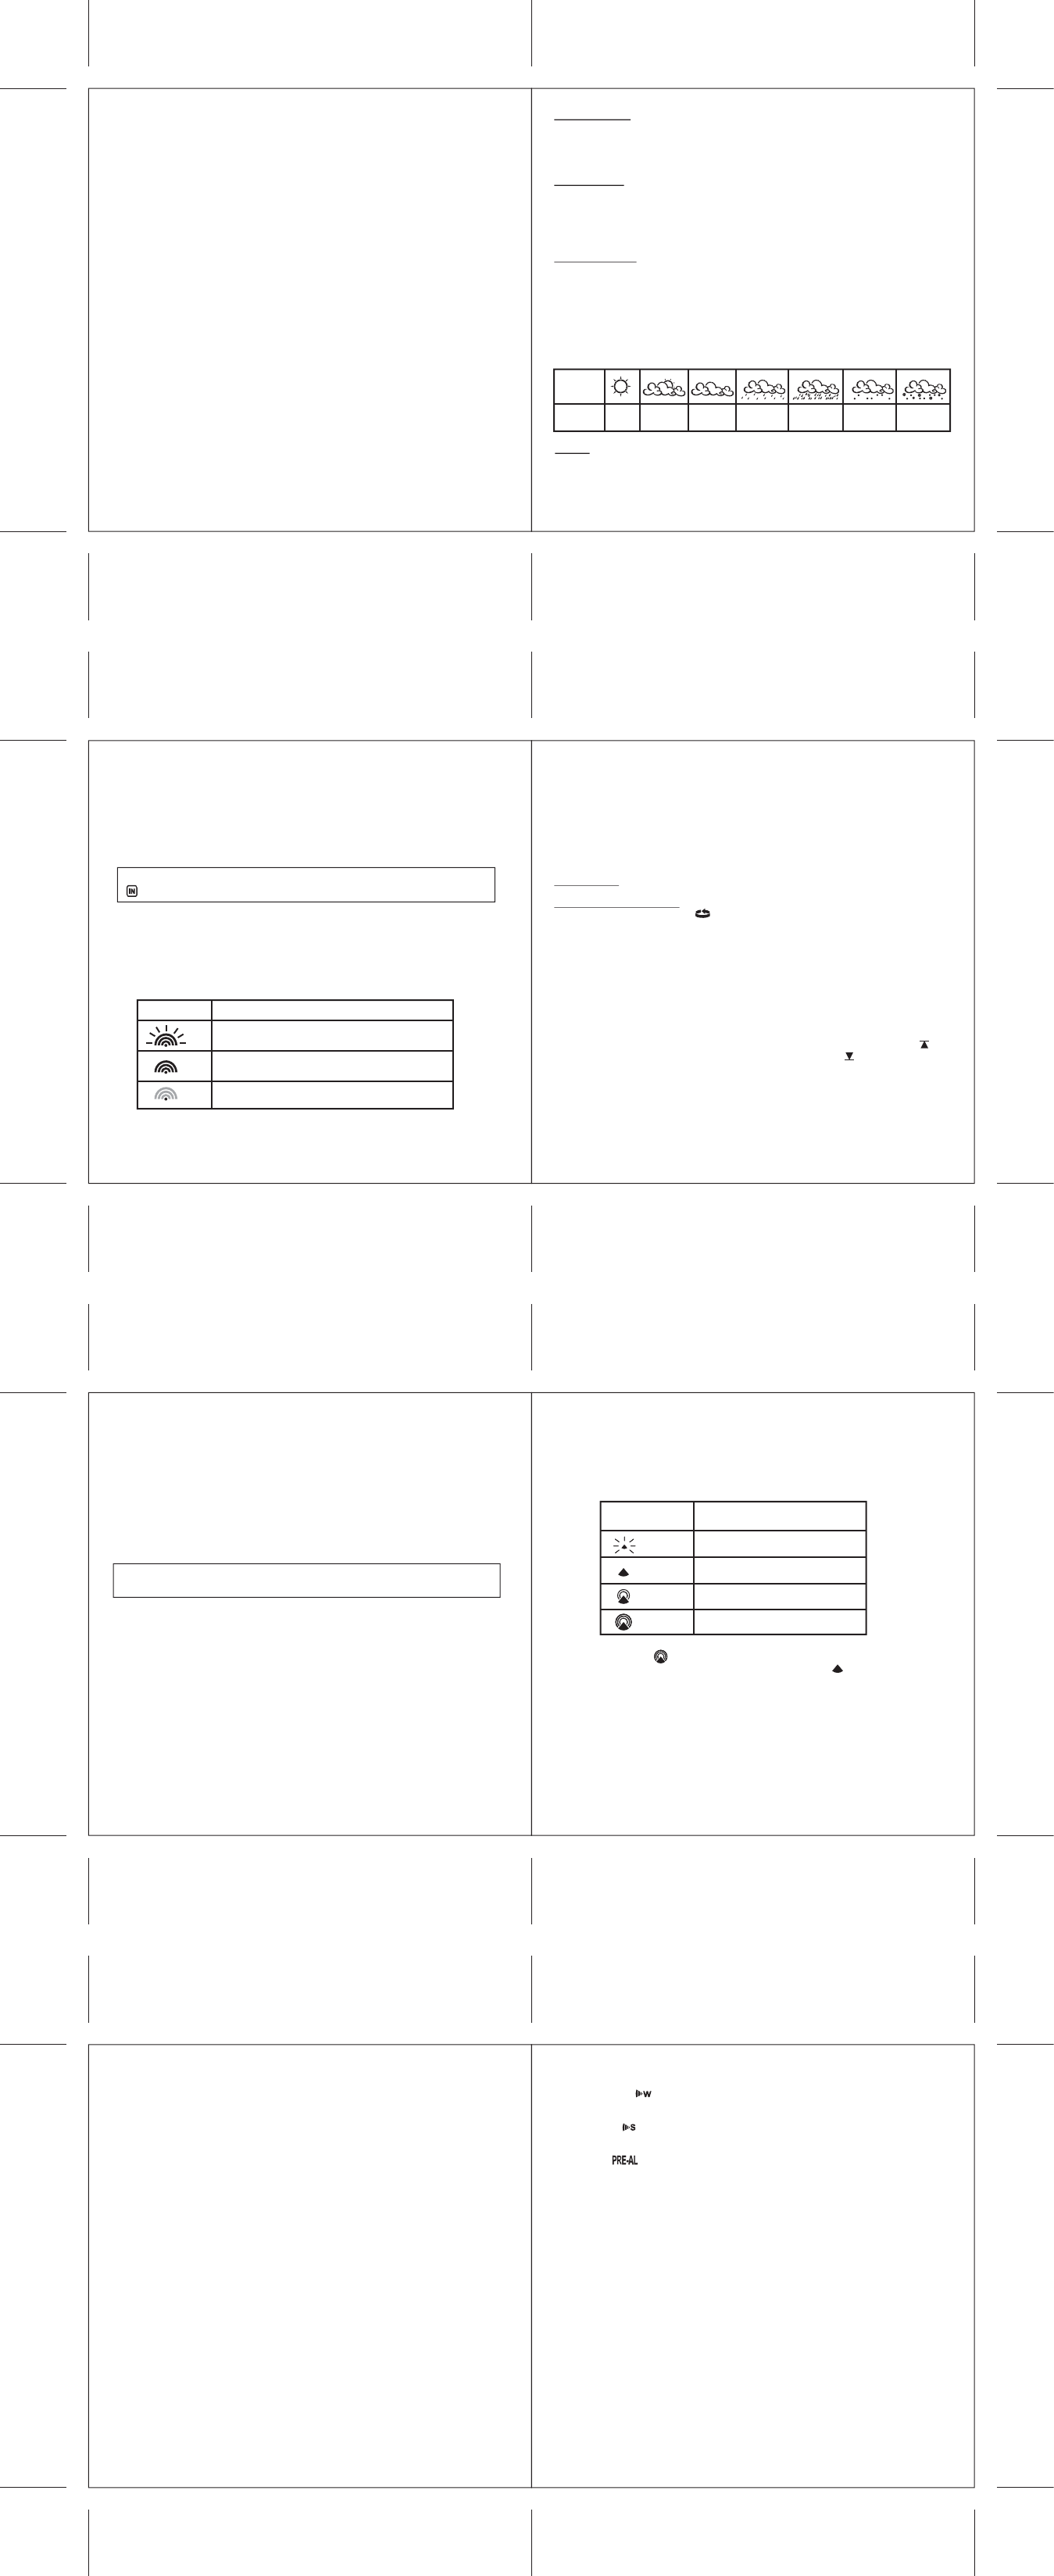
When the
display
shows...
Forecast
is...
Sunny
Partly
Cloudy
Heavy
Rainy
Heavy
Snowy
Cloudy Rainy Snowy
NOTE: The weather
the forecasted (pr
clear weather
4.2 TEMPERA
The main unit supports up to 3 remote sensors, each corresponding to a separate channel
of the temperature display
Celsius (ºC) or Fahrenheit (ºF).
A
once one of the remote temperatures exceeds or falls below the pre-set upper and lower
limits.
OPERA
FORCED SEARCH FOR REMOTE SENSORS
Select the TEMPERA
The main unit can be manually activated to search for the signal from the selected remote
sensor by pressing and holding the DOWN (▼ ) button for 3 seconds.
The wave icon above the current channel icon shows the connection status of the
corresponding remote sensor:
For all operations described in Chapter 4.2, press UP▲ ) or DOWN (▼ ) until the
icon, to the left of the indoor temperature value, begins to flash.
Icon
Status
Searching for the signals from the remote sensor
Corresponding remote sensor signal received
successfully
No signals received for over 1 hour
VIEWING REMOTE (CHANNEL) TEMPERA
Select the TEMPERA
Static Display: Press the CHANNEL button to select measurements from different
remote sensors (channel 1, 2 or 3).
Channel
and hold CHANNEL , until the icon is displayed. The measurements from each
remote channel will be alternately displayed with a 5 seconds viewing.
NOTE: the channel auto-scan feature can be activated only if there are mor
remote sensors operating and are set to different channels.
PROGRAMMING TEMPERA
Select the TEMPERA
Press and hold MODE button for 3 seconds to toggle the temperature unit in Celsius (ºC)
or Fahrenheit (ºF).
TEMPERA
Select the TEMPERA
Press ALARM button selecting the desired alarm, the upper temperature alert with icon
(if disabled, display shows OFF ), or lower temperature alert with icon (if disabled,
display shows OFF ).
Press and hold ALARM button until the temperature digits flashing.
temperature digits using the UP▲ ) or DOWN (▼ ). Press and hold either button for fast
setting. Press the ALARM to confirm selection and return to the temperature alarm
selection screen
ACTIV
Once the above alerts are displayed, press the UP▲ ) to enable or DOWN (▼ ) to disable
the alert.
VIEWING MAX/MIN READINGS
Select the TEMPERA
Press the MEM button to read the minimum temperature of all sensors (indoor and
remote) with the MIN, next MEM press the maximum values with the MAX icon and then
back to the current values.
RESETTING TEMPERA
Select the TEMPERA
Press and hold the MEM button for 3 seconds to clear all max/min memories.
4.3 CLOCK WINDOW
For all operations described in Chapter 4.3, press UP▲) or DOWN (▼ ) until the
TIME icon, in the left corner of the time window
4.3.1 TIME FUNCTION
The radio controlled time signal (DCF 77) is transmitted from the central atomic clock in
Frankfurt/Main. It has a reception range of approx. 1500 km. If the tower icon is not fully
lit, or if the time and date are not set automatically
During night-time hours, atmospheric disturbances are typically less severe and radio
signal reception may improve.
clock accuracy within 1 second.
Make sure the unit is positioned at least 2 meters (8 feet) distance from any interference
source such as a TV
W
signal may be weakened. In such a case, place the main unit near the window for better
reception. Sometimes it also helps to turn the unit by 90°
NOTE: In any of below described settings, the unit will automatically exit any
programming mode if it does not detect a button press for about 2 minutes.
made before this will not be taken over by the unit. Therefore, as long you are in a setting
and you have made changes, close the setting mode as described in below chapters.
ICON Time Signal Reception Str
Undefined data
No Reception for the past 24 hours
W
Strong signal
4. If the radio signal is received, the date & time will be set automatically and the radio
control signal icon [ ] turns on.
5. If the clock fails to receive the time signal, it will show the [ ] icon. If the time is not
correct, you may set the time manually
HOW T
Tnot the ZONE ) and then
press and hold MODE.
Now it will show the language.
French (Fr), Italian (IT), Spanish (SP), Dutch (Du) and Swedish (SW). Press UP▲) or
DOWN (▼ ) to change it.
Press MODE to confirm. Repeat the same procedure to set the year
day-month format, 12/24 hour format, hour and minute. During the setting, press and hold
will change the value rapidly
If there is an item you do not wish to change, simply press MODE to bypass the item.
After the last setting, pressing MODE will exit the setting mode and return to the clock
mode.
HOW T
TZONE icon.
press and hold MODE .
Press UP▲) or DOWN ( ▼) to adjust value in steps of 30 min. Press and hold either
button for fast advance. Press MODE to confirm your selection.
SELECT THE CLOCK/CALENDAR DISPLA
Each time you press MODE , you may rotate from one of the following displays to the
next:
- Hour: Minute: Second
- Hour: Minute: W
- Hour: Minute: W
- Hour: Minute: Second of the T
- Day: Month
ACTIV
1. Press ALARM to rotate between:
- W
- Single
- Pre-Alarm T
2. When the above alarms are displayed, pressing UP▲) will activate, pressing
DOWN (▼ ) will deactivate the corresponding alarm.
Note: Press MODE anytime during above alarm selection mode to return to normal clock
display
4. OPERA
Immediately after batteries are installed, the remote sensor will start transmitting the
temperature data to the main unit in regular intervals.
Once the main unit is powered-up by activating the batteries, the display will show all
available LCD segments for a moment.
IMPORT After this, the unit will scan the remote sensors (Ch 1 to Ch 3) in the
T.
process.
After this, the unit will start to scan the DCF77 time transmitter in the Clock Window .
Thereby
there is no immediate need to press any button during this process.
Recommendation: without touching
ANY for about 6-8 minutes during the main unit initial set up. This will give the
unit time to synchronize with remotes, stabilize pressure readings and settle with default
settings.
4.1 WEA
This unit is capable of detecting the atmospheric pressure changes. Based on collected
weather data, it forecasts the weather for the next 12 to 24 hours.
HOW T
1.
(DCF77 from Germany). It takes about 3-10 minutes to finish this process.
2. If you wish to disable the auto-reception feature, hold UP▲) for 3 seconds to disable
it. Having done that, the tower icon will disappear
3. TUP▲) for 3 seconds again to start the
reception and the regular synchronization (daily at 0:00, 3:00, 6:00 and 12:00).
W
previously logged in. If you replace the batteries in the sensor
code and will then no longer be recognized by the display unit.
problem by:
- removing the batteries from the display unit and replacing them with new ones
or
- if the batteries are still O.K., repeating the logging in procedure as described above by
pressing and holding the▼ button for 3 seconds and while the wave icon is blinking, press
and hold the ▼ button again for 3 seconds. The temperature indicator will start to blink
indicating that a new sensor is being searched for and will be logged in.
4.3.2 W
There are three time alarms available on the main unit:
* W
The alarm sound will be activated and the icon will flash on weekdays (Mo-Fr) when it
is armed and the alarm time is reached.
* Single
The alarm sound will be activated and the icon will flash when it is armed and the alarm
time is reached. Once it finished, it will be disabled automatically
* Pre-Alarm
The pre-alarm will be activated and the icon will flash if the temperature of channel 1 is
falling to +0 ºC or below
It is programmable 15, 30, 45, 60 or 90 minutes earlier than the weekday alarm or single
alarm time.
10
1211
14
16