C
400W F
with Integrat
with
Than
Y
sta
per
inst
the training, ex
per
your
yourself with it
If you have any qu
aspe
Audio d
the JL Audio T
call (954) 443
Installation Applications
This amplifier is designed for opera
ground electrical systems. Using this pr
ground and/or voltages other than 12V ma
product and will void the warranty
approved f
Product Description
This is a four-channel, full-range Class D amplifier equipped with the
second generation of JL Audio
It is engineered to deliver ref
outstanding efficiency and unprecedented, built-in pr
Instead of traditional analog processing contr
VXi amplifiers feature an int
amplifier and its integrated DSP ar
(PC,
installed. (See What is TüN? section for mor
Planning Y
It is impor
and that you plan your installation car
expensive vehicle syst
have found appr
or without analyzing with proper test equipment. If you ar
or unfamiliar with reading diagrams or testing methods
services of your authorized JL Audio dealer to perform the installation.
Y
equi
The
following are some c
planning your installation.
Safety Considera
•
does not interfere with your vehicle
(air bags, seat belt systems
•
compartment or in any areas of extreme heat.
•
loose in the event of a collision/sudden jolt or as a result
of repeated vibrations during normal operation.
•
a fuel tank, gas/brake line, wiring harness, or other vital system.
•
vehicle/vessel.
which can result in severe damage/injury
•
connections to the vehicle
•
tying them down and using grommets and loom where appr
•
to protect them from moving parts and sharp edges.
Cooling Efficiency Consider
The outer shell of your JL A
from the amplifier circuitry
shell should be exposed to as large a volume of air as possible
the amplifier in a small, poorly ventilated chamber can lead t
heat build-up and degraded performance. If an installation calls for an
enclosure around the amplifier
ventilated with the aid of a fan. In normal applications, fan-cooling is not
necessary. If mounting the amplifier under a seat, make sure ther
least 1 inch (2.5 cm) of space above the amplifier’
proper cooling.
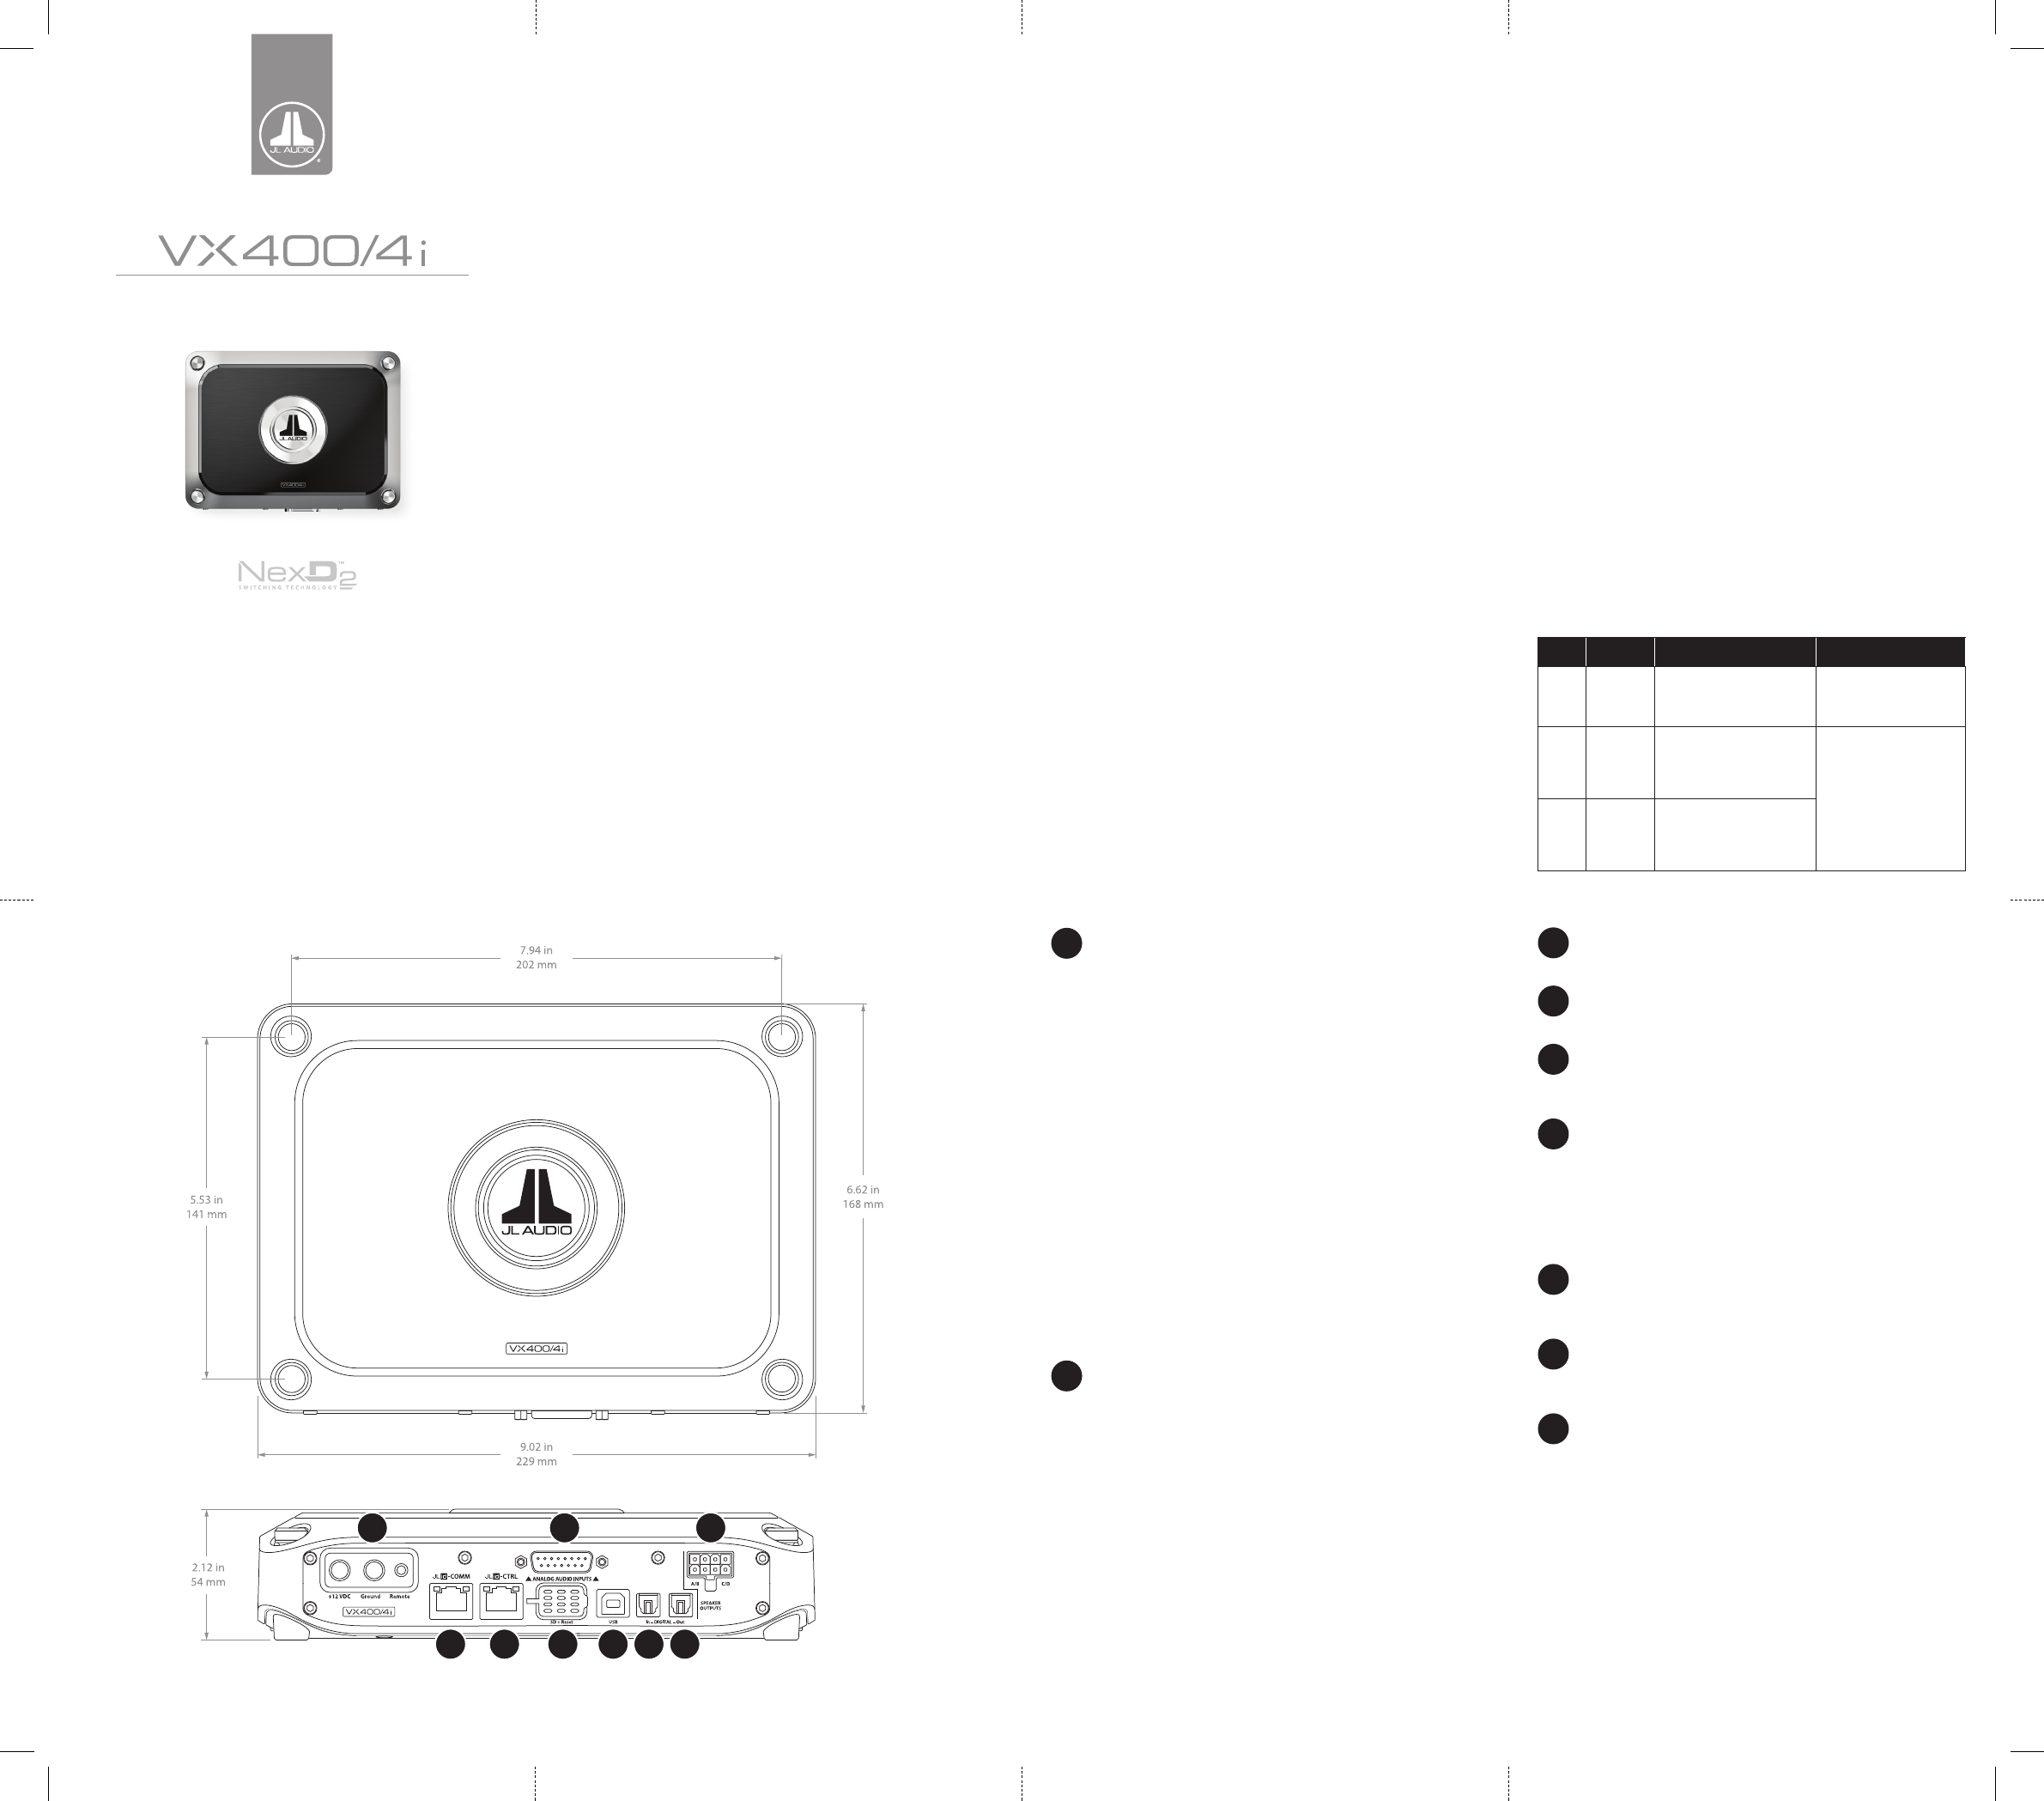
What is Included
(1) Amplifier (1) Pow
(1) Analog Input/Pre-Out Harness (1) Speaker Output Harness
(1) JL Audio Badge (4) Corner Caps
(1) USB A/B Cable (6 ft./1.8 m) (1) Corner Cap
(2) Black Hex Cap Machine Screws (1) 2.5 mm Hex
(2) (1) 3 mm Hex
(1) Connection Guide
JL Audio Badge
T
includes a recessed key fea
increments on the amplifier’
and press the badge at the desired orientation.
Corner Cap Installa
The corner caps are designed to c
and hardware
hole.
included, plastic corner cap tool and lift below each cap
Making Connections
VXi amplifiers utilize removable plugs and harnesses to make the
following connections:
• Po C
T
back out the set screws on the connector using the supplied hex
wrenches. Strip back 3/8 inch (10 mm) of insulation fr
wire and insert the bare wire into the rec
plug, seating it firmly so that no bare wir
wire in place, tigh
head of the screw
amplifier’
• Analog Input/Pre-Out Harness
This harness includes connections for Signal Input (RCA plugs), Preamp
Outputs (RCA plugs), Remote
(wire lead). Select either the included black hex cap machine screws or
the silver thumbscrews t
the amplifier
•
This harness includes output wire leads to connect with speaker cables.
T
VXi amplifiers can be switched on and off using one of three methods,
configured by the
Refer to the table below f
suited for your specific sy
Setting Mode Function Connection
Remote
Conventional
(Preferr
T
source unit.
Connect your source unit’s
+12V remote turn-on output to
the Pow’s Remote
T
DC
Offset
DC Offset
Sensing
(Auto)
Automatically turns on by
detecting the presence of small
DC signal in OEM audio outputs
and turns off (within 5 minutes)
after the signal is removed.
This circuit senses the Analog
Input 1 only. Note:
of this circuit is designed for
high-level (speaker level) signals,
not for low-level (pr
signals. Make sure the OEM
audio outputs contain midrange
signals.
Signal
Signal
Sensing
(Auto)
Automatically turns on by detecting
full-range OEM audio signals and
turns off (within 5 minutes) after
the signal is removed (varies
depending on input signal levels).
3
Speaker Output Harness
Connect the speaker output leads to the corresponding speaker wires
4
JLid-COMM
Connect optional accessories (
5
JLid-CTRL
Conne
to this p
6
SD + Reset
Lift the dust cover to access the f
Reset Buttons: Use a small pin to perform the following:
Reboot Amp - Press and r
Factory Reset (wipe memor - Press and hold the left
button for 7 seconds
Micro SD Slot: F
7
USB
This USB A
and tun
8
D
T
(S/PDIF) d
9
D
Provid
RF interference or
is a pass-
intend
digit
may conf
control functionalit
1
Po
The VX400/4i’
accept 4 A
recommended. 4 A
A. Run copper wire from the positiv-
er mounting location. If additional amplifiers are being installed, run
the appropriate gauge copper wir-
rent draw
B. An appropriate fuse (sold separately) at the main po
vital for vehicle saf
(45 cm) of the battery post connection. I-
nected to this main wire, use a 40 A fuse
the power wire has been secur
C. The ground connection should be made to a clean, solid metal
grounding point using copper wir
The metal surface of the grounding point should be sanded to create
a clean, metal-to-metal connection. For optimal grounding
recommend using a JL Audio ECS mastAll
ground connections (source unit and amplifiers) should be made
at the same location.
D. The remote connection should be made to the source unit’
(+12V
dedicated remote turn-on output, consider one of the alternative
turn-on options. (See T section for more info
2
Analog Input/Pre-O
The Analog Input Harness accepts the following c
Line-Level Analog Inputs: Four f
balanced input section, providing a high degree of input flexibility
retaining superior noise rejection.
allows the
VRMS, without using a line-
Preamp Outputs:
outputs (Max 4 V RMS) tha
equipment.
™
Software Inter
Remote:
(475 mA limit) to activate other aftermarket equipment (similar to an
aftermarket head unit
V When connected to negativ
V
removedusing the TüN
™
Software Inter
will override any DRC contr
1 2 3
4 5 6 8
7
9