27OPERATION
4.14 RINGS
Press the SHM/RINGS key to set rings on/off.
4.15 SHM
Momentarily disables the Ship’s Heading Flash while SHM/RINGS key is held
depressed.
4.16 POSITION
This allows selection of latitude/longitude (LL), time difference (TD) position
or off displays. In addition you may display waypoint (WPT) as a LL position
in place of your own position data. To use POSITION, it is necessary to connect
with the equipment of the outside of NAV-AID, COMPASS. (Refer to 3.6.2)
Moreover, it isn’t possible to go if not setting BEARING to “T”. (Refer to
4.18).
4.17 WAYPOINT
When the waypoint mode is turned on, and the radar is connected to a LORAN
or GPS with the necessary data output, a waypoint symbol appears on the radar
screen. Numeric data, showing the waypoint’s bearing, range, and time-to-go
appears is surrounded by the frame to the lower right corner of the screen and it
displays.
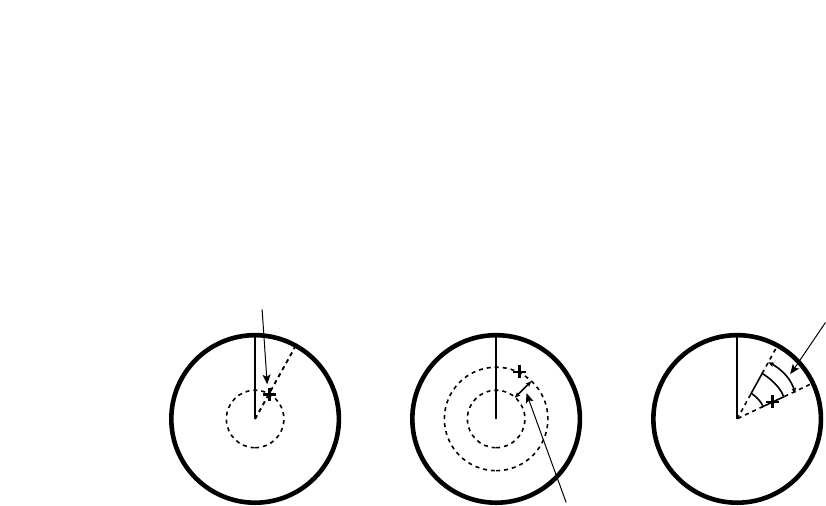
To activate the memorized alarm zone, just press and hold the GUARD key
until the display beeps. Your memorized zone will reappear. The zone will
be displayed as an IN mode alarm. If you want to change to an OUT mode
alarm, press the GUARD key.
START POINT
GUARD ZONE WIDTH
BEARING LIMITS
27OPERATION
4.14 RINGS
Press the SHM/RINGS key to set rings on/off.
4.15 SHM
Momentarily disables the Ship’s Heading Flash while SHM/RINGS key is held
depressed.
4.16 POSITION
This allows selection of latitude/longitude (LL), time difference (TD) position
or off displays. In addition you may display waypoint (WPT) as a LL position
in place of your own position data. To use POSITION, it is necessary to connect
with the equipment of the outside of NAV-AID, COMPASS. (Refer to 3.6.2)
Moreover, it isn’t possible to go if not setting BEARING to “T”. (Refer to
4.18).
4.17 WAYPOINT
When the waypoint mode is turned on, and the radar is connected to a LORAN
or GPS with the necessary data output, a waypoint symbol appears on the radar
screen. Numeric data, showing the waypoint’s bearing, range, and time-to-go
appears is surrounded by the frame to the lower right corner of the screen and it
displays.
To activate the memorized alarm zone, just press and hold the GUARD key
until the display beeps. Your memorized zone will reappear. The zone will
be displayed as an IN mode alarm. If you want to change to an OUT mode
alarm, press the GUARD key.
START POINT
GUARD ZONE WIDTH
BEARING LIMITS