SPEAKER INSTALLATION(for New Construction, skip to step #3)
1. Cut the appropriate size opening in the wall or ceiling using
the template provided. If the template is not available, cutout
dimensions are provided on the Klipsch website,
www.klipsch.com. Sizes listed are minimum. If accuracy of cut
cannot be achieved, you may add 1/4" to each dimension. Be
careful not to cut through any existing wiring or plumbing.
Avoid compromising any fire stops between studs.
2. Run speaker wiring (18 gauge minimum) to the openings. Be
sure to comply with all building codes in your area.
3. Attach the wire to the speaker using the wire’s color coding or
markings as a guide to maintain proper polarity.
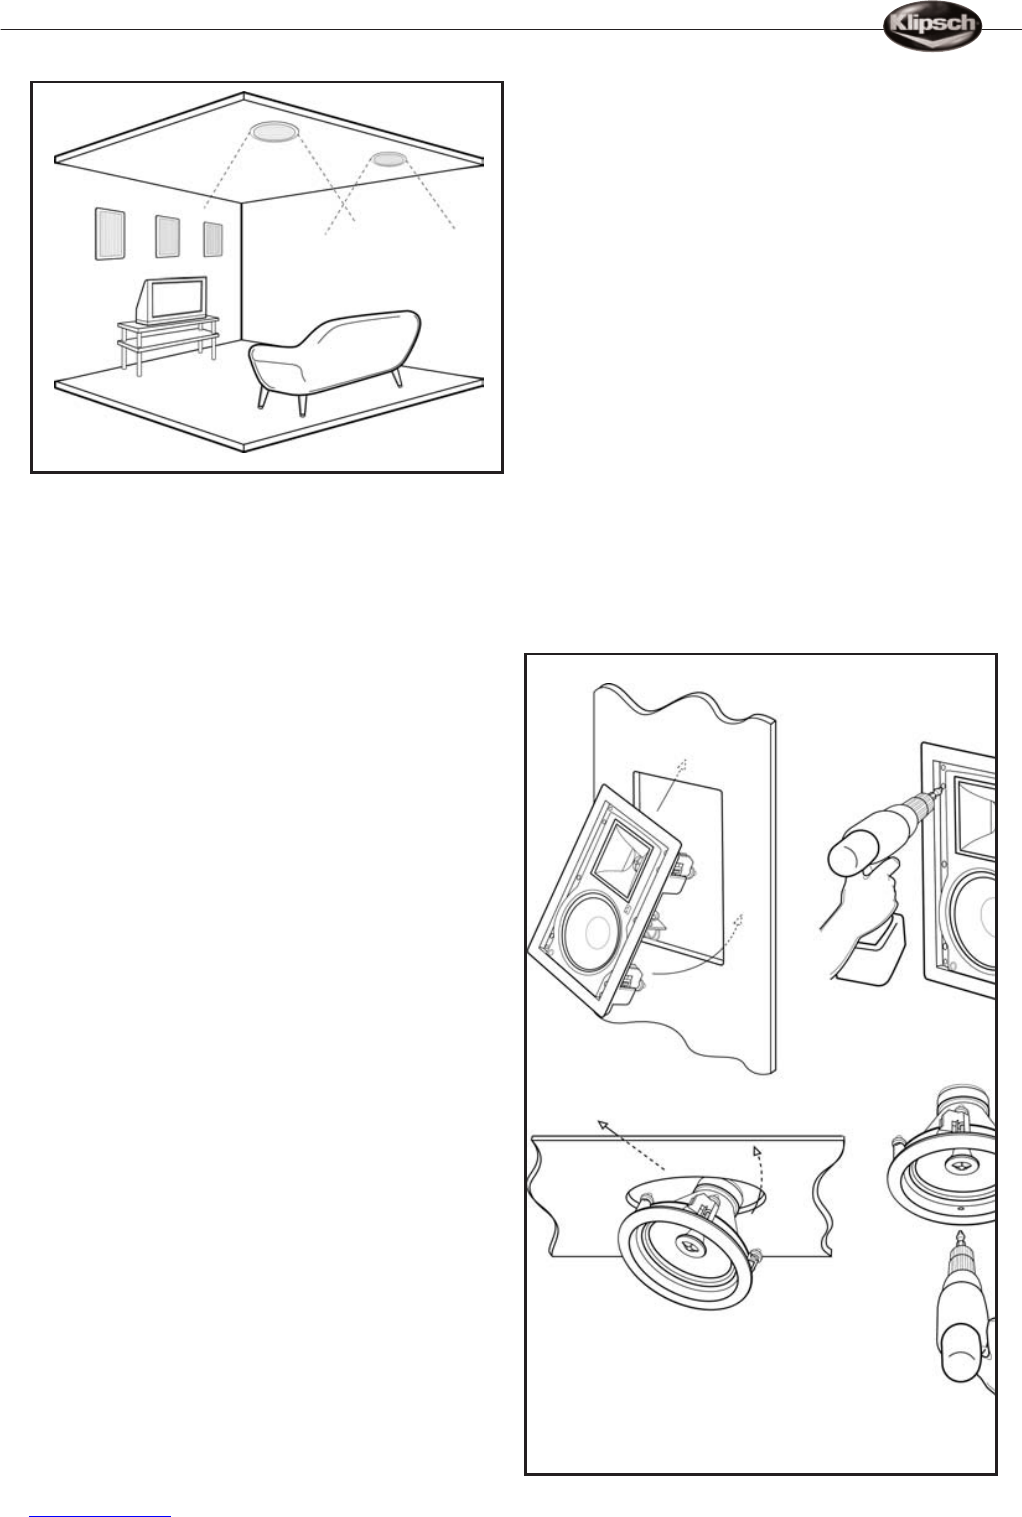
4. Insert the speaker assembly into the opening and attach by
tightening the four Phillips screws (figure 3). The frame’s
“dog” legs will swivel out and “sandwich” the wall and frame
together. (Klipsch new construction brackets make this simple
if used prior to drywall installation.)
5. At this point, you may paint the speaker grilles before
inserting them into the speakers. Klipsch grilles are designed
to accept most types of paint. You may wish to remove the
scrim material before painting. It may be reinserted after the
paint is dry. Care should be taken to avoid excessive paint
build-up in the grille perforations.
6. Press the grille into place.
See back page for more illustrations.
OPERATING CONTROLS
Mid-Bass and Tweeter Attenuator Switch
(3000 and 5000 Series)
Some models feature a Tweeter switch (3000 series) or both a
Mid-Bass and a
Tweeter switch (5000 series) located on the
front baffle. The switch allows a setting of either 0dB (normal) or
–3dB in the respective frequency range. If installing in an
acoustically bright room, such as a bathroom or kitchen, you
may want to adjust the Tweeter level switch. If the speaker is
located in a corner and produces too much bass, you may need
to adjust the Mid-Bass level switch. The position of the switch
should always be checked prior to attaching the grille.
Pivoting Horn (In-Wall Models)
The 3000 and 5000 series fea
ture a pivoting horn that allows
the horn to be toed-in. Before the grille is installed, carefully aim
the horn toward the listening area.
Swiveling Horn Tweeter (In-Ceiling Models)
Klipsch Reference in-ceiling models (3000 and 5000 Series)
fea
ture a swiveling tweeter to aim the high frequencies. To aim
sound directly at the listening area, gently adjust the horn to the
desired angle before the grille is installed.
Do not attempt to turn the tweeter stem while adjusting the
swivel tweeter
.
Infrared Sensor Mount (In-Wall Models)
The 2000,
3000 and 5000 Series in-wall speakers feature a
1/2’’ infrared sensor locator on the baffle.
WARRANTY–U.S. AND CANADA ONLY
Klipsch warrants to the original retail purchaser that this product
is to be free from defective ma
terials and workmanship for the
life of the product, if it is properly used and maintained. If this
product proves defective in either material or workmanship,
Klipsch, at its option, will (a) repair the product, or (b) replace the
Figure 2
Figure 3