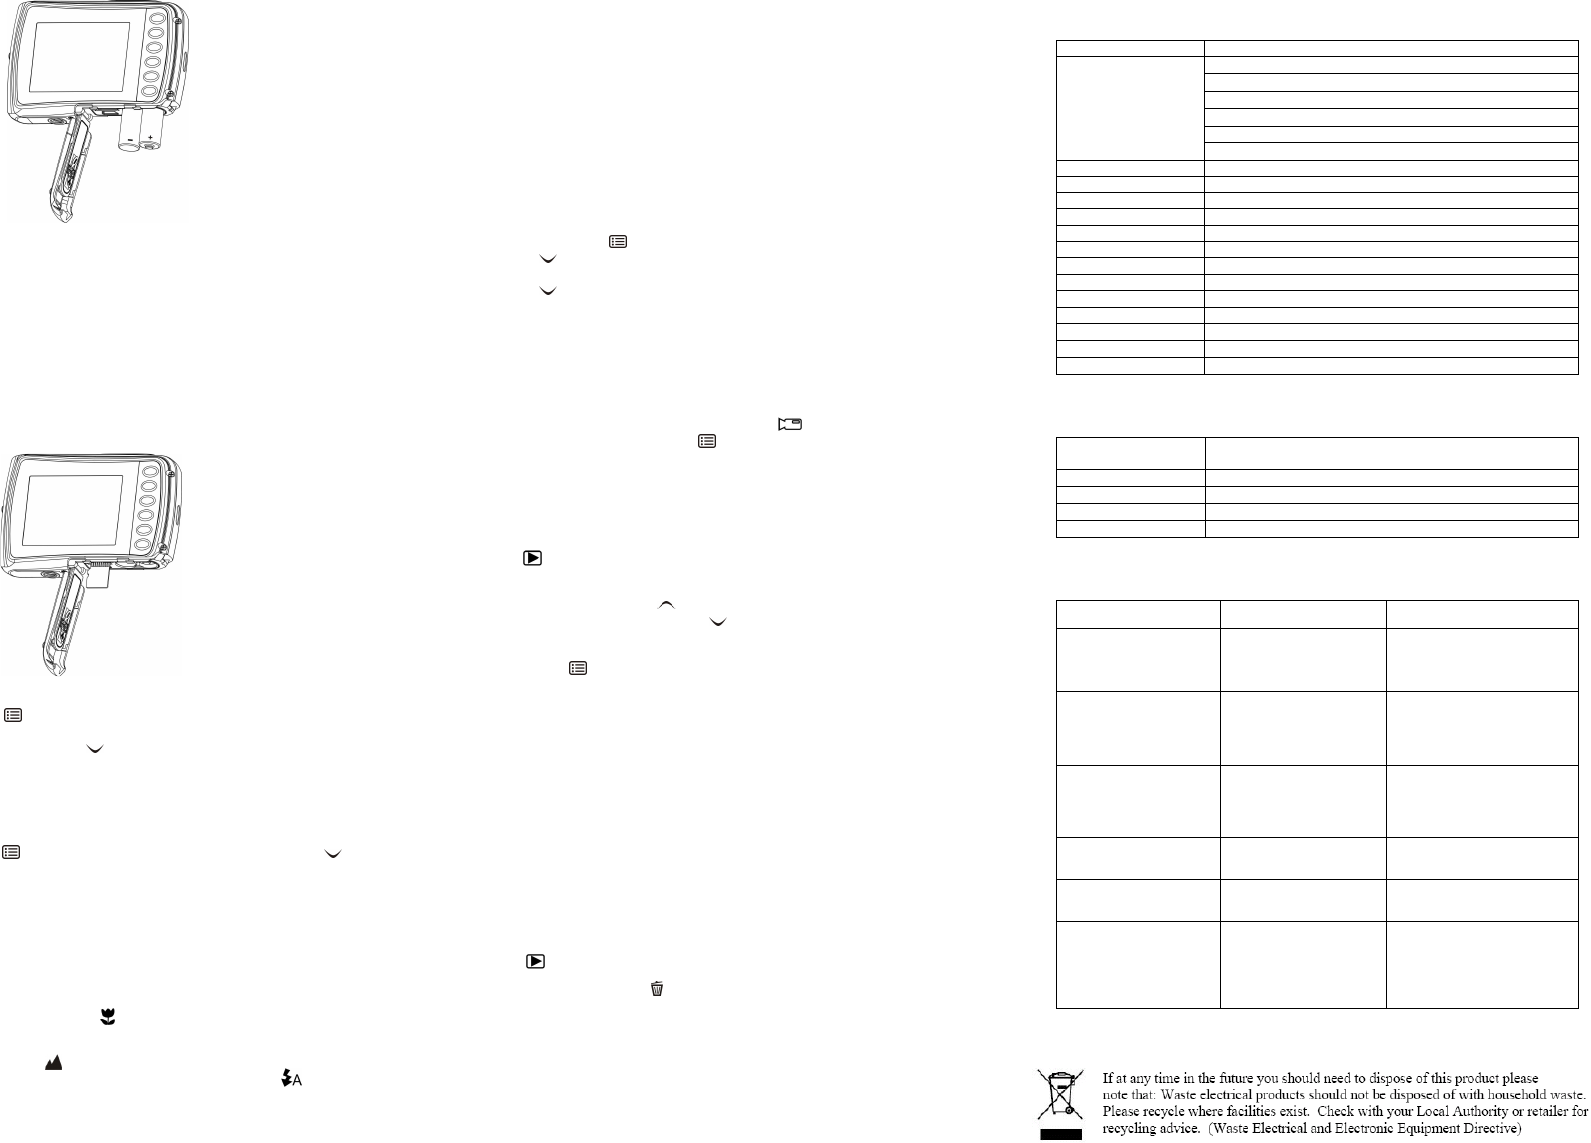
5.2 Inserting a memory
This memory can be extended wi
Follow the instructions below to i
1. Turn off th
2. Open
3. Insert th
Note: There is only one right di
force the
memory card.
Note: The micro SD memory card m
following sections for more i
5.3 Formatting the micro SD card
1. Press the ) in PHOTO or VIDEO mode.
2. Select th
3. Select thW ( ) button and press the SHUTTER butt
confirm.
4. Select SD card and confirm with the SHUTTER b
5.4 Setting the resolution
The camera can be set to differe
1. Press the ) in PHOTO mode, select tW ( ) key and
press the SHUTTER to confirm.
Resolutions: VGA (640 x 480), 1.3M (1
5M (2560 x 1920), 8M (3264
2. Six differen
down buttons and press the SHUTTER
5.5 Taking photographs
1. Turn on
2. Depen
the distance. Select the flower symbol ) if you wish to take a close-
(11cm –18 cm).
If you wish
macro switch to normal mode ( ).
3. If you a ) by pressi
flash button. (If the battery power i
4. Use the
Face detection function wi
5. Press SHUTTER button and wait until
6. If ‘SMILE’ d
detected
Caution: 1) Taking picture for fast-movi
2) Image may be distorted w
5.6 Zoom in and out
The camera can zoom in up to 8 ti
Zoom in or out by pressing the
maximum zoom ratio.
5.7 Self-timer setting
You can use the self-ti
photograph without flash of a
1. Set th
2. Press the ). The menu will
3. Press theW ( ) bu
button.
4. Press theW ( ) bu
5. Press the
6. Aim at the
7. Press the
8. Th
beep during the delay ti
5.8 Recording video clips
1. Press the ).
2. For setting ) button and sel
SHUTTER button to confirm. T
VGA (640 x 480), QVGA ( 320
3. Press
recording. The video cli
5.9 Playback photographs
1. Press the ) button to get i
2. The last picture or video clip taken will be di
through the pictures or vi
3. In full screen display, press the T ( ) button to
4. To view images in thumbnail, press the W ( ) button.
5. To shift the
up/down/left/right buttons.
6. Press the ) butto
menu options displayed. Sel
the SHUTTER button to confirm. The p
will be displayed in sequence automati
again.
5.10 Playback video clips
1. W
press the SHUTTER button agai
2. Press right button to fast forward or press l
3. Press the
4. Press the
5.11 Delete photographs and video clips
You can delete a single photograp
memory.
Follow the instructions below to del
1. Press the ) button to e
2. Press left or right button to select photograp
3. Press the and sel
4. Press the
5. Press the
NOTE: Select “All” and Press t
deleted.
6. Connecting to a PC
The unit can be connected to t
for storage.
7. Specifications
12.0 Mega pixels: (4032x3024)
8.0 Mega pixels: (3264x2448)
5.0 Mega pixels: (2560x1920)
3.0 Mega pixels: (2048x1536)
1.3 Mega pixels: (1280x960)
Image resolution
VGA: (640x480)
Digital zoom 8
Flash strobe B
External memory card Supports SD cards up to 8GB
Picture: JPEG, Video: AVI
PC interface US
Power source 2xAAA alkaline batteries
8. S
Operating system
Windows XP / Vista or above
Mac 9.x or X.x
9. Troubleshooting
Problem Cause Solution
Cannot turn on the
camera
Low battery power.
Battery placed at wrong
polarities.
Replace or install
correctly.
Photos can not be saved
when taking pictures.
The memory built-i
memory hasn’t been
formatted properly.
Format the memory in setup
mode of the camera. Please
refer to section 5.3.
Cannot find removable
disk after connecting the
camera to the computer.
Connection failure. Make s
connections are secured and
restart the computer if
necessary.
Flash does not work. Battery power is too low. Replace with new 2xAAA
alkaline batteries.
The batteries used up
very fast.
Incorrect or old, used up,
battery
Replace with new 2xAAA
alkaline batteries.
The photos are blurry 1. The camera is not held
steadily
2. The lens of camera is
dirty.
1. Hold the camera steadil
until it beeps when taking
video photo.
2. Clean the lens with soft dry
cloth.
List of accessories:
Camera 1x User manual 1x Handstrap 1x USB cable 1x Pouch 1x