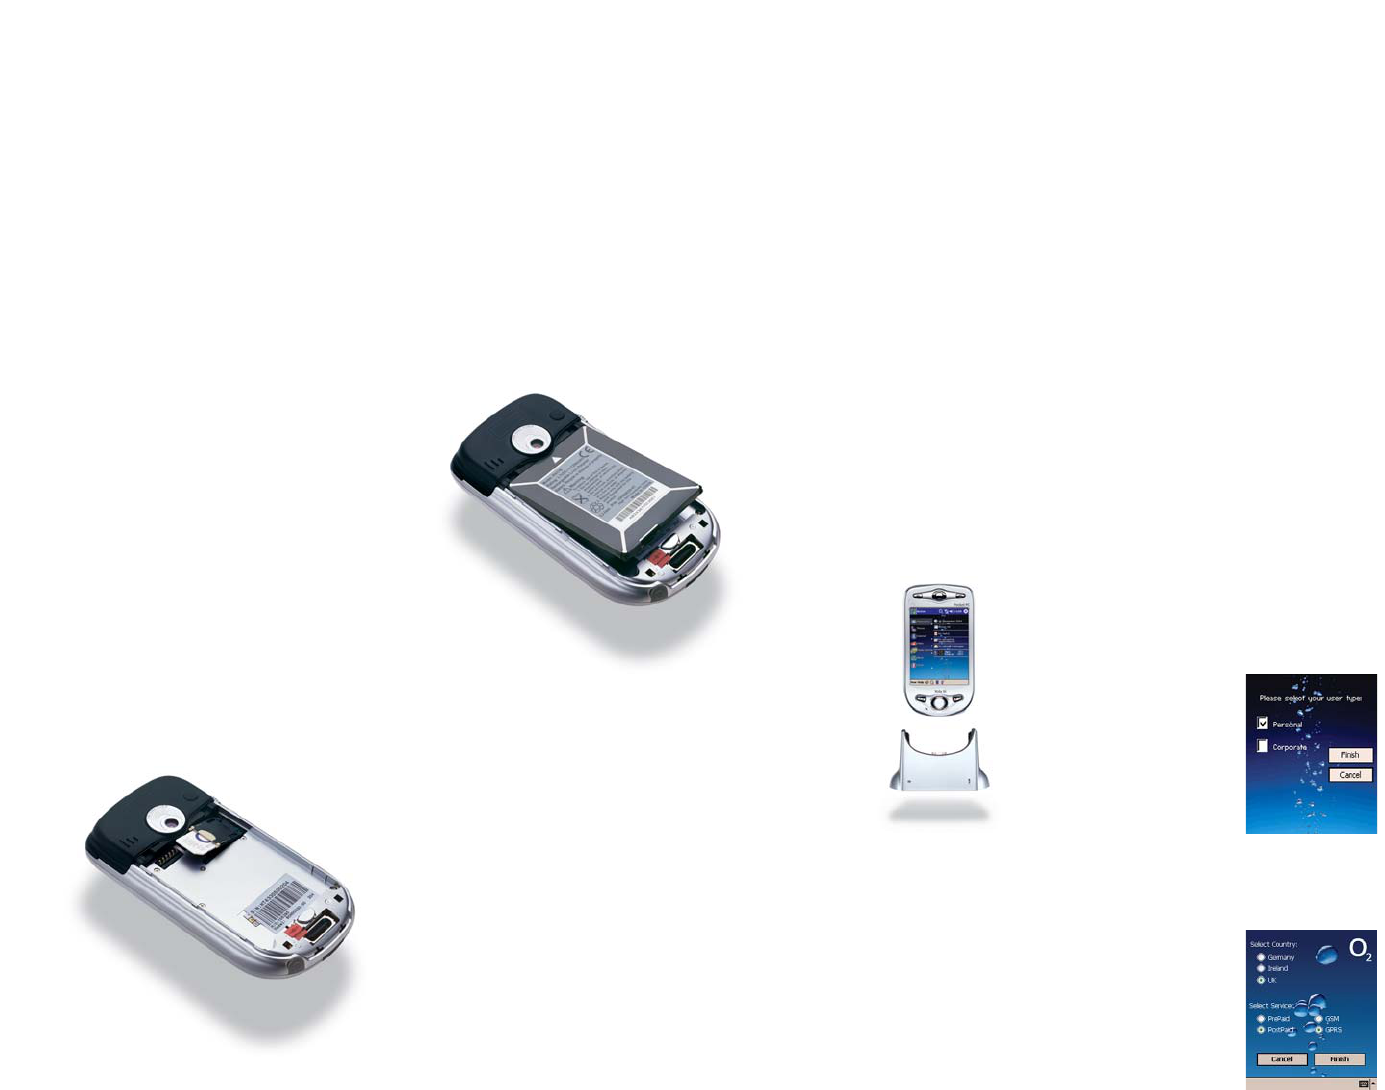
1. Insert your SIM card
• Remove the rear cover by pressing the
button near the bottom of the Xda IIi
and pulling the cover downwards
• Open the SIM reader by pushing the
beige tab to the right
•Insert the SIM into the SIM reader door
so that the gold contacts face down.
Ensure that the SIM is inserted with
the angled corner to the lower left
hand side
Close the SIM reader door and lock it by
sliding the tab to the left.
Please note
Do not force any of the SIM reader
components, as this may cause damage. If
the SIM is inserted correctly, little physical
force will be required.
2. Insert the battery, fit the
rear cover
• Carefully insert the battery correctly so
that the gold contacts meet
• Lock the battery into place by sliding
the red catch into place
• Replace the rear cover
3. Fully charge the battery
The battery must be fully charged before
you use your Xda IIi for the first time.
•To charge the battery, insert the AC
adaptor into the back of the cradle and
connect to an external power source.
Then place your Xda IIi in the cradle
• An amber light indicates charging and
green light fully charged. Wait until
your Xda IIi is fully charged. This will
take approximately 3 hours
•A spare battery can also be charged in
the cradle separately from your Xda IIi
Please note
• Remembering to charge your battery is
extremely important as in the event
that all power is lost all your data and
any new programs you have installed
will be erased. Only the default
programs installed when you bought
the device will remain
• Using your Xda IIi whilst charging will
significantly increase charging time
4. Turn on, first time setup
• Switch on your Xda IIi by pressing the
power button
•You will be presented with a welcome
screen which will prompt you to Tap the
screen to setup your Pocket PC. Do this
and follow the on-screen instructions
•You will be presented with a screen that
allows you to choose from Personal or
Corporate setup
Personal setup gives you the fully featured
Xda IIi experience including the O
2
Active
TM
menu. Corporate setup gives you Xda IIi
without the O
2
Active menu, allowing you
to customise connection settings for your
business – you should talk to your IT
Manager before choosing this option.
Next you can choose the connection
settings to use in your Xda IIi.
• Simply tap Finish to
complete your
setup. Please ensure
that you choose the
correct country,
otherwise your
Xda IIi will not
work properly
Get started