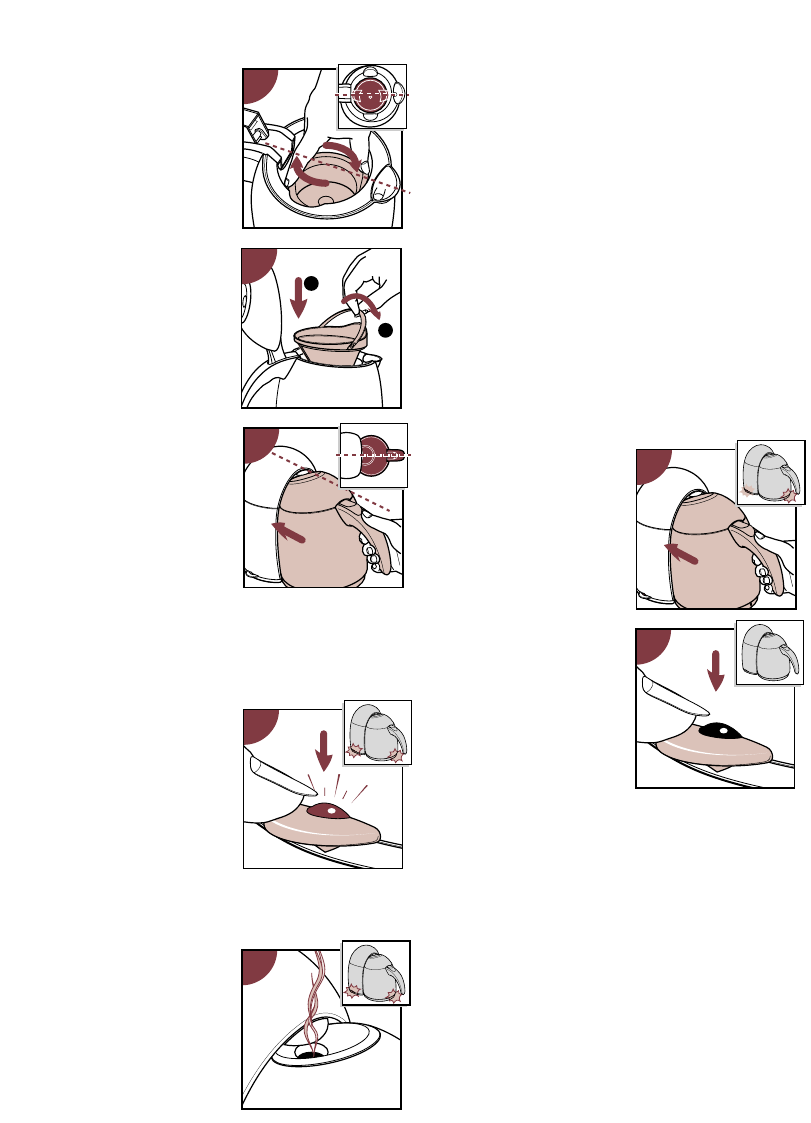
- (Fig. 10.) Place the
Thermo lid on the jug
and screw it until tight.
(Please note: the
Thermo lid must reach
the illustrated position
exactly.)
- (Fig. 11.) Position the
filter holder on top of
the Thermo lid. (See
the illustration for
correct positioning.
Please note the
position of the handle.)
Then close the lid of
the jug.
- (Fig. 12.) Position the
jug.
Slide the jug fully
against the coffeemaker
to ensure correct
electrical connection.
Note the correct
position: only then the
hot water can stream
into the water inlet
opening of the jug.
- (Fig. 13.) Switch the
applliance on by
pressing the on/off
switch downwards. The
two pilot lights (at the
on/off switch and on
the jug) will come on
and the brewing
process will begin.
Coffee is ready
- (Fig. 14.) After some
time hot water will
stop flowing into the
jug. Then some steam
will come from the
appliance.
At this stage the
appliance is ready
making coffee.
To keep the coffee hot, the jug remains
switched on. The two pilot lights (at the on/off
switch and on the jug) stay on.
- When the steaming stops, you can remove the
jug.
Your coffee is now ready to be poured.
• Prevent splashing and spillage. Move the jug
gently. Do not turn it over more than required
for pouring (just a little further than horizontal is
quite enough).
• You can pour out coffee without removing the
filter holder from the jug.
• Or, if you prefer, the filter can be easily removed
using the handle.
However, the Thermo lid must remain in place
whilst doing so.
-
(Fig. 15.) Since the jug is
partly insulated, the
coffee will not cool down
rapidly.
However, to keep the
coffee nice and hot for a
longer period of time,
place the jug back on
to the coffeemaker.
The pilot light on the
jug will come on again,
to indicate that the
integrated hotplate is
on.
-
(Fig. 16.)
If you do not
wish to keep coffee hot
any longer,
switch off by
pressing the on/off
switch.
The two pilot lights (at the on/off switch and on the
jug) will go out.
Making more coffee straight away?
If you have finished making coffee and wish to
make more straight away, first switch off by
pressing the on/off switch (fig. 16).
The two pilot lights (at the on/off switch and on
the jug) will go out.
Allow the appliance to cool down for about three
minutes.
After that you can refill the water tank.
6