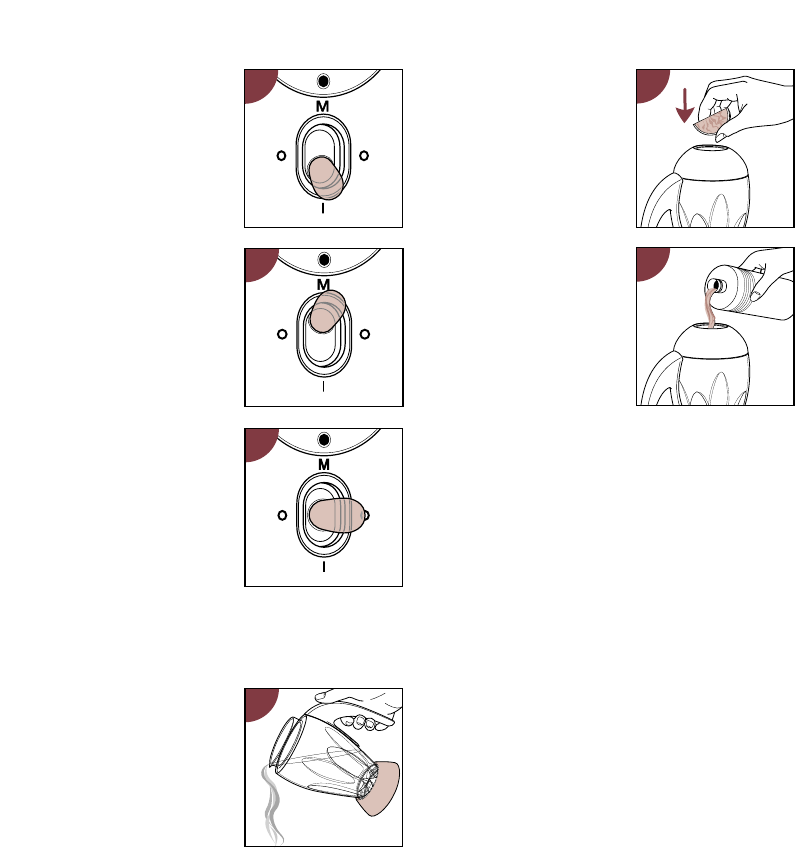
- Switch the appliance
on by flipping the
on/off switch to I
(fig. 9).
• If you are not sure
which speed to use,
you can always choose
the highest speed
(i.e. the largest dot).
If necessary, you can
switch to a lower
speed during
processing.
- If you want to run the
appliance only briefly,
move the switch to
pulse position M and
let go of it (fig. 10).
- To switch the
appliance off, move the
switch to position O
(fig. 11).
After use
Note: If you want to
pour out the contents of
the jar, lift the glass jar,
with the knife unit still
attached to it, off the
motor unit (fig. 12)!
Never detach the jar
from the knife unit when
it is filled. If you were to do so, the contents would
flow out at the bottom.
Tips
• The filling hole in the lid
can be used to add
ingredients while the
blender is running
(figs. 13a and 13b).
• You tend to get finer
results if you allow the
blender to run a little
longer (max. 3 minutes).
Dry ingredients should
not be processed for
more than 1 minute.
• Cut meat and other
solid ingredients into
pieces before putting
them in the jar.
• If you want to process solid ingredients, put
them in the jar in small portions.
• If the appliance runs too slowly, switch it off and
- set the on/off switch to pulse position M a few
times, or
- stir the ingredients with a spatula
(when the appliance is switched off!), or
- pour some of the contents out of the jar.
• To crush ice cubes: drop the ice cubes via the
filling hole onto the rotating knife.
• For tomato juice: quarter the tomatoes and drop
the tomato quarts via the filling hole onto the
rotating knife.
Cleaning
• Do not clean the appliance, the knife unit, the
glass jar and the other parts in a dishwasher.
• Cleaning is easiest when done immediately after
use.
- Assemble the knife unit and the jar onto the
motor unit in the manner described under
“Assembly”.
- Pour lukewarm water and some washing-up
liquid into the blender jar.
- Run the appliance briefly.
- Unplug the appliance.
- Disassemble the blender jar with the knife unit
still attached and rinse it with clean water.
- Disassemble the knife unit from the jar and rinse
it under the tap. Be careful: the knife edges are
very sharp!
- The motor unit can be cleaned with a moist
cloth. Do not use abrasives, scourers, alcohol
etc.
4