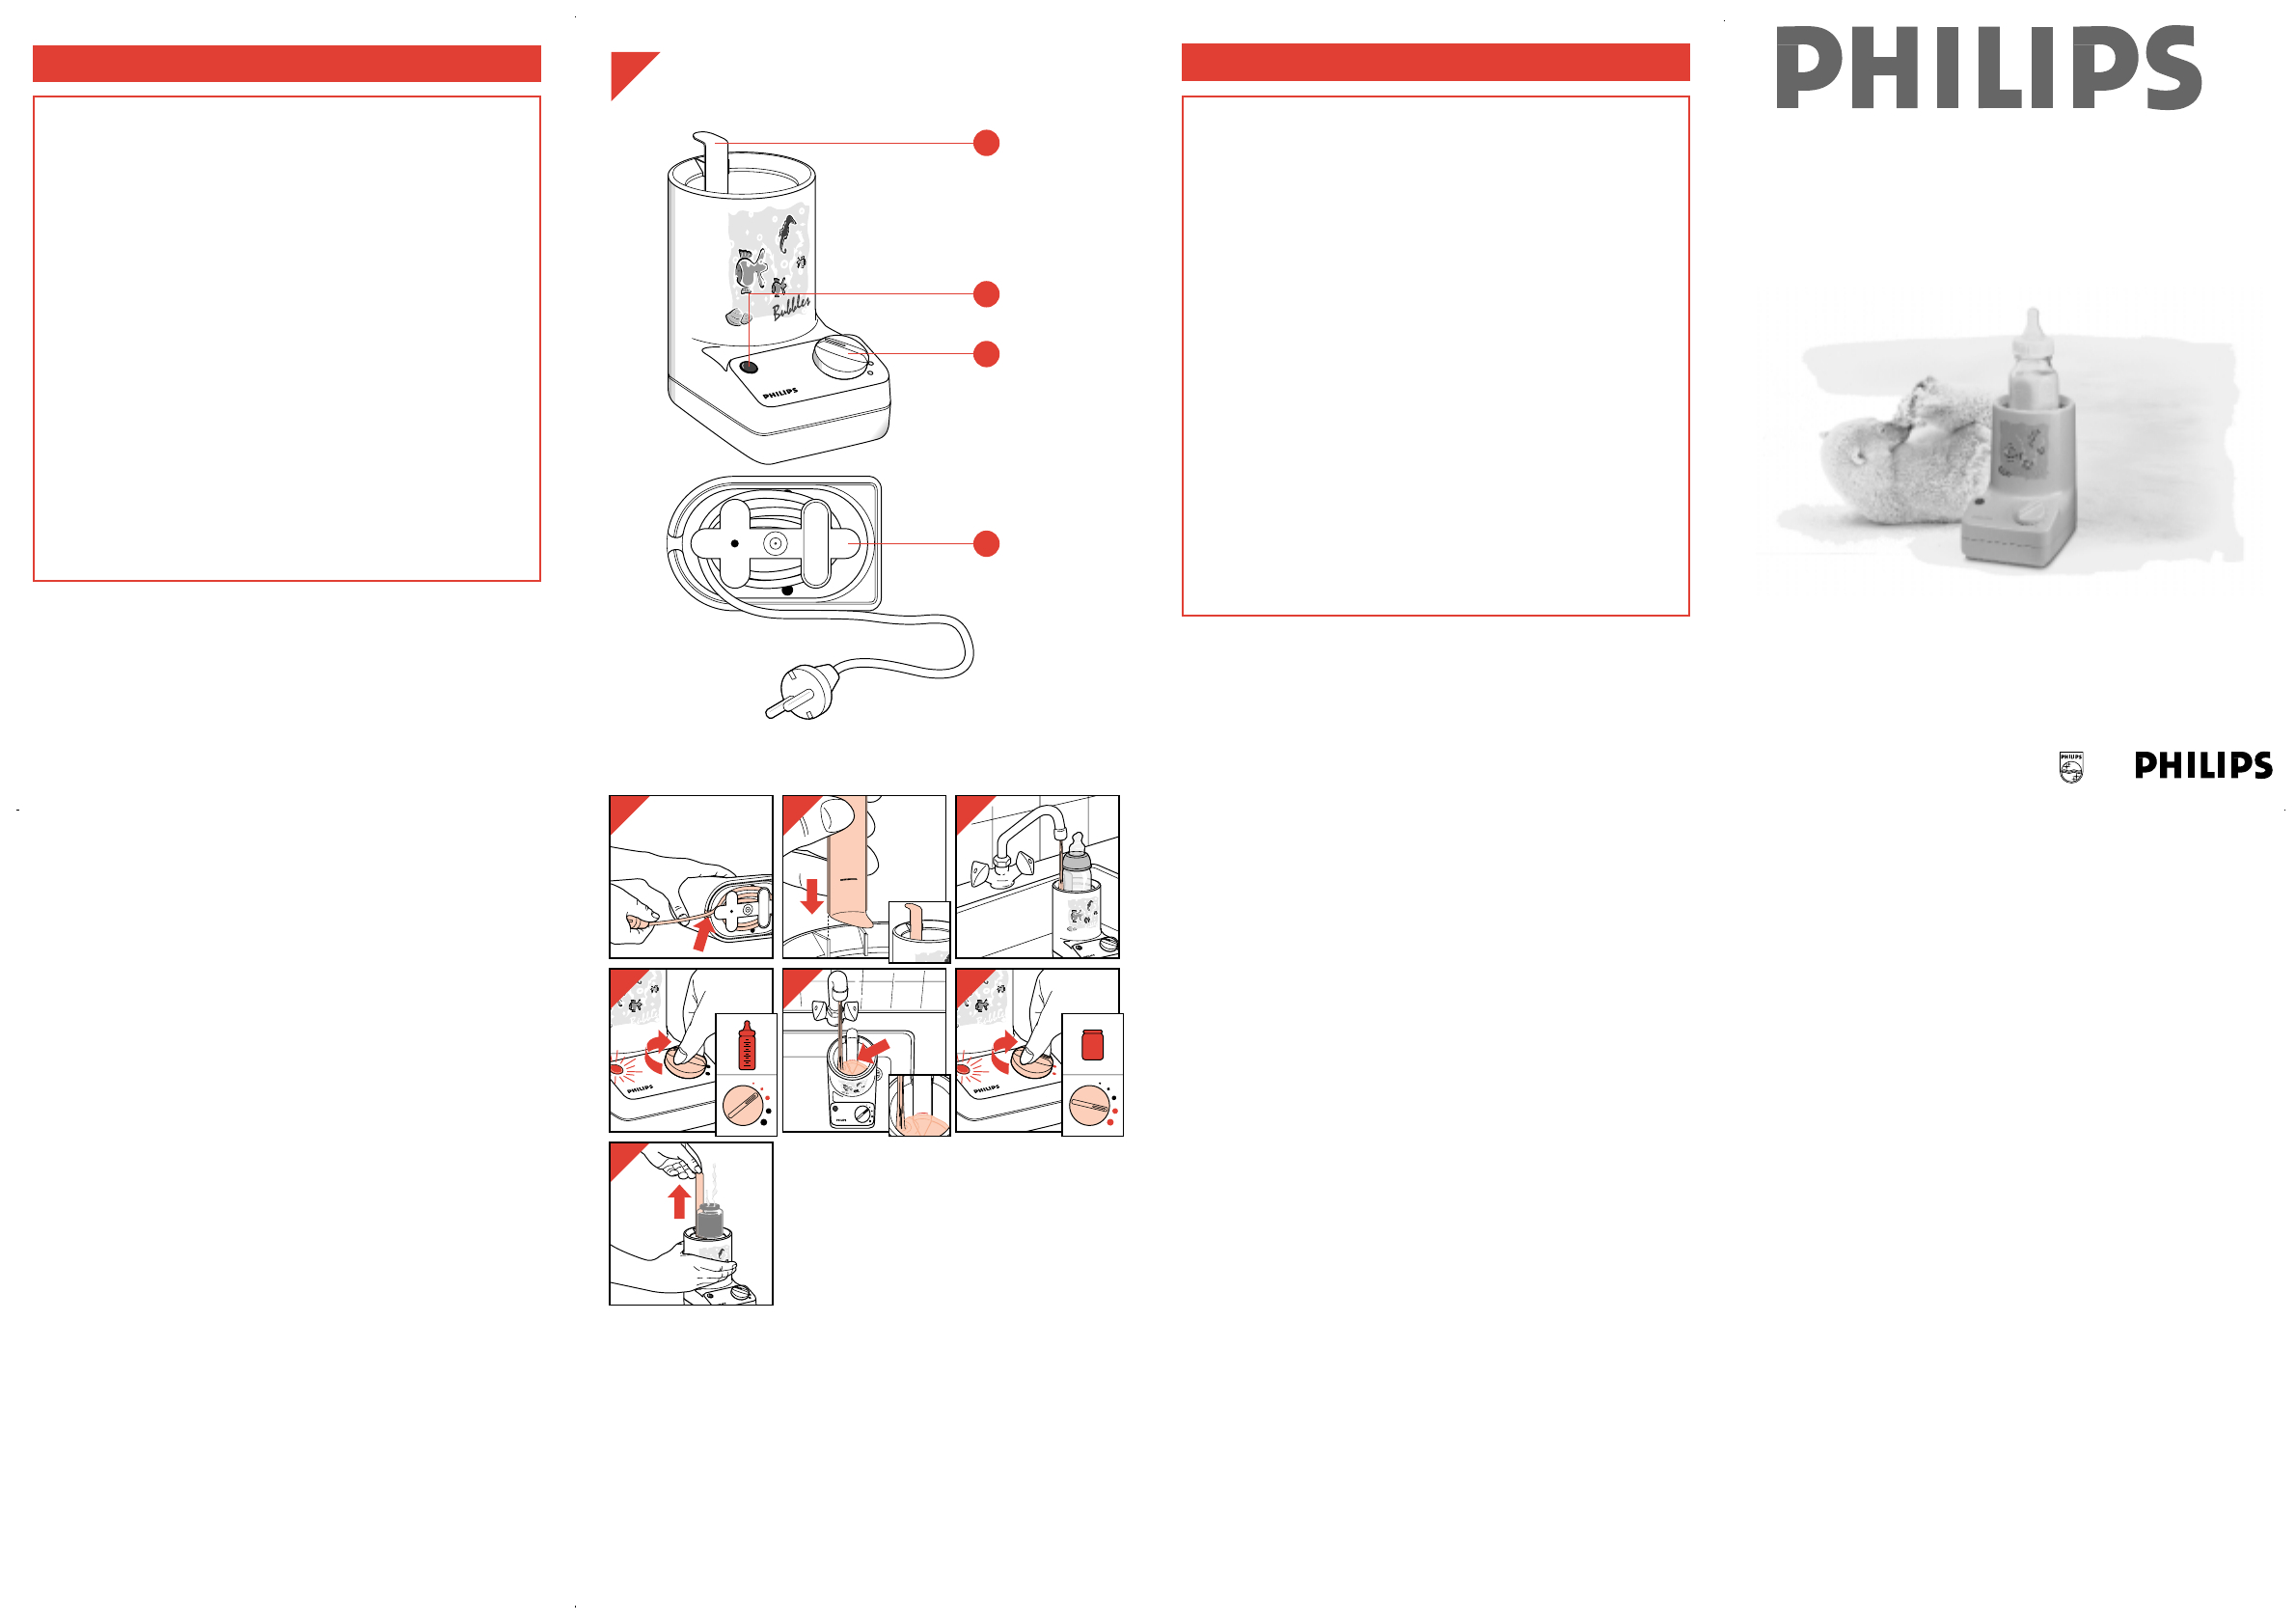
Description générale (fig. 1)
A Témoin lumineux
B Bouton du thermostat
C Extracteur
D Compartiment de rangement du cordon
Avant la première utilisation
- Réglez la longueur du cordon d'alimentation en l'extrayant par l'arrière
de l'appareil (fig. 2).
- Mettez l'extracteur en place (fig. 3).
Biberon :
- Faites glisser l'extracteur jusqu'au fond.
- Placez le biberon rempli dans l'appareil et comblez le vide avec de l'eau
(fig. 4).
- Réglez la température au moyen du bouton du thermostat
Réglez sur position 1 - 2 si le biberon est à demi-plein et sur position
2 - 3 si le biberon est plein (fig. 5). Le témoin lumineux s'allume alors.
- Lorsque le témoin lumineux s'éteint, le biberon est arrivé à la
température désirée.
- Sortez le biberon et agitez-le pour obtenir une bonne répartition de la
chaleur.
• Vérifiez la bonne température en mettant le biberon en contact
avec l'intérieur de votre poignet.
Petit pot :
- Faites coulisser l'extracteur jusqu'au fond.
- Remplissez l'appareil avec de l'eau jusqu'au repère indiqué sur
l'extracteur (fig. 6).
- Relevez l'extracteur et placez-y le petit pot (sans son couvercle !).
- Descendez l'extracteur jusqu'à ce que l'eau soit au niveau du filet de
fermeture du couvercle du petit pot.
- Réglez le bouton du thermostat sur la température désirée.
- Réglez sur la position 4 pour un petit petit pot et sur la position 5 pour
un grand petit pot (fig. 7). Le témoin lumineux s'allume alors.
- Lorsque le témoin lumineux s'éteint, le petit pot est arrivé à la
température désirée.
- Sortez le petit pot à l'aide de l'extracteur (fig. 8).
- Remuez le contenu du petit pot pour une bonne répartition de la
chaleur.
• Vérifiez la bonne température en goûtant/sentant vous même le
repas de bébé.
Nettoyage
Débranchez toujours l'appareil avant de procéder à son nettoyage.
Ne plongez jamais le chauffe biberon dans de l'eau.
N'utilisez pas d'agents abrasifs ou à base de chlore.
Nettoyez le chauffe biberon à l'aide d'un chiffon humide.
Remplacement du cordon d'alimentation
Si le cordon d'alimentation de cet appareil est endommagé, il ne doit être
remplacé que par Philips ou un de ses centres services car cette opéra-
tion necessite des pièces et/ou un outillage spéciaux.
Important
• Assurez-vous que la tension d'alimentation du secteur
correspond à celle indiquée sur la plaque d'identification située
sur le fond de l'appareil.
• Ne faites jamais fonctionner l'appareil sans eau. Assurez-vous
que l'eau ne s'évapore pas complètement pendant le
fonctionnement de l'appareil.
• Pensez à retirer le couvercle des petits pots en verre avant de
faire chauffer le repas de bébé ; vous éviterez ainsi toute
surpression.
• Attention : les petits pots en verre, ainsi que l'eau, deviennent
très chauds pendant le fonctionnement de l'appareil.
• Lorsque le témoin lumineux s'éteint, les aliments sont arrivés à
la température désirée. Puis, le témoin lumineux s'allumera et
s'éteindra successivement par périodes pour signaler le
fonctionnement du thermostat qui permet de maintenir
toujours la bonne température.
• Débranchez toujours l'appareil après utilisation. N'éteignez pas
avec le bouton du thermostat.
• Ne nettoyez l'appareil qu'après l'avoir débranché. Ne plongez
jamais le chauffe-biberon dans l'eau.
• Gardez l'appareil hors de portée des enfants.
• La température du biberon ou du petit pot dépend beaucoup de
l'épaisseur du verre, de sa forme, de la température ambiante et
de l'aliment.
Vous apprendrez avec le temps à bien régler l'appareil.
• Pour l'hygiène : ne faites pas chauffer l'aliment pendant plus
d'une heure. Ne réchauffez pas un aliment.
English
General description (fig. 1)
A Pilot light
B Thermostat knob
C Lifter
D Cord storage compartment
Before first use
- Adjust the length of the mains cord and lead it out of the appliance at
the rear side (fig. 2).
- Position the lifter (fig. 3).
Feeding bottle:
- Slide the lifter completely downwards.
- Place the filled feeding bottle into the appliance and fill the remaining
space with water (fig. 4).
- Select the desired temperature with the thermostat knob.
Select dot 1 - 2 for a half full bottle and dot 2 - 3 for a full bottle (fig. 5).
The pilot light will come on.
- When the pilot light goes out, the bottle is at the set temperature.
- Shake the bottle after warming up, to ensure even temperature.
• Always check the correct temperature by feeling the bottle against
the inside of your wrist.
Glass jar of baby food:
- Slide the lifter completely downwards.
- Fill the appliance with water up to the mark on the lifter (fig. 6).
- Pull the lifter upwards and put the glass jar on it (without the lid!).
- Push the lifter downwards until the water reaches the screw collar of the
glass jar.
- Select the desired temperature with the thermostat knob. Select dot 4
for a small jar and dot 5 for a large jar (fig. 7). The pilot light will come
on.
- When the pilot light goes out, the bottle is at the set temperature.
- Pull the glass jar upwards using the lifter (fig. 8).
- Stir the contents of the jar after warming up, to ensure even
temperature.
• Always check the correct temperature by tasting/feeling yourself.
Cleaning
Always remove the mains plug from the wall socket before cleaning.
Never immerse the baby bottle heater into water.
Do not use abrasives or chlorous agents.
Clean the baby bottle heater with a damp cloth.
Replacing the mains cord
If the mains cord of this appliance is damaged, it must only be replaced
by Philips or their service representative, as special tools and/or parts
are required.
Français
Important
• Ensure that the mains supply voltage corresponds with the
voltage indicated on the identification plate on the bottom of
the appliance.
• Never operate the appliance without water. Prevent it from
boiling dry.
• Always remove the lid from a glass jar before warming up the
babyfood: otherwise there will be high pressure.
• Caution: the glass containers and the water will become hot
during use.
• When the pilot light goes out, the food is at the set
temperature. Subsequently the pilot light will go on and off at
intervals, indicating the thermostat functioning to maintain the
correct temperature.
• Always remove the mains plug from the wall socket after use.
Do not switch off with the thermostat knob.
• Only clean the appliance after removing the mains plug from
the wall socket. Never immerse the baby bottle heater into
water.
• Keep the appliance out of children's reach.
• The temperature of the bottle or jar depends strongly on the
thickness of the glass, its shape, the ambient temperature and
the kind of food.
You will learn from experience which setting is most suitable.
• Hygiene: Do not keep hot for longer than one hour.
Do not heat up food for a second time.