(Registering Addresses and Users for Facsimile/Scanner Functions,
Connecting the Machine/ System Settings)
3. (3. Storing Files Using the Scanner Function) (3. Storing Files
Using the Scanner Function) (3. Storing Files Using the Scanner
Function) (3. Storing Files Using the Scanner Function)
Available scan functions:
AScan to E-mail
BScan to Folder (SMB/FTP/NCP)
CScan Using WSD (Web Services on Devices)
DStore to Hard Disk
ESave to Memory Storage Device
FScan to Delivery Server
GScan via TWAIN Driver
For details about C, E, F, and G, see Scan on
the supplied CD-ROM.
How to save to the machine’s hard disk...
(Storing and Saving the Scanned Documents)
APress the {Home} key on the top left of the control panel,
and press the [Scanner] icon on the [Home] screen.
BPress the {Reset} key.
CPlace originals.
DPress [Send Settings].
EPress [
T
] three or four times, and then press [Store File].
FPress [Store to HDD].
GIf necessary, specify file information, such as [User Name],
[File Name], and [Password].
HPress [OK] twice.
IIf necessary, press [Send Settings] or [Original] to configure
settings for resolution and scan size.
JPress the {Start} key.
For details about saving to memory storage device, see
“Storing the Scanned Documents to a USB Flash Memory
Device or SD Card”, Scan on the supplied CD-ROM.
Why use it?
To store scanned files in the hard disk of the machine for
later (shared) use. (See Scan.)
Displaying a list of files stored
on the machine’s hard disk
(Storing and Saving the
Scanned Documents)
*The shape of the machine, screen displays,
procedures, and titles in references vary depending
on the machine you are using. Also, not all functions
are available on all machines.
APress the {Home} key on the top left of the control panel,
and press the [Scanner] icon on the [Home] screen.
BPress [Send Settings].
CPress [
T
] four times, and then press [Select/Manage Stored
File].
The list of stored files is displayed.
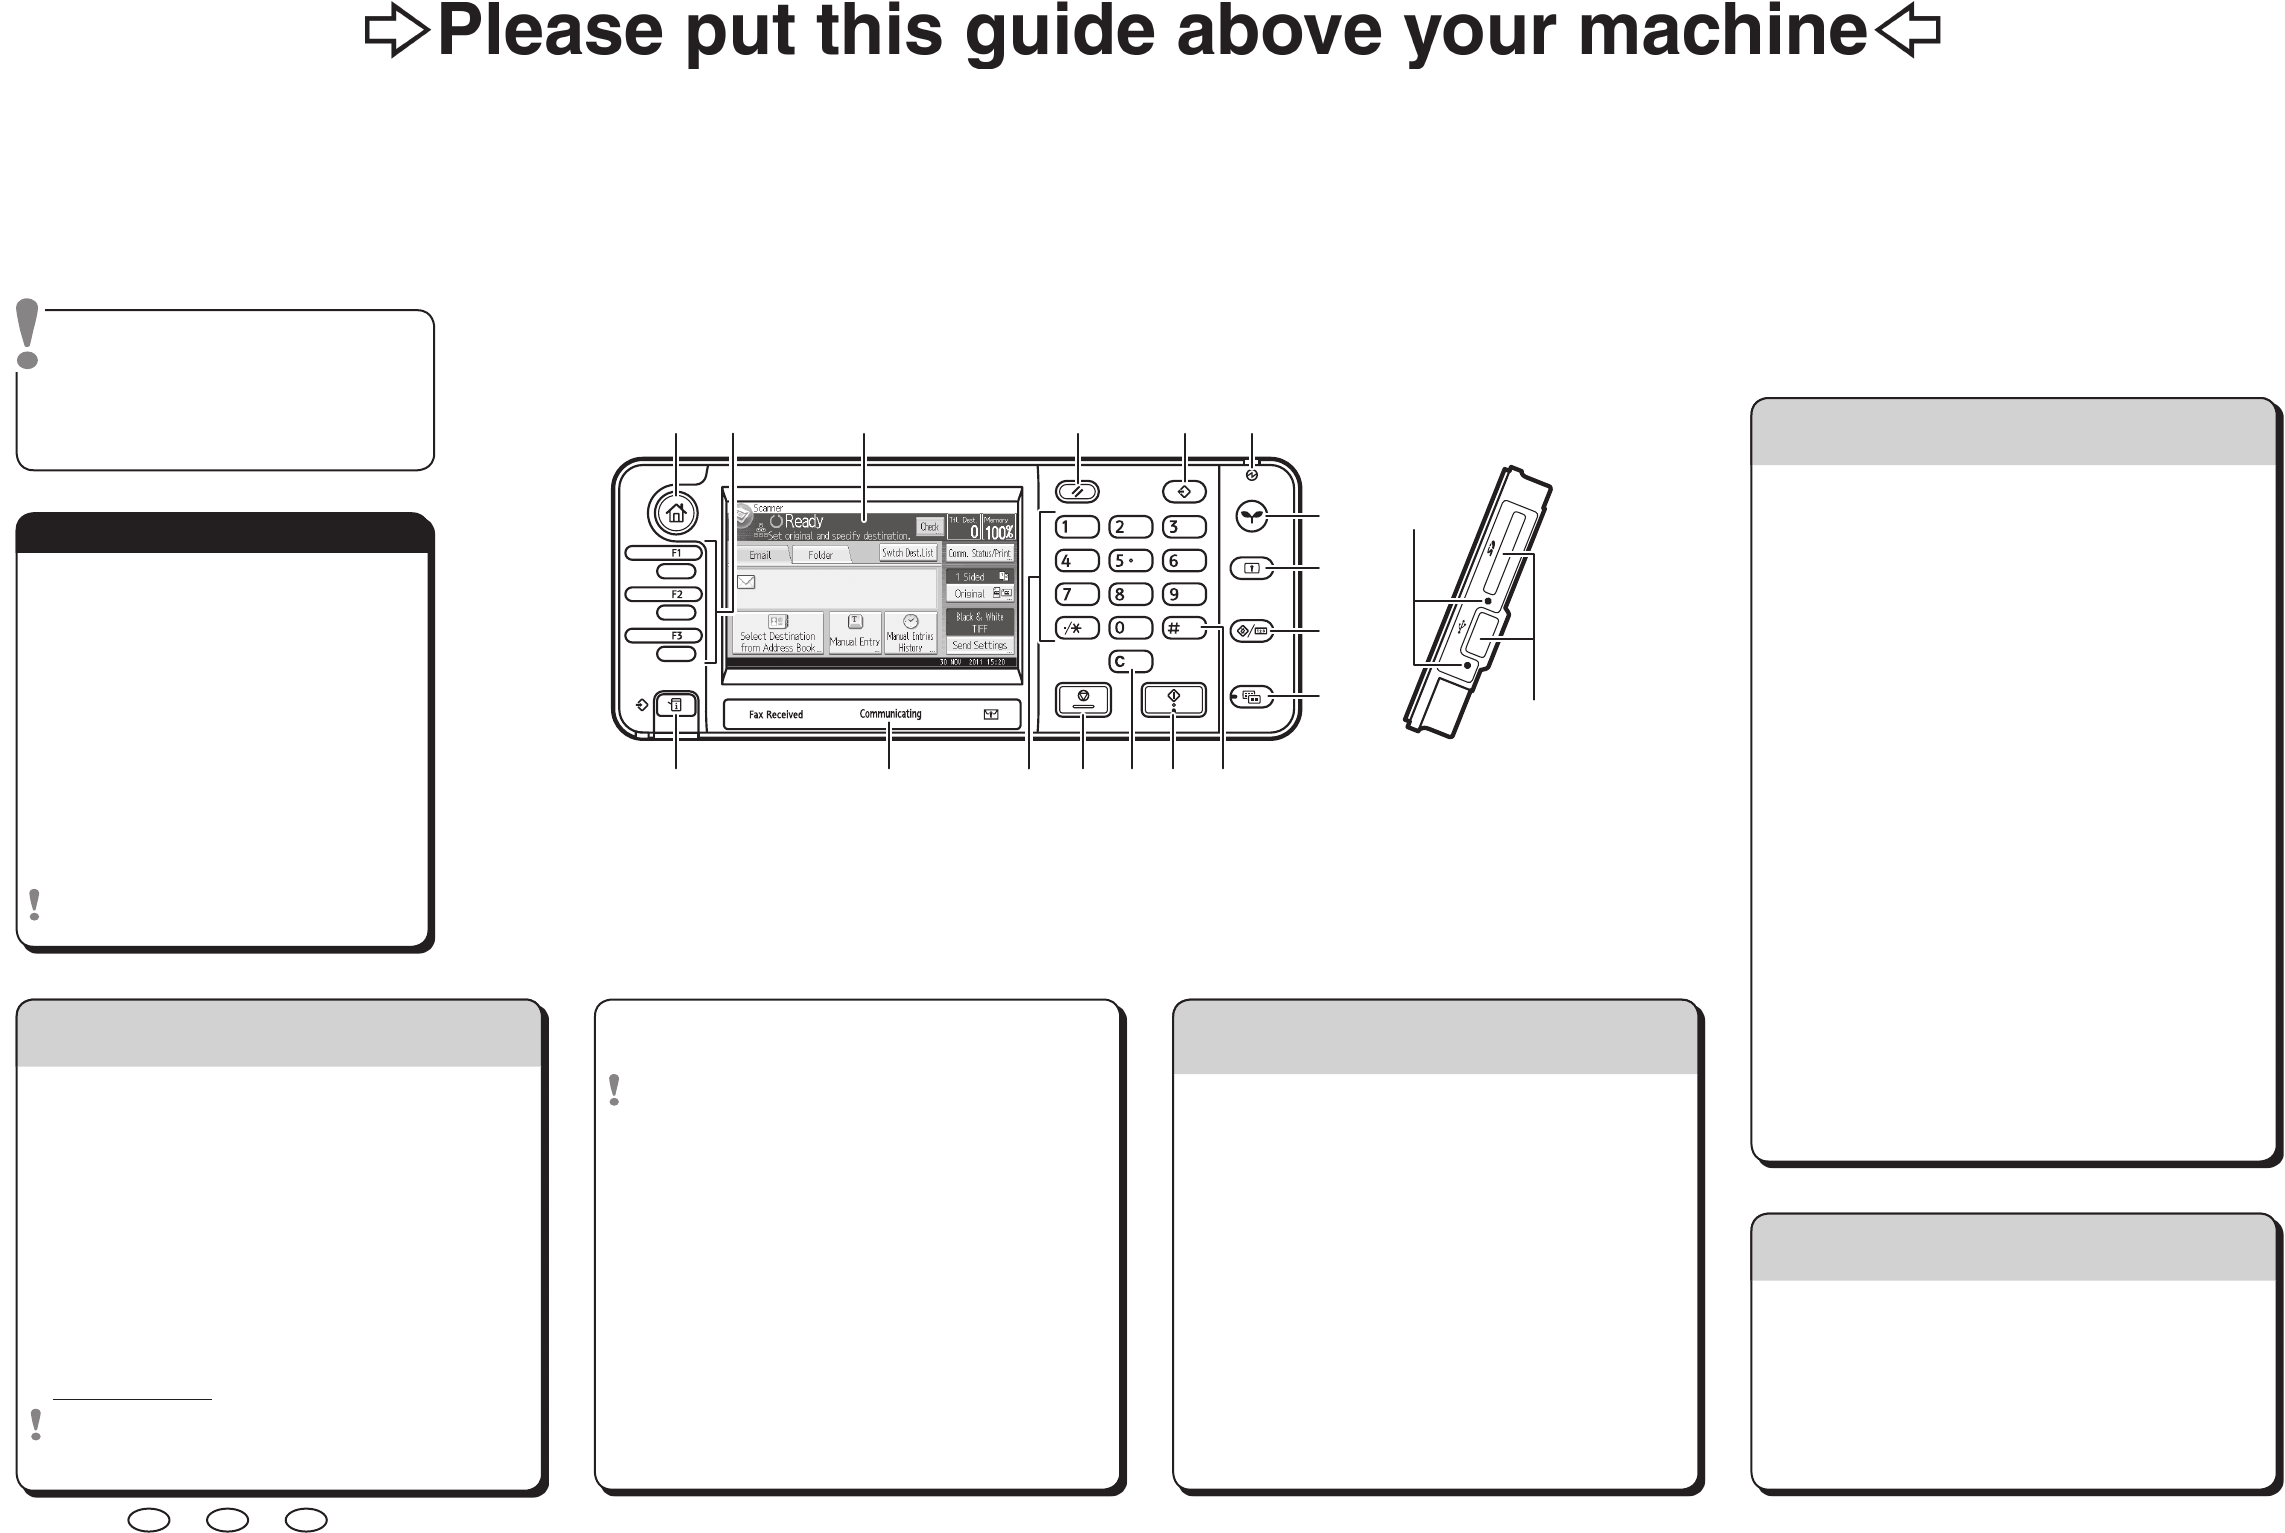
1. {Home} key
Press to display the [Home] screen.
2. Function keys
No functions are registered to the
function keys as a factory default.
You can register often used functions,
programs, and Web pages.
3. Display panel
4. {Reset} key
Press to clear the current settings.
5. {Program} key
Press to register frequently used
settings, or to recall registered settings.
6. Main power indicator
7. {Energy Saver} key
8. {Login/Logout} key
9. {User Tools/Counter} key
10. {Simple Screen} key
11. {#} key (Enter key)
12. {Start} key
Press to start copying, printing,
scanning, or sending.
13. {Clear} key
Press to delete a number entered.
14. {Stop} key
Press to stop a job in progress, such as
copying, scanning, faxing, or printing.
15. Number keys
16. Communicating indicator
17. {Check Status} key
18. Media access lamp
19. Media slots
1
7
11
18
1214
23456
8
9
10
131517
19
16
Brauchen Sie Hilfe? Stellen Sie Ihre Frage.
1
Forum
ricoh-mp-2001sp
Suche zurücksetzen
Wo stelle ich das Format der Scanvorlage ein? D. h. ich möchte bei einer doppelseitigen Vorlage nur die linke Seite A4 scannen.
Eingereicht am 25-2-201909:42
Libble nimmt den Missbrauch seiner Dienste sehr ernst. Wir setzen uns dafür ein, derartige Missbrauchsfälle gemäß den Gesetzen Ihres Heimatlandes zu behandeln. Wenn Sie eine Meldung übermitteln, überprüfen wir Ihre Informationen und ergreifen entsprechende Maßnahmen. Wir melden uns nur dann wieder bei Ihnen, wenn wir weitere Einzelheiten wissen müssen oder weitere Informationen für Sie haben.
Art des Missbrauchs:
Forenregeln
Um zu sinnvolle Fragen zu kommen halten Sie sich bitte an folgende Spielregeln:
Lesen Sie zuerst die Anleitung;
Schauen Sie nach, ob die Frage bereits gestellt wurde;
Stellen Sie die Frage so deutlich wie nur einigermaßen möglich;
Erwähnen Sie was Sie bereits versucht haben um das Problem zu lösen;
Ist Ihr Problem von einem Besucher gelöst dann lassen Sie ihn / sie wissen in diesem Forum;
Falls Sie reagieren möchten, so verwenden Sie bitte das Antworten- Formular;
Da ihre Frage für alle Besucher sichtbar ist, sollten Sie lieber keine persönliche Daten erwähnen.
Neu registrieren
Registrieren auf E - Mails für Ricoh MP 2001SP wenn:
neue Frage gestellt werden
neue Handbücher vorhanden sind
Sie erhalten eine E-Mail, um sich für eine oder beide Optionen anzumelden.
Das Handbuch wird per E-Mail gesendet. Überprüfen Sie ihre E-Mail.
Wenn Sie innerhalb von 15 Minuten keine E-Mail mit dem Handbuch erhalten haben, kann es sein, dass Sie eine falsche E-Mail-Adresse eingegeben haben oder dass Ihr ISP eine maximale Größe eingestellt hat, um E-Mails zu erhalten, die kleiner als die Größe des Handbuchs sind.
Ihre Frage wurde zu diesem Forum hinzugefügt
Möchten Sie eine E-Mail erhalten, wenn neue Antworten und Fragen veröffentlicht werden? Geben Sie bitte Ihre Email-Adresse ein.