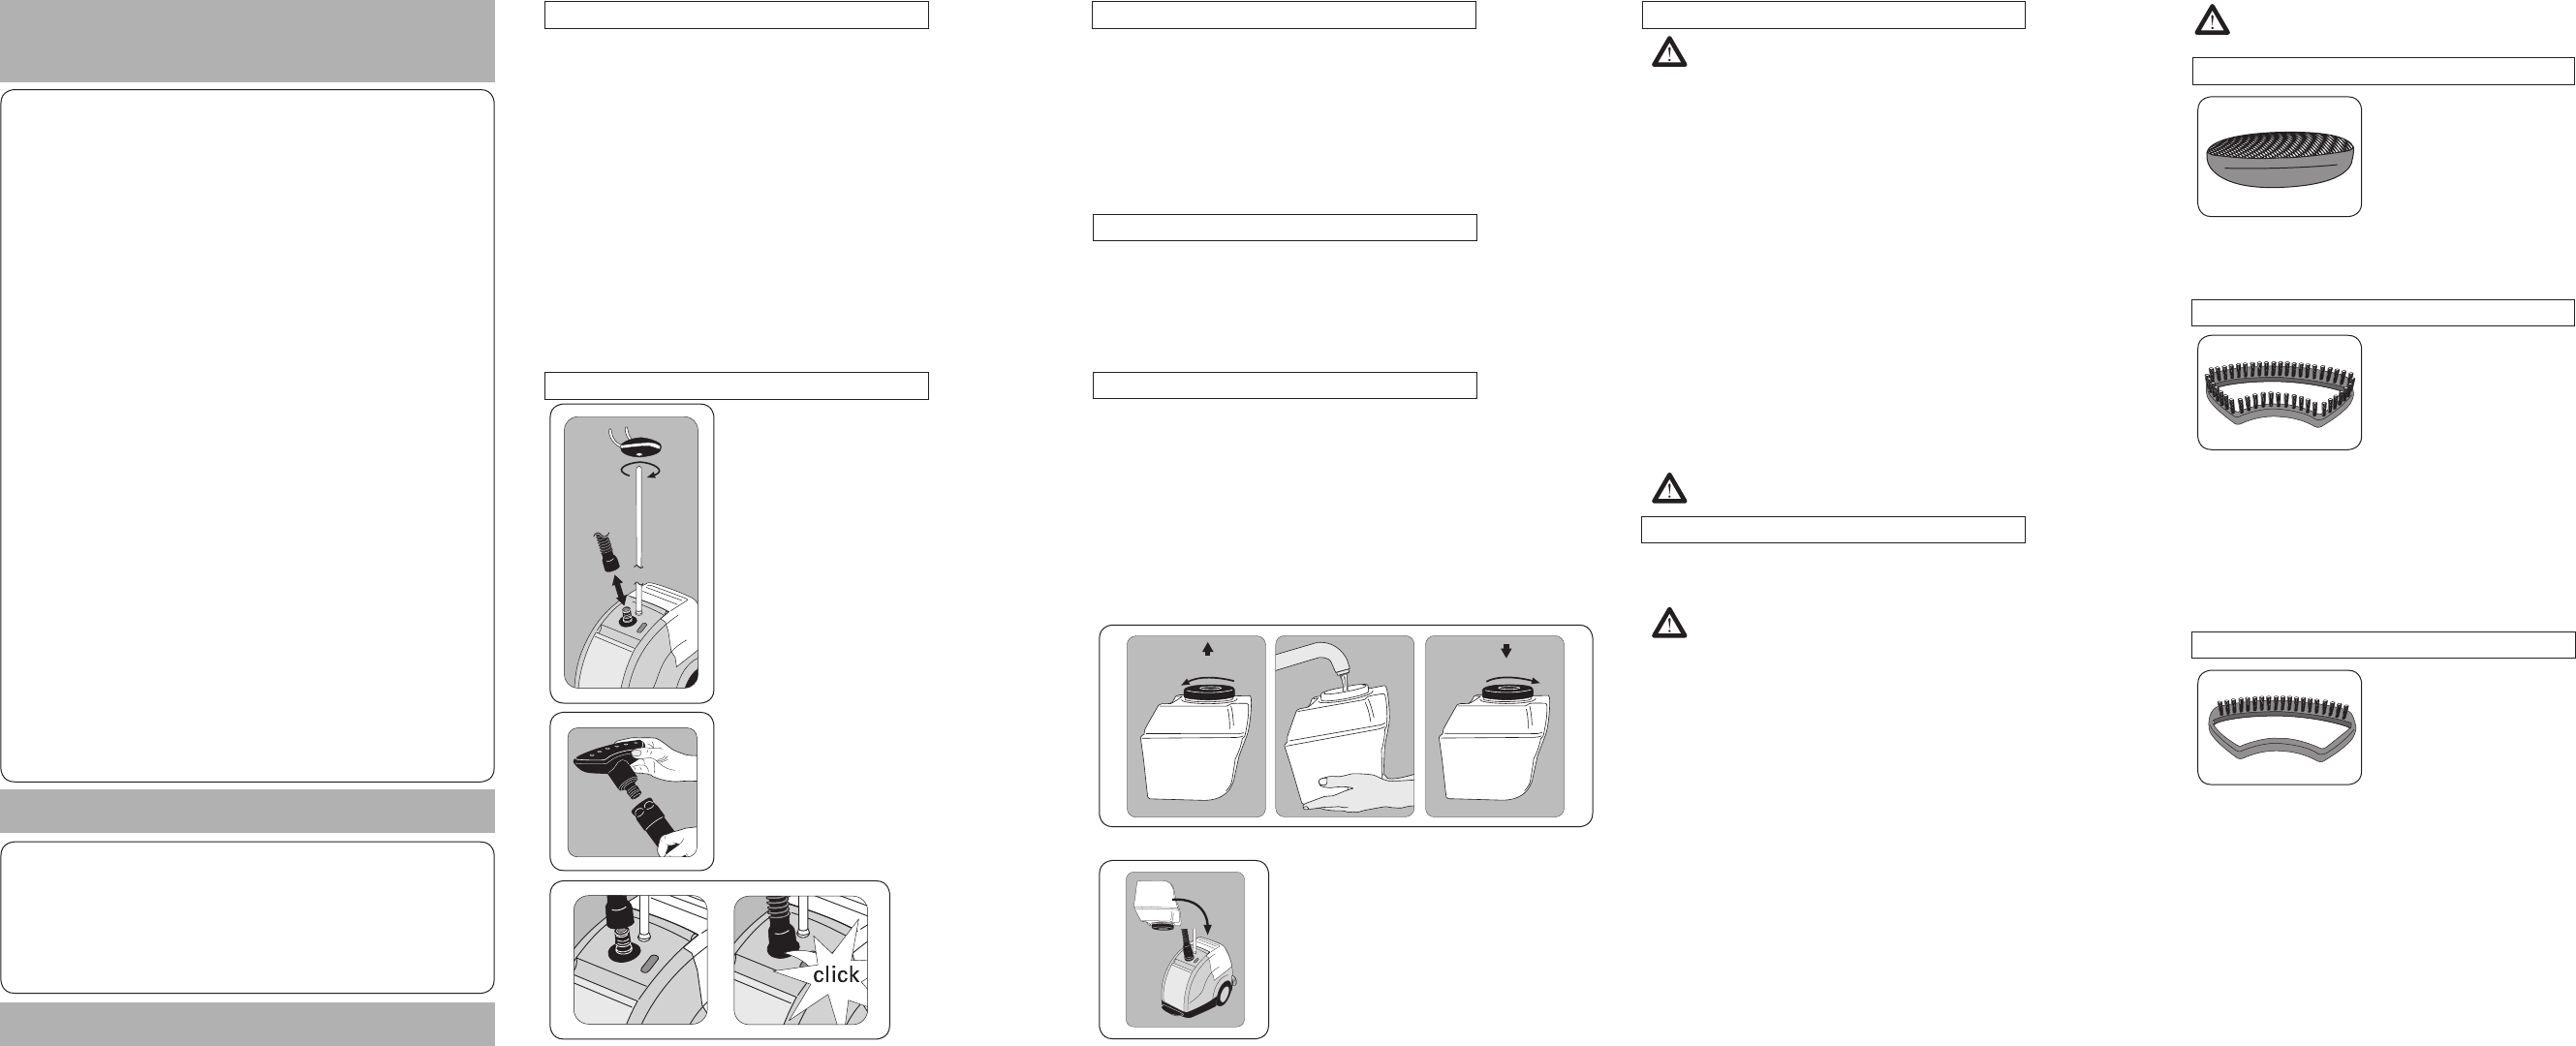
Lint Pad
The lint pad removes hair, lint and animal
fur for a professional finish.
• To use the lint pad, slowly brush the clothing
with the grain or nap of the fabric.
• The lint pad can be cleaned by
brushing in the opposite direction. We
recommend cleaning on an old cloth
that can be discarded.
Note: The lint pad does not attach to the steamer.
Upholstery Brush
The upholstery brush is used to aid steam
penetration into difficult, heavy fabrics for
faster results.
• Be sure unit is unplugged and completely
cool before attaching accessories.
• Attach the upholstery brush to the
steam head by lining up the bottom of
the brush with the bottom of the steam
head. Gently push the top of the brush into place on the
steam head until it clicks into place.
• Gently brush the area to be steamed with the grain or nap
of the fabric.
• Remove the upholstery brush once unit is unplugged and
completely cool. Remove it by pressing on the release
button on top of brush while pulling it forward.
Fabric Brush
The fabric brush opens the weave of the
fabric for better steam penetration.
• Be sure unit is unplugged and
completely cool before attaching
accessories.
• Attach the fabric brush to the steam head
by lining up the bottom of the brush with
the bottom of the steam head. Gently
push the top of the brush into place on the steam head
until it clicks into place.
• Gently brush the area to be steamed with the grain or nap
of the fabric.
• Remove the fabric brush once unit is unplugged and
completely cool. Remove it by pressing on the release
button on top of the brush while pulling it forward.
• To disconnect the steam head, firmly grasp the handle
connector at indentations. Gently pull down on the
handle connector until the steam head releases.
• To disconnect the hose from the base unit, firmly grasp
the hose connector at indentations. Gently pull up on
hose connector until hose releases.
Auto off
The Auto-off function prevents unit from overheating, but
does not switch-off the appliance.
Do not use as on/off switch.
Filling with water
• The steamer can be used with REGULAR TAP WATER (up
to 12 grains of hardness). If your water is harder than this,
Rowenta recommends mixing half tap water with half
distilled water which reduces the hardness; or just use
inexpensive bottled spring water; or 100% distilled water.
• Battery water and water containing additives (such as
starch, perfume or fabric conditioner) may not be used in
the steamer. Such additives can affect the properties of
the steam and can form deposits.
• Be sure that unit is unplugged. Remove
water tank from main unit by pulling
up. Unscrew the cover and fill. Do not
fill above the max line at the water tank.
Water tank capacity is
1 gallon.
• Screw cover back onto tank when filled.
• Firmly place tank back on the main unit.
Use
Warning: Never steam clothes while they are being worn.
Hose and steam head will become hot during use. This is
normal. Use caution and avoid prolonged contact.
• Place steamer on a flat, level surface. Do not block vents
on bottom of unit.
• Plug in cord and activate the power switch by hand
or foot. The power indicator light will illuminate once
steamer is turned on.
• Wait for the steam to come out. It will take approximately
90 seconds.
• Put garment onto the hanger head. Grasp the steam
head with the steam vents pointing away from you. Start
steaming by touching material lightly with steaming head
and moving in an up/down vertical motion. Begin at the
bottom of the garment and move in an upward direc-
tion. Steam with hose in an upright position. If steaming
in a low position near floor, straighten hose up and out
FREQUENTLY to keep clear of condensation. This allows
any condensation to flow back into the steamer.
• During operation, the steamer hose may make a gurgling
noise. This is a normal result of condensation. If it begins
to gurgle, extend hose up and out to move excess
moisture back into the base.
DO NOT ALLOW STEAMER TO RUN DRY
Accessories (depending on model)
Rowenta offers various accessories to add versatility to
your garment steamer. Depending on the model, some of
these accessories may be included in your product.
Reminder: When using accessories steam only in an up and
down vertical motion. Never use steamer in a horizontal
position and never tilt it in a backward position.
Before using any of the accessories on upholstery or
garments, be sure to consult the manufacturer regarding
their recommendations. We also recommend testing on an
unobtrusive area.
If you are interested in purchasing additional accessories,
please visit our website at www.rowentausa.com.
You can also call one of our main service centers.
Tips
Thank you for purchasing the Rowenta Commercial
Garment Steamer.
Vertical Steamers are designed to refresh garments after
hanging or folding, and to remove wrinkles from items that
are delicate or difficult to iron. Steamers are not intended
to replace an iron. To view the full range of Rowenta steam
irons, visit www.rowentausa.com.
Here are some helpful tips to consider before using your
new steamer.
• Check the fabrics label for recommendations on care.
• Test fabric for color fastness on an unobtrusive part of the
garment (inner seam) before steaming.
• Do not touch silk or velvet with steam head.
• Some articles can be steamed better from the underside.
• If steaming in a low position near floor, straighten hose
up an out frequently to keep clear condensation. If hose
becomes clogged, it will make a gurgling noise.
• Heavier fabrics may require repeated steaming.
• Exercise caution at all times.
Before use
• Please read the instructions for use and
Important Safeguards carefully.
•
Remove any packaging from the appliance.
• Do not plug in or turn on until assembly
is complete.
• Assemble the support rod by screwing
the individual pieces together.
•
Insert support rod in the hole on top of
the main unit and screw it in a clockwise
direction by hand until it is firmly in place.
•
Attach the hanger head to the rod and
secure by pressing down until it clicks in
place. A rubber mallet may be used to
gently tap top of hanger head until it locks.
The hanger head will still rotate, for
convenience, even when in place.
• Attach the steam head to the hose by
placing it inside the handle connector.
Secure by pressing down until it clicks
into place.
• Attach the hose
to the base unit
by placing the
hose connector
over the base
connector. Secure
by pressing down
until it clicks into
place.
IMPORTANT SAFETY
INSTRUCTIONS
When using your appliance, basic precautions should always be
followed, including the following:
Read all instructions before use.
1. Use appliance for its intended use only.
2. Children should not use this appliance. Close supervision is
necessary when any appliance is used near children. Do not leave
appliance unattended while connected to a power source.
3. Do not operate any appliance with a damaged cord, plug or
steam hose or after the appliance malfunctions, or is drop-
ped or damaged in any manner. To reduce the risk of electric
shock, do not disassemble or attempt to repair the appli-
ance. Return appliance to nearest authorized service center
for examination, repair or adjustment.
4. To reduce the risk of contact with hot water emitting from
steam vents, check appliance before each use by holding it
away from body and operating.
5. Steam only in an up and down vertical motion. Never use
steamer in a horizontal position or tilt into a backward
position, this may result in water discharge.
6. To reduce the risk of electric shock, do not immerse the
appliance in water or other liquids.
7. Appliance should always be turned off before unplugging.
Never yank cord to disconnect from outlet, instead grasp
plug and pull to disconnect.
8. Do not allow cord to touch hot surfaces. Let appliance cool
completely before putting away. Loop cord loosely around
integrated cord storage bar before storing.
9. Do not let power cord contact sharp edges or hot surfaces.
10. Do not remove the hose during operation. Scalding may
occur if the hose adapter is removed.
11. Always disconnect appliance from electrical outlet when fil-
ling with water, emptying or when not in use.
12. Do not attempt to hang up the unit using the hose.
13. The use of accessory attachments not recommended by
Rowenta may result in fire, electric shock or personal injury.
14. Burns could occur from touching hot parts, hot water or
steam. Use care when you empty a steam appliance.
There may be hot water in the reservoir.
15. Indoor use only.
SPECIAL INSTRUCTIONS
SAVE THESE INSTRUCTIONS
1. This is a 1500 watt appliance. To avoid a circuit overload, do not
operate a high wattage appliance on the same circuit.
2. If an extension cord is absolutely necessary, the marked
electrical rating should be at least as great as the electrical
rating of the appliance. Cords rated for less amperage may
overheat. Care should be taken to arrange the cord so that it
cannot be pulled or tripped over.
3. Do not cut or attempt to extend the steaming hose.