Maintenance
Batteries
This register displays a low battery warning
message “LOW BA
low
“NO BA
or batteries are not installed.
If no batteries are installed, install two new alkaline
batteries LR6 (“AA” size) at once. If batteries
are already installed, replace them with new
ones as soon as possible. If the
is disconnected or a power failure occurs when
the batteries are dead or not installed, all the
programmed settings will be reset to the default
settings and any data stored in memory will be
cleared.
C
Improper use of batteries could cause them
to burst or leak, which might damage the
interior of the register
following precautions:
• Be sure that the positive (+) and negative
(-) poles of each battery are oriented
properly
• Never mix batteries of different types.
• Never mix old batteries and new ones.
• Never leave dead batteries in the battery
compartment.
• Remove the batteries if you plan not to
use the register for long periods.
• Should a battery leak, clean out the
battery compartment immediately
care not to let the battery uid come into
direct contact with your skin.
• If an incorrect battery is used, it may
explode or leak.
• For battery disposal, follow the relevant
law or regulation in your country
Replacement
1. Be sure the register is plugged in.
2. Remove the printer cover.
Reading and Resetting Sales
List of
• Use the reading function (X) when you need to
take the reading of sales information entered after
the last resetting. Y
number of times. It does not affect the register’s
memory
• Use the resetting function (Z) when you need to
clear the register
sales information and clears the entire memory
except for the GT1 through GT3, reset count, and
consecutive number
• X1 and Z1 reports show daily sales information.
Y
• X2 and Z2 reports show periodic (monthly)
consolidation information. Y
reports in the X2/Z2 mode.
• In the OP X/Z mode, an clerk can take his or her
report.
• If you want to stop the printing report, press the
a
key
Item
Mode
OP X/Z X1/Z1 X2/Z2
X Z X Z X Z
General report
○ ○ ○ ○
PLU report by designated
range
○ ○
PLU report by associated
department
○ ○
Individual clerk report
○ ○ ○ ○
All clerk report
○ ○
Hourly report
○ ○
GLU report *
○ ○
GLU report by clerk*
○ ○
Balance report *
○
Flash report
○
*: For XE-A217W/XE-A217B only
3. Open the battery cover and remove the old
batteries.
4. Install two new LR6(“AA” size) batteries into
the battery compartment.
5. Close the battery cover.
6. Replace the printer cover.
Paper Roll
When colored dye appears on the edges of the
paper roll, it is time to replace the paper roll. Use
paper of 57.5 ± 0.5 mm in width. T
jamming be sure to use paper specied by SHARP
Replacement
1. Conrm that the REG mode has been
selected.
2. Remove the printer cover.
3. Lift up the print roller arm.
4. Remove the remaining paper roll.
5. Install a new paper roll correctly by following
the steps in “Installing a Paper Roll”.
Removing a Paper Jam
C
The paper cutter is mounted on the printer
cover
touch the print head immediately after
printing, as the head may still be hot.
1. Remove the printer cover.
2. Lift up the print roller arm.
3. Remove the paper jam. Check for and
remove any shreds of paper that may remain
in the printer
4. Reset the paper roll correctly by following
the steps in “Installing a Paper Roll”.
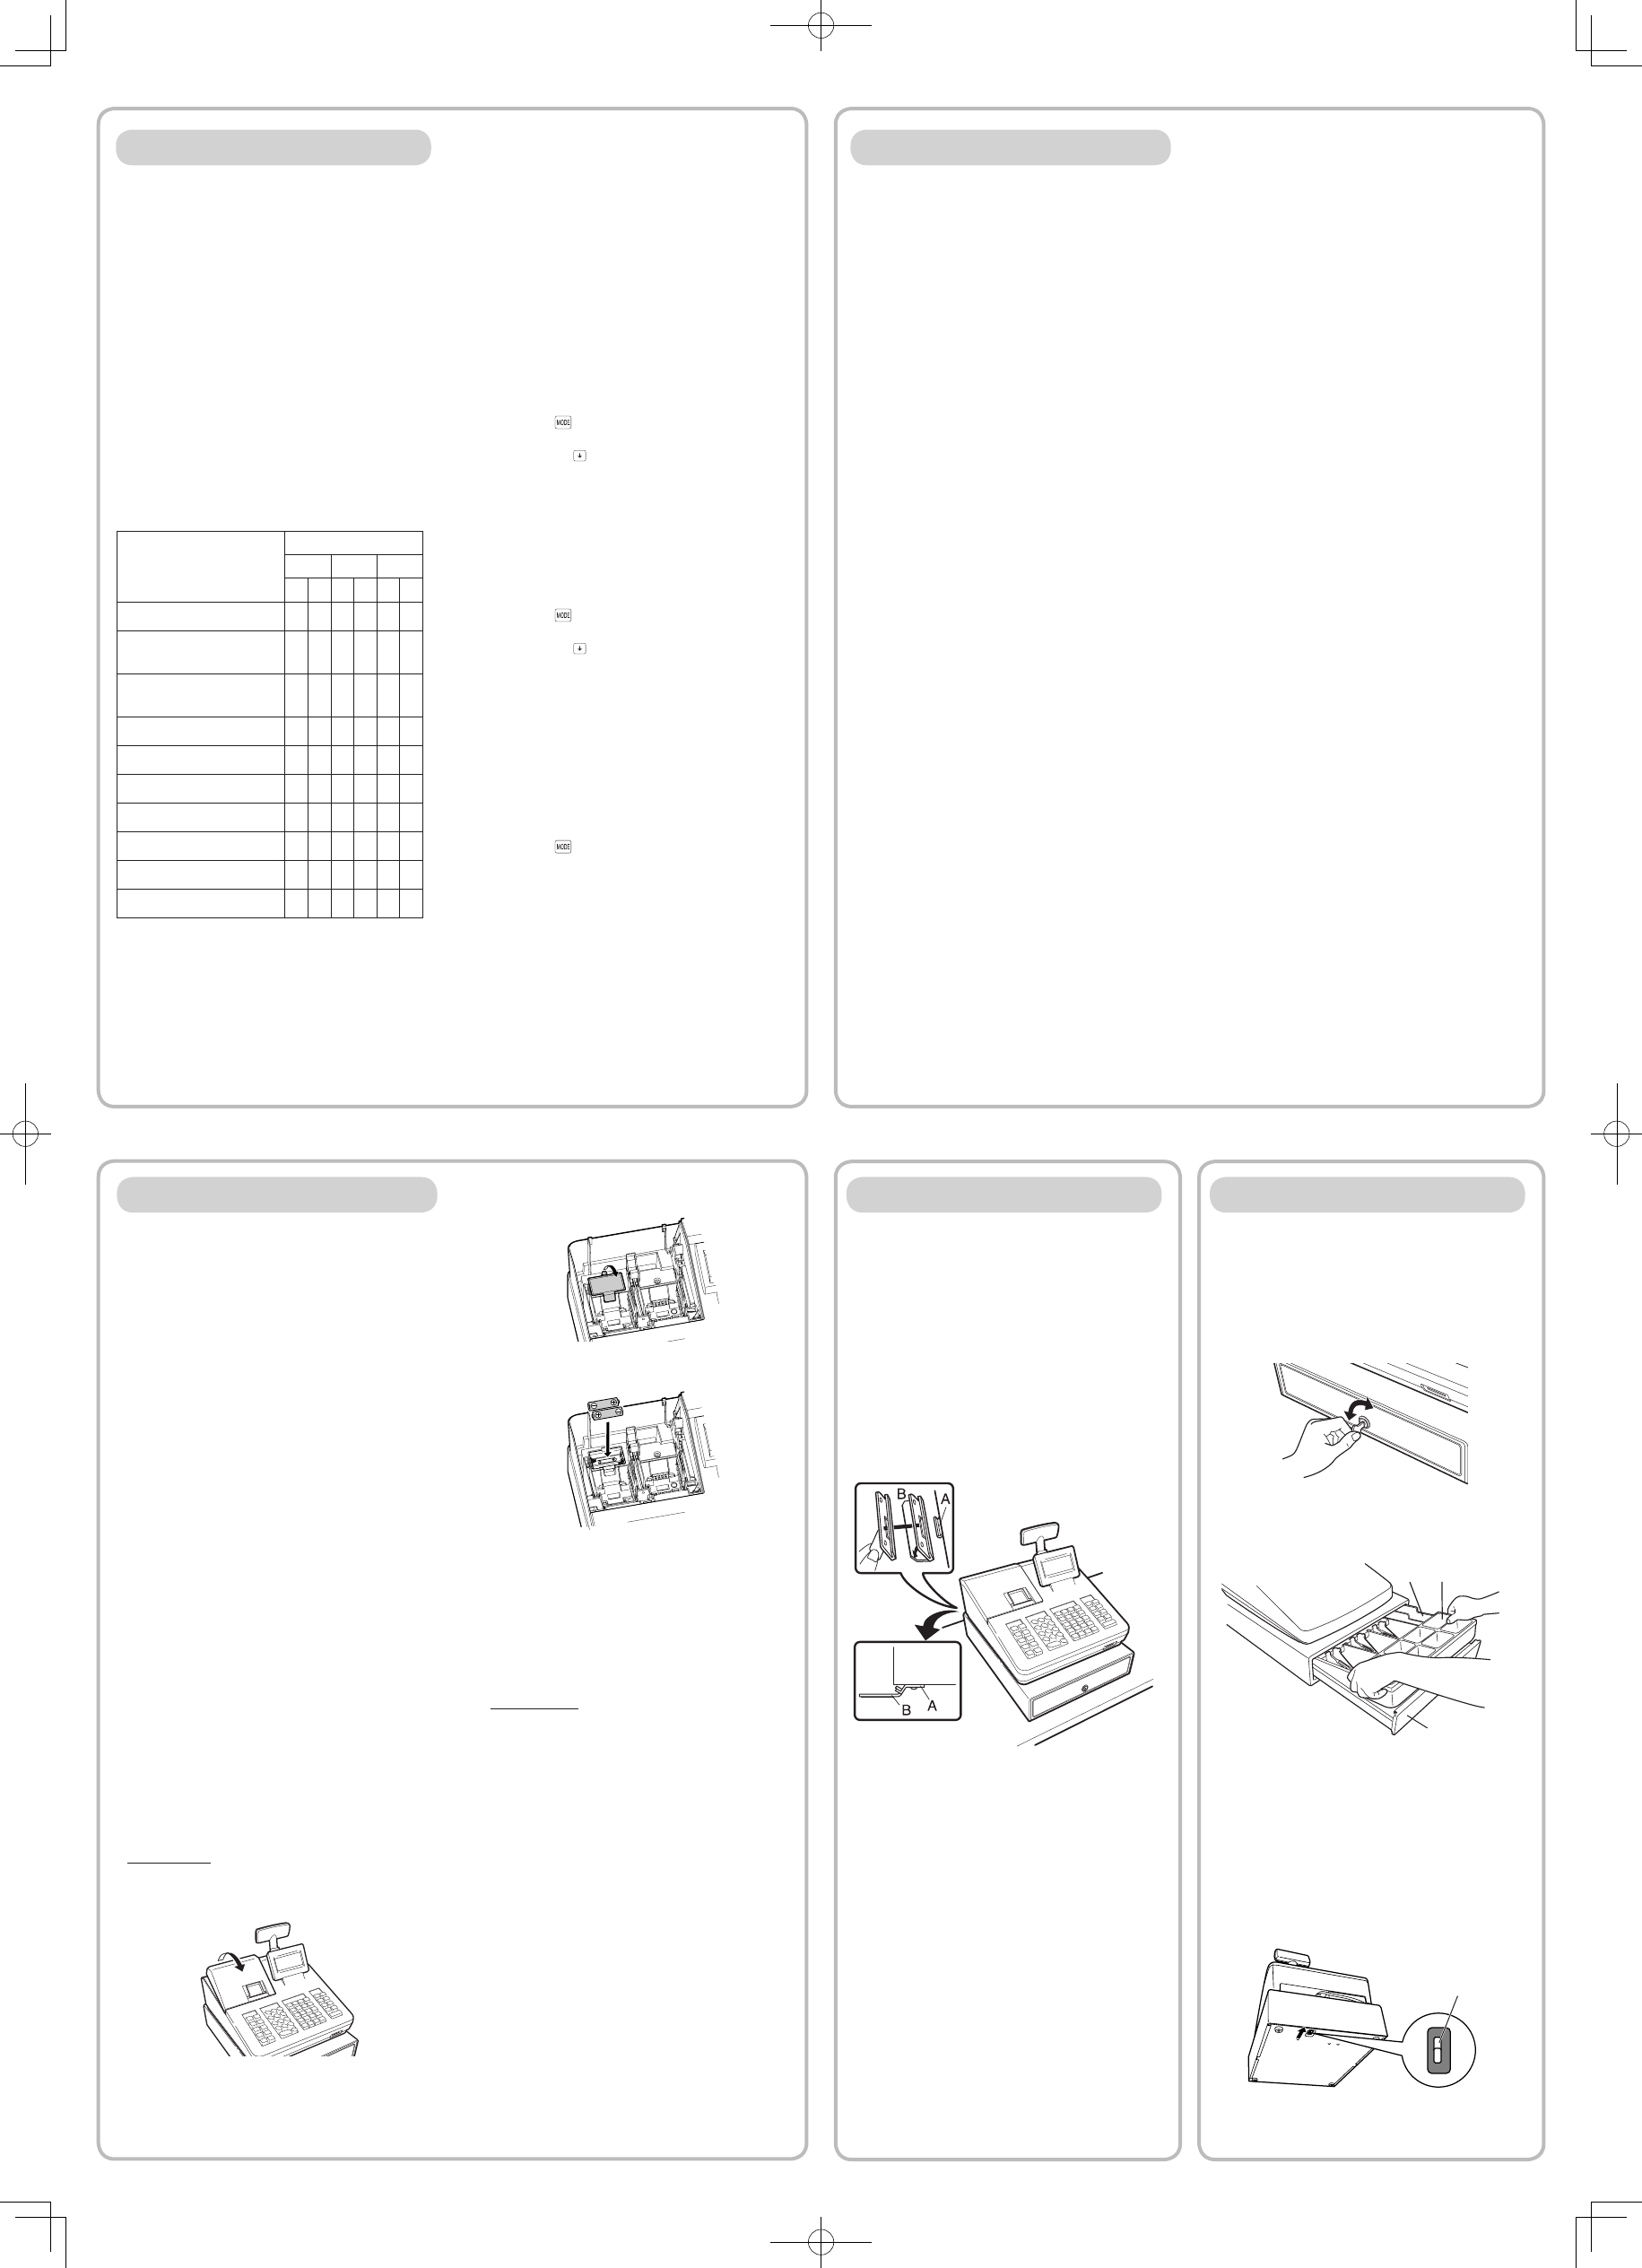
Drawer Handling
Locking the Drawer
Develop the habit of locking the drawer when not
using the register for any extended period of time.
T Insert the key into the drawer lock and
turn it 90 degrees counter-clockwise.
T Insert the key into the drawer lock and
turn it 90 degrees clockwise.
Removing the Drawer
T
Drawer
Till
Coin
D
• T
empty the drawer after work and leave it
open at the end of the day
• Coin case is detachable.
Manually Opening the Drawer
In case of a power failure or if the machine is out of
order
and move it in the direction of the arrow to open the
drawer
the drawer lock key
Lever
Installing the Fixing
T
opens, the xing angle bracket is supplied with the
register
the register is installed, you can hook the register on
this bracket and secure the register to its position.
How to install the xing angle bracket
1.
angle bracket (B) is to be placed.
2.
bracket.
3.
is located at the bottom rear of the register
4.
table surface that your cleaned above.
How to remove the register from the
xing angle bracket
Lift up the front of the register and pull the register
towards you.
Main Functional Overview
The register has the following main functions. For
details, refer to “FULL
MANUAL”.
Item Entries
Single item entries
Repeat entries
Multiplication entries
Split-pricing entries
Single item cash sale (SICS) entries
Special Entries for PLU
PLU entries
Direct PLU entries (For XE-A217W/XE-A217B
only)
Display of Subtotals
Subtotal
Finalization of T
Cash or check sale that does not need any
tender entry
Credit sale
Mixed sales and tender entries
Computation of V
V
V
V
only)
Guest Check (GLU)
Guest look up (GLU) system (For XE-A217W/
XE-A217B only)
Auxiliary Entries
Refund entries
Percentage discount
Amount discount
Non-add code entry
D
• When both sales quantities and sales
amounts are zero, printing is skipped.
If you do not want to skip, change the
programming. For details, refer to “FULL
DET
• “X” represents read symbol and “Z”
represents reset symbol in the reports.
• The drawer does not open when you take
X/Z reports.
• When printing is performed continuously
the printing may be intermitted for several
seconds.
printing will be restarted.
How to take a X1/Z1 or X2/Z2 report
[T
1. Press the
key
2. Select the “4 X1/Z1 MODE” or “5 X2/Z2 MODE”
by using the key
A
key
3. Select “2 READING” in the X1/Z1 mode or
select “1 READING” in the X2/Z2 mode menu
window and press in both cases the
A
key to
display the items list.
4. Select the appropriate report title.
5. Press the
A
key
[T
1. Press the
key
2. Select the “4 X1/Z1 MODE” or “5 X2/Z2 MODE”
by using the key
A
key
3. Select “3 RESETTING” in the X1/Z1 mode
or select “2 RESETTING” in the X2/Z2 mode
menu window and press in both cases the
A
key to display the items list.
4. Select the appropriate report title.
5. Press the
A
key
Flash report
Y
mode for department sales, cash in drawer (CID)
and sales total at the point you take the report.
1. Press the key
2. Select “1 FLASH READ” in the X1/Z1 mode
menu window and press the
A
key to display
the items list.
3. Select “DEPT
department sales, “CID” to take a ash report
of cash in drawer
ash report of sales total.
Payment T
Currency exchange
Received-on-account entries
Paid-out entries
No-sale (exchange)
Cashing a check
Correction
Correction of the last entry (direct void)
Correction of the next-to-last or earlier entries
(indirect void)
Subtotal void
Correction of incorrect entries not handled by
the direct, indirect or subtotal void function
Special Printing Function
Copy receipt printing
Bill printing
Manager Mode
Manager sign-on
Override entries
Other Functions
T
SD card mode
Electronic journal
Electronic journal data view function
Reports
General report
T
Department report
PLU report
Hourly report
Clerk report (All/Individual)
GLU (For XE-A217W/XE-A217B only)
Balance (For XE-A217W/XE-A217B only)
Electric Journal (Search)
Flash reports
Euro change