6
Transportation,
Befor
1. Turn
2. Rel
aPagâ 8: Filter in the
3. Drai
aPagâ 8: Drain pump
4. Isolate th
5. Rem
Inst
1. Rem
reta
2. Insert a
Clam
the h
Insert th
tighten
The tramust beaPageâ 3
To pre
Pour 1 liII and start Empty ( D) or Spin programme
Technic
ʑ
Dimen 600 x 60
ʑ
Weight 84,5 kg
ʑ
Power s
Nominalâ V, 50 Hz
Max. cu
Max. was
Max. dryin
ʑ
Water p 1001000 k
ʑ
Drain 60100 c
ʑ
Test progra Accordin
7
Care
Mac
W
D
I
D
Cle
... if it co
1. Pull ou
onâ theâ insert and re
2. Remo
3. Clea
4. Refit th
guideâ pin).
5. Insert th
6. Leave th
Drum
Leave th
Rust
Desc N
This
instruction
from our we
After-sal
ʑ
If aOperating What ,
pleas
visit from
ʑ
The
ʑ
Please g
(FD) of th
Product n
You will fi
on
service fla
*depending
ʑ
Rely on the Please c
This
equip
Risk of elec
Pull out the
Risk of ex
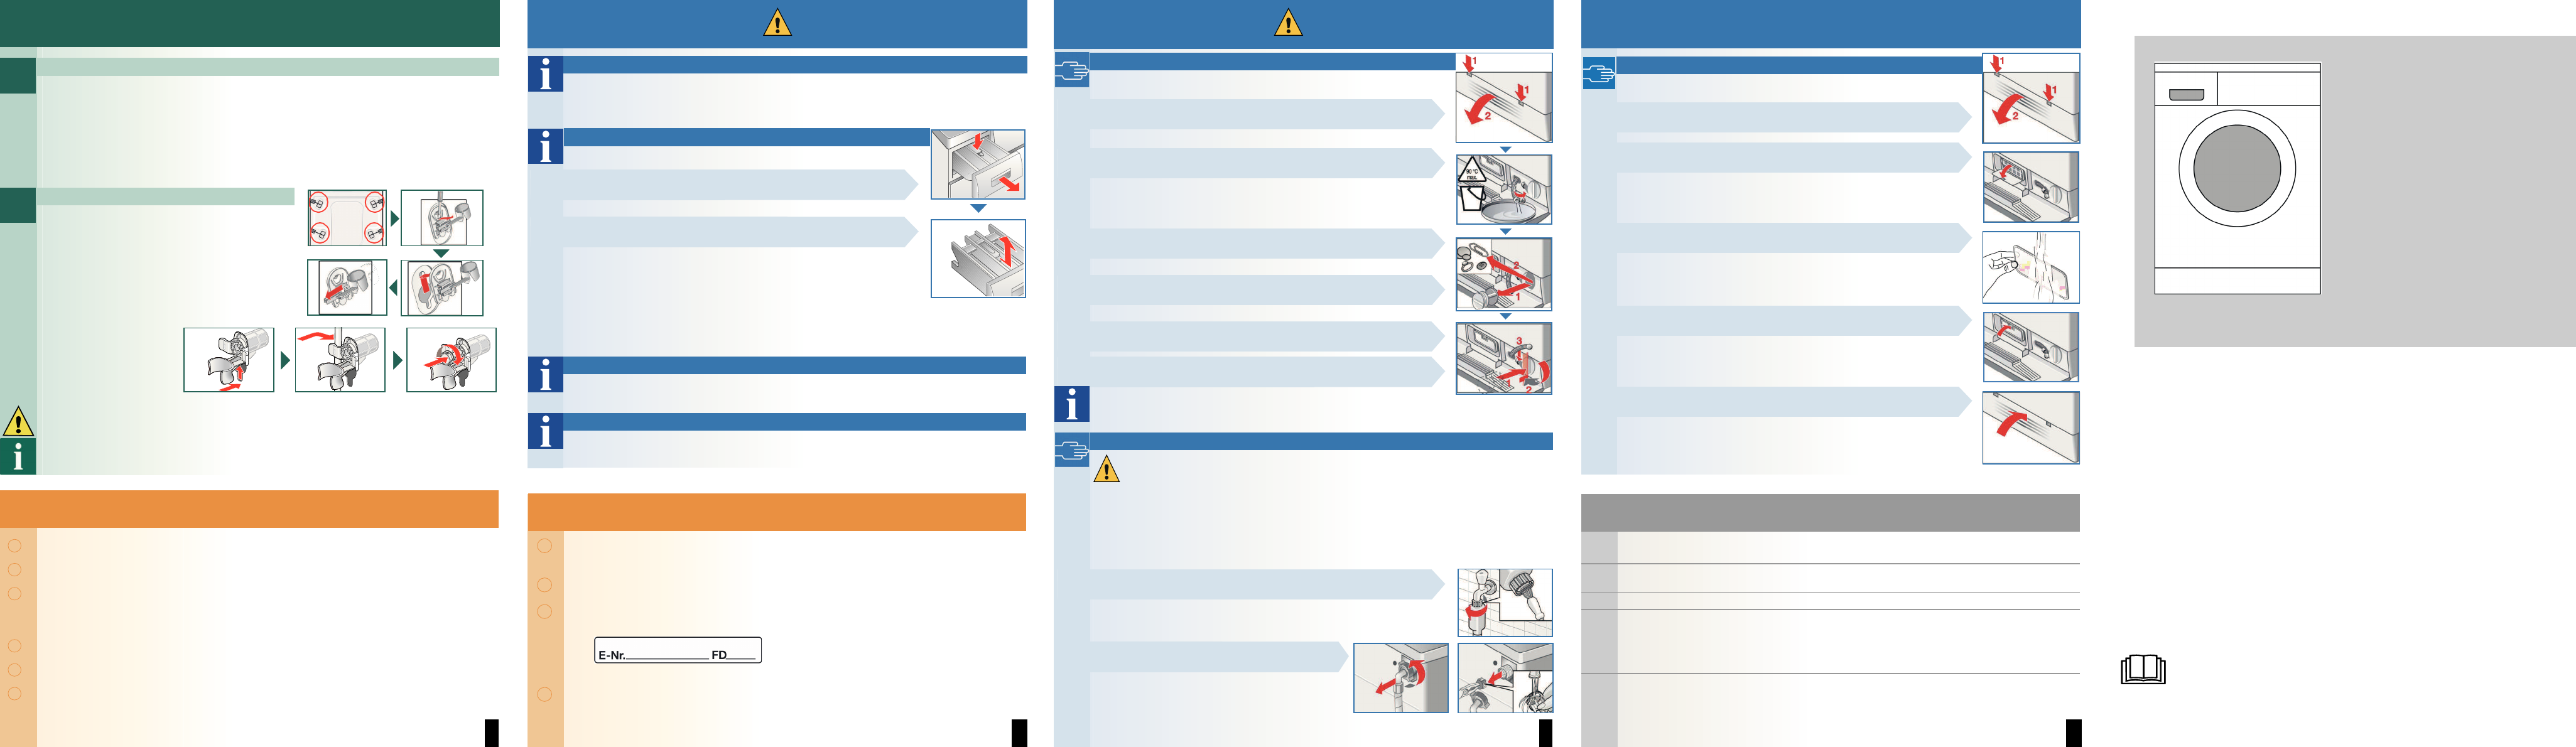
8
Maintena
D
SOff ,
1. Op
2. Rel
Rem
solutio
3. Rem
insid
4. Cle
andâ pumphou
5. Attach
Plac
6. Plac
To
the nII and s
the S pr
with d
Filte
Risk of electr
Do not im
Reduce t
1. Turn
2. S Spin or Empty( Drain)).
3. ToucStart button an
4. Set O. Dis
Clean the
1. Dep
Cle
and/or on st
Rem
us
2. Rec
is tigh
Risk of
Allow d
Turn o
9
Maintena
A
SOff ,
1. Op
2. Rem
3. Cle
4. Plac
5. Plac
Aqu for appliances w
In
to
1. If
us
2. The l
3. A cl
cor
instal
Ou
conne
4. Ap
neces
The tap should only be tu
holid
Co
ʋ Safety .
ʋ Environ
ʋ Scope
ʋ Installa . . . . . . . . . .
ʋ Hose . . . . . . . . . . .
ʋ Built- . . . . . . . . . . . . . . . .
ʋ Rem . . . . . . . . . .
ʋ Water . . . . . .
ʋ Align . . . . . . . . . . . . . .
ʋ Electric .
ʋ Transp
ʋ Tech
ʋ Care . . . . . . . . . . . . . . . .
ʋ After-s .
ʋ Mainten 8/9
ʋ Aqua- . . . . . . . . . . . . . . . .
Washer dr en
Read these
Also follow
Retain all d
Ins
ins