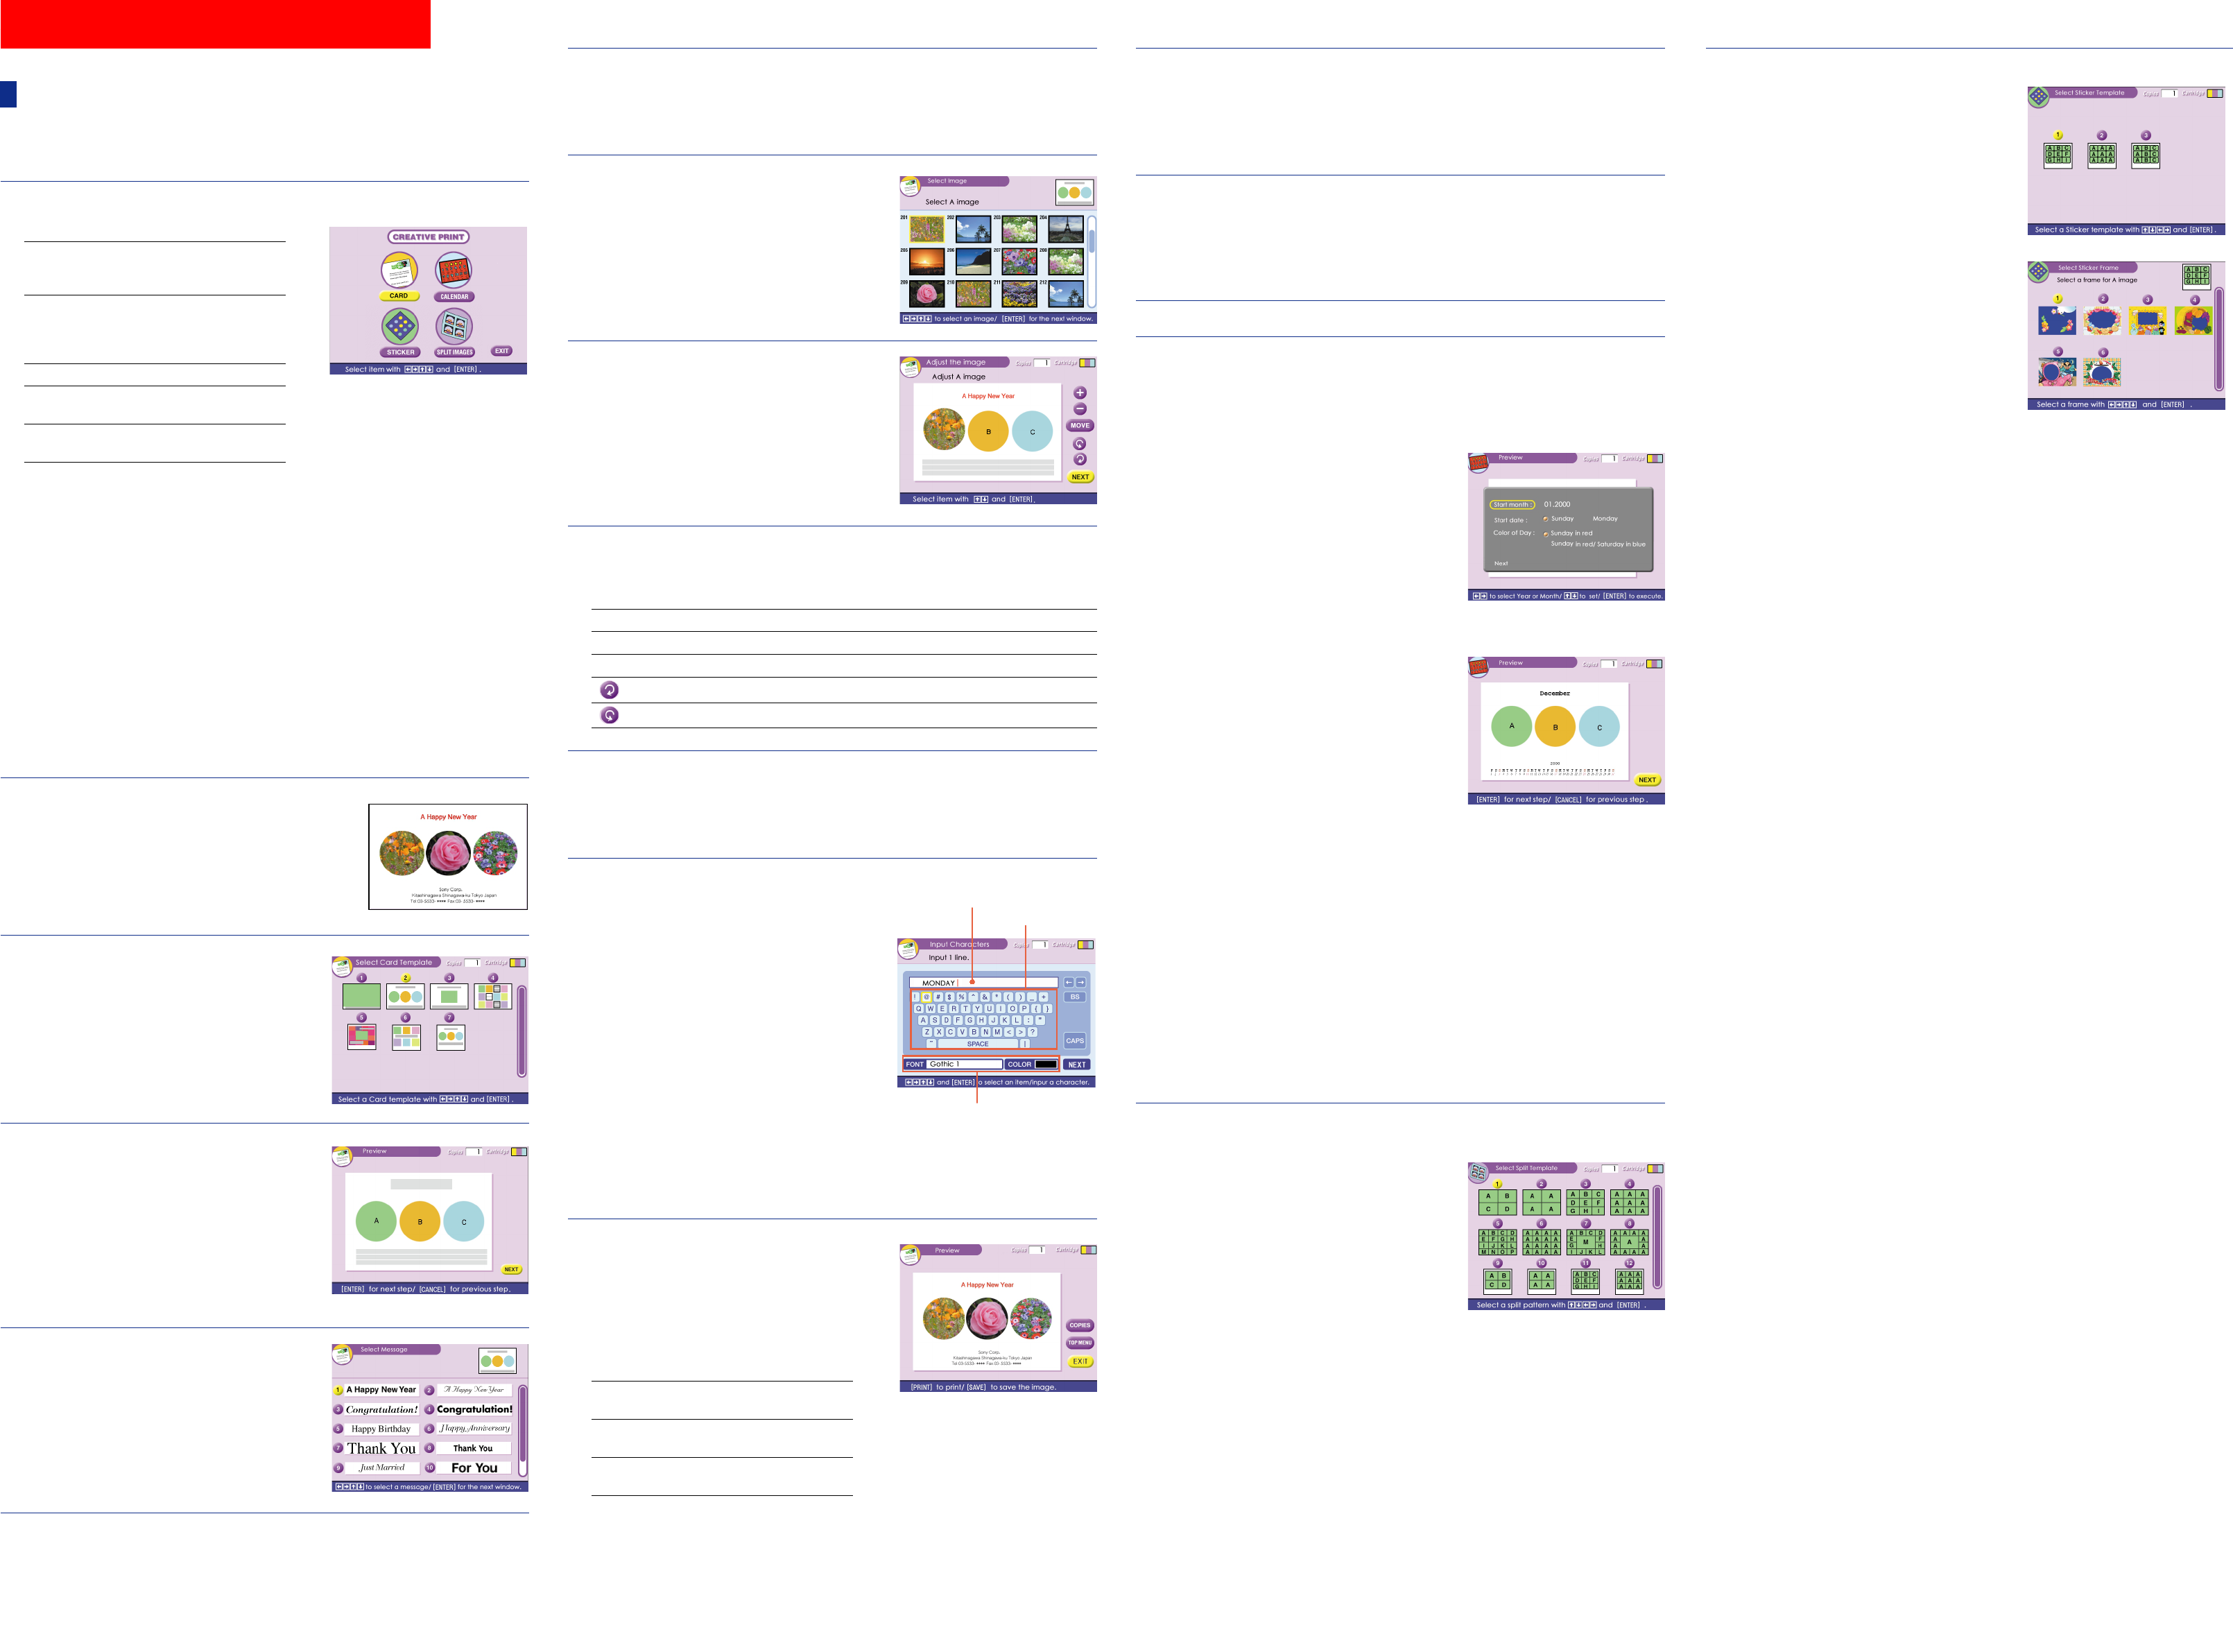
Using CREA
Making various prints
Y
screen will guide you to complete a print.
1 Pr
The CREA
CARD Adds a selected greeting and
your input message to make
an original card.
CALENDAR Add a calendar of selected
month(s) to an image or
images to make an original
calendar.
STICKER Makes 9-split images sticker.
SPLIT IMAGES
Makes 4-split or 9-split
images print.
EXIT Exits the CREATIVE PRINT
menu.
T
Press CANCEL. The scr
preceding pr
If it is difficult to r
procedur
menu is displayed. If this occurs, start from the
beginning.
Note
When you cancel operation or exit the CREA
PRINT menu without pressing SA
created image, the cr
T
Y
“Beep” settings during the CREA
Y
“Auto Fine Print.” The settings before the CREA
PRINT is selected are ef
Making a car
Y
images and make an original card like the one
shown to the right.
2 PrB/b/V/v ) button
to move the cursor to “CARD”,
then pr.
The Card templates ar
3 PrB/b/V/v ) button
to move the cursor to the desir
template (2 ), then pr
The preview of the selected template (2) is
displayed. The preview allows you to check the
preceding pr
T
Press CANCEL
preceding pr
4 Pr
The window for selecting a greeting is displayed.
5 PrB/b/V/v ) button to move the cursor to the
desir1 ), then pr
The color selection window for the greeting (1) is displayed.
6 PrB/b/V/v ) button to move the cursor to the
desired color
The preview reflecting your selections up to the pr
The greeting is displayed in the selected color
7 Insert the “Memory Stick” or PC
card into the printer and pr
ENTER.
The thumbnail list for selecting an image is
displayed.
8 PrB/b/V/v ) button
to move the cursor to the desired
image, then pr
The window to adjust the image position is
displayed.
9 PrV/v) button to move the cursor to the desir
adjustment item, then press ENTER.
T
+ Each time you press ENTER, the image is enlarged.
– Each time you press ENTER, the image is reduced.
Move Move the picture with B/b/V/v , then press ENTER.
Each time you press ENTER, the image rotates 90° clockwise.
Each time you press ENTER, the image rotates 90° counterclockwise.
10PrV/v ) button to move the cursor to “NEXT
then press ENTER.
Repeat steps 8 through 10 until you select and adjust the r
character input window is displayed.
11Input characters.
Press the arrB/b/V/v ) button to move the
cursor to the desired item, then pr
input a character
1 Select the font in the “FONT” box and the
color in the “COLOR” box.
2 Select a character in the character table.
The selected character is input in the selected
font and color in the input box.
T
Select “B ” or “b ” on the screen to move the
cursor in the input box after the character you
want to delete. Then select “BS.” The character
before the cursor is deleted. Input the new
character
Note
Y
line.
12PrB/b/V/v ) button
to move the cursor to “NEXT
press ENTER.
Repeat steps 1
lines. When you finish, the preview of the
created print is displayed.
By selecting the following button in the window
you can do:
COPIES Press ENTER to set the printing
quantity.
TOP MENU
Returns to the CREATIVE PRINT
top menu.
EXIT Exits the CREATIVE PRINT
menu.
Note
A
button will be deleted.
Set the month and day for a calendar
Making a sticker
When you select “STICKER” in the CREA
PRINT menu, you can add a frame to each 9-split
image to make a 9-split images sticker
1 Do the following steps in “Making a card” to
select a template. In step 2, select “STICKER.”
1 c 2 c 3 c 4
The window for selecting a frame is displayed.
2 Press the arrB/b/V/v ) button to move the
cursor to the desired frame, and pr
The thumbnail list for selecting an image is
displayed.
3 Press the arrB/b/V/v ) button to select an
image, and press ENTER.
The preview is displayed. The selected image is
inset in the selected frame.
4 Do the following steps in “Making a card” to
adjust the image position and print the framed
image:
9 c 10 c 13 c 14
T
Press SA
menu. The created image is saved in the “Memory
Stick” or PC card.
Note
A
button will be deleted.
9-split sticker with framed images
Character input box
font (5 fonts available)
and color boxes
Character table
13Press PRINT
Printing starts.
T
Press CANCEL. When multiple copies ar
will be canceled.
14Press the arrB/b/V/v ) button to move the cursor to “EXIT
then pr
The CREA
Note
The created CARD image that is not saved with the SA
Making a calendar
When you select “CALENDAR” in the CREA
PRINT menu, you can add a selected calendar to
an image or images to make an original calendar
1 Do the following steps in “Making a card” to
select a template. In step 2, select “CALENDAR” .
1 c 2 c 3 c 4
The window for setting a calendar is displayed.
2 Set the first month and the year starting the
calendar
Press V/v to select “Start month” and prB/b
to move the cursor to the year
press V/v. In the
press ENTER.
3 Set the day starting the week (placed to the most
left in a calendar).
Press V/v to select “Start date” and prB/b to
move the cursor to “Sunday” or “Monday
Then press ENTER.
Some templates do not have the “Start date”
setting.
4 Set the color of days.
Press V/v to select “Color of Day” and prB/b
to move the cursor to “Sunday in red” or “Sunday
in red/Satur
Then press ENTER.
5 Press the arrB/b/V/v ) button to move the
cursor to “NEXT
The preview of the cr
6 Do the following steps in “Making a card” to
select and adjust an image, and print the
calendar:
7 c 8 c 9 c 10 c 13 c 14
T
Press SA
menu. The created image is saved in the “Memory
Stick” or PC card.
Note
A
button will be deleted.
Making a split print
When you select “SPLIT IMAGES” in the
CREA
with 4-split, 9-split, or 16-split images.
Do the following steps in “Making a card” to select
a template, select and adjust images for all the split
planes, and print the created split images. In step
2, select “SPLIT IMAGES.”
1 c 2 c 3 c 4c 8 c 9 c 10 c 13 c 14
T
Press SA
menu. The created image is saved in the “Memory
Stick” or PC card.
Note
A
button will be deleted.
Preview of your calendar selections