Quick S
NW
©2015 Sony Corpor Printed in Malaysia
Co
Please check the items in the package
W
USB cable (1)
Leather Carrying Case (1)
Spacer (1)
Quick Start Guide (this manual)
Headphones and microSD Car
Abou
case
This product is made of genuine leather
leather may have scra
case has a unique appear
Wr
storing may leave headphone cor
When using cleaner
inconspicuous part first.
Do not use any type of solvents such as alcohol or thinner f
Doing so will cause color f
damage the leather carrying case.
Moisture such as r
migration t
Do not use or stor
sunlight (such as in a car),
or dust.
Be careful tha
button of the leather carrying case when you put the W
it from the case
About the manuals
T
acc
http://rd1.sony
While browsing is fr
carrier contr
Regarding the basic oper
Important Information,
section on this manual.
Abou
countries/
European Direc
An alarm (beep)* and warning [Check the volume level] ar
prot
level for the first time.
[OK] on the alert dialog.
* The alarm (beep) does not sound when conne
device.
Note
Y
alarm and warning.
After the initial warning,
cumulative hours that the volume is set beyond the specific level;
happens,
If the volume is set beyond the specific level and you turn off your W
the volume returns t
Init
1 Use the supplied USB cable t
W
the W
Y
Note
If a large batt
you are char
remaining char
W
start automatically aft
about 10 minutes.
It takes about 4.5hours t
T
six months or every year.
2 If the USB connect
to quit the scr
initial settings.
The language selection scre
* Depending on where you pur
selection screen may no
3 Select the desir
display the End User License Agr
4 Make sur
the license agr
The initial setup scr
5 T.
The screens and illustr
shown are f
and may differ fr
actual product or scr
6 Select the desir
4-54511 (1)
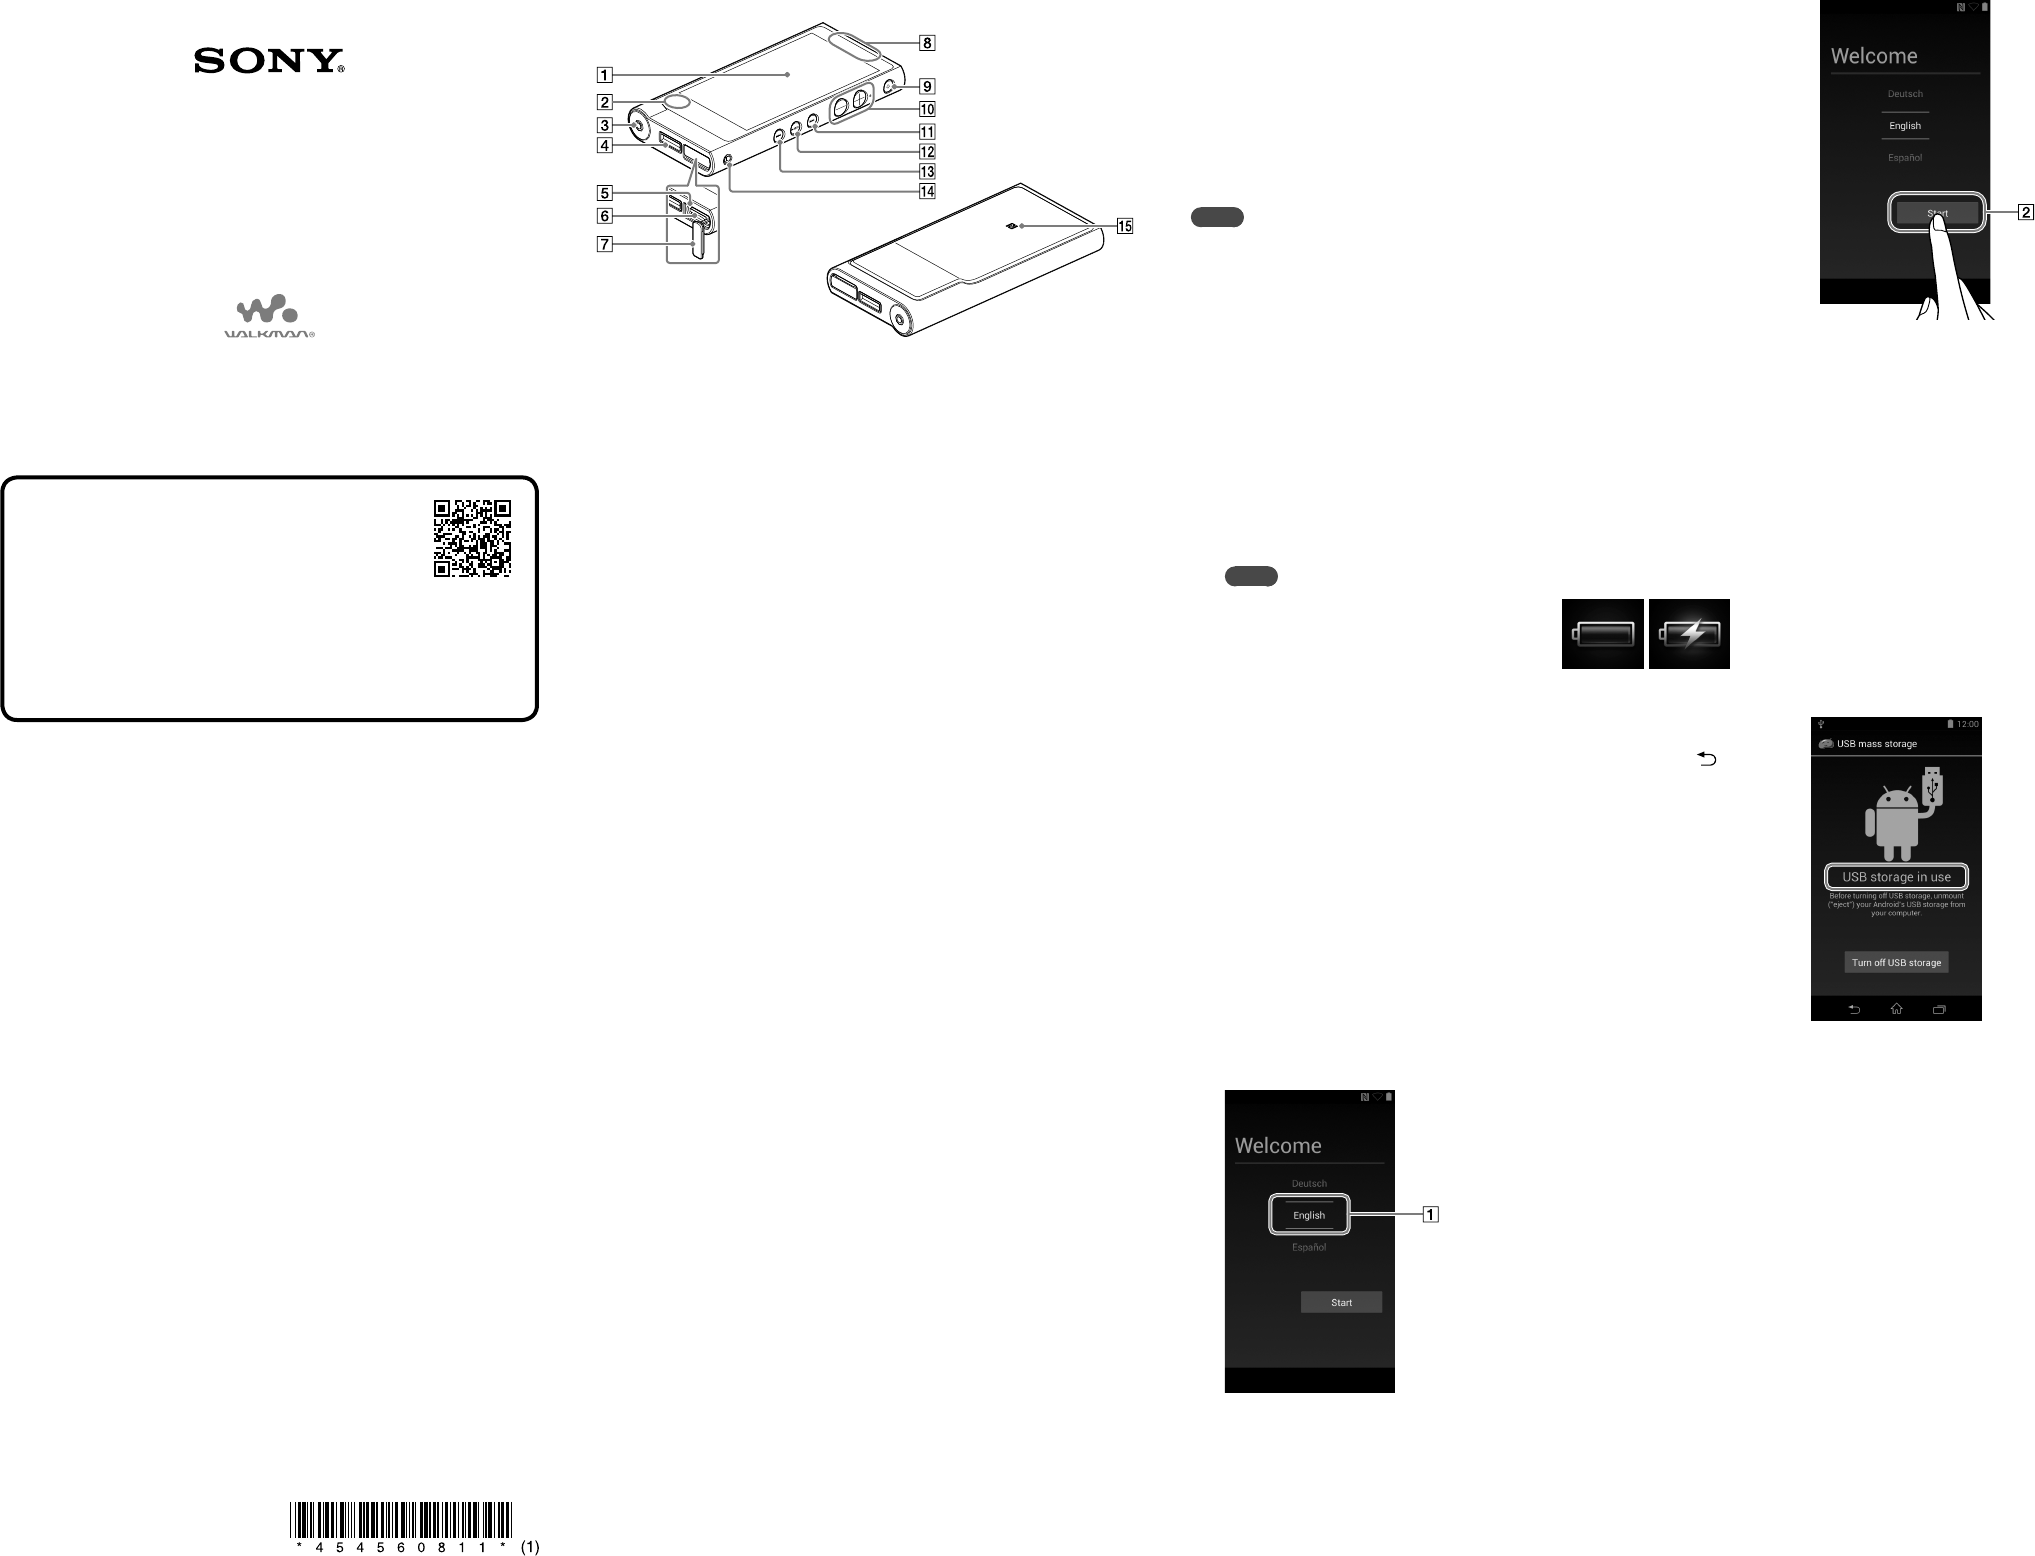
Par
Screen (t
T
Built-in micr
Headphone jack
Push the headphone plug all the way in.
connect
Sound is not emitted fr
jack when a Bluetooth c
connection.
WM-PORT jack
Connect the USB c
WM-PORT (not supplied).
Acc
The acc
microSD c
The microSD c
the cover befor
car
W
microSD c
Built-in ant
Wi-Fi,
(P
Pr
turn the screen on/off
the button for about 8 sec
V
Pr
down the volume.
There is a tactile do
opera
(Ne
Skip to the next song,
minutes later
fast
(Play/P
Play back or pause songs or videos.
There is a tactile do
(Pr
Skip to the previous (or curr
a scene that played 5 minut
songs or videos are f
Str
This is used to attach a str
N mark
T
mark.
7 T to begin using your W
8 Se acc
and date/time
instructions shown on the scr
Hint
Wi-Fi connection and Google ac
How to Install and R
Install the
of your W
transf
1 Connect your W
2 Make sur
the scr
Hint
If [USB connecte
3 Open the following f
ex
Windows 7 or earlier:
WINDOWS] – [Help_Guide_Installer(.e
Windows 8:
– [W
Windows 8.
[FOR_WINDOWS] – [Help_Guide_Installer(.e
Mac:
for_mac].
4 F
installation.
5 T
the alias icon gener