3.3 Manual clock setting (normal time)
• While the clock is in normal display mode ( D1 ) Press and hold the CL
the Y
• Set the following information in the order listed below:
Year > Month-Da
> Seconds ( reset to zer
selection
• T
the CLOCK butt
is required and to skip ahead.
Note:
• If no entry is made, the clock will automatically exit the clock setting mode after 30 sec.
• Language selection for day of week: English (GB), French (FR), German (DE), Spanish (ES), and
Italian (IT)
4. HOME TIME/CI
4.1 Home time/city
• Press the MODE button until the home time “
” is displayed ( D2 ). The default home city is
Washington ( W
• T
• Press the
MODE button.
Please refer to the following table for the selection of cities, including city abbr
difference to UT
4.2 World time/city
• Press the MODE button until the world time“
” is displayed ( D3 ).
• T
eastward or westwar
Please refer to the following table for the selection of cities, including city abbr
difference to UT
City icon City Time difference
UTC
DST
LIS Lisbon 0
LON London 0
BCN Barcelona +1
PA Paris +1
BRU Brussels +1
AMS Amsterdam +1
BRN Bern +1
MIL Milan +1
OSL Oslo +1
CPH Copenhagen +1
ROM Rome +1
BER Berlin +1
PRG Prague +1
VIE Vienna +1
STO Stockholm +1
AT Athens +2
HEL Helsinki +2
JNB Johannesburg +2
IST Istanbul +2
CAI Cairo +2
JRS Jerusalem +2
JED Jebbah +3
THR T +3:30
MOW Moscow +4
DXB Dubai +4
KBL Kabul +4:30
KHI Karachi +5
MLE Male +5
DEL New Delhi +5:30
DAC Dhaka +6
RGN Yangon +6:30
BKK Bangkok +7
KUL Kuala Lumpur +8
SIN Singapore +8
HKG Hong Kong +8
BJS Beijing +8
TPE T +8
SEL Seoul +9
TYO T +9
ADL Adelaide +9:30
SYD Sydne +10
GUM Guam +10
NOU Noumea +11
WLG W +12
PPG Pago Pago -11
HNL Honolulu -10
ANC Anchorage -9
YVR Vancouver -8
SFO San Francisco -8
LAX Los Angeles -8
DEN Denv -7
MEX Mexico City -6
CHI Chicago -6
MIA Miami -5
TOR Toront -5
WAS Washington -5
NYC New York City -5
CCS Caracas -4:30
YYT St. Johns Newfoundland -3:30
RIO Rio de Janeiro -3
RAI Praia -1
T
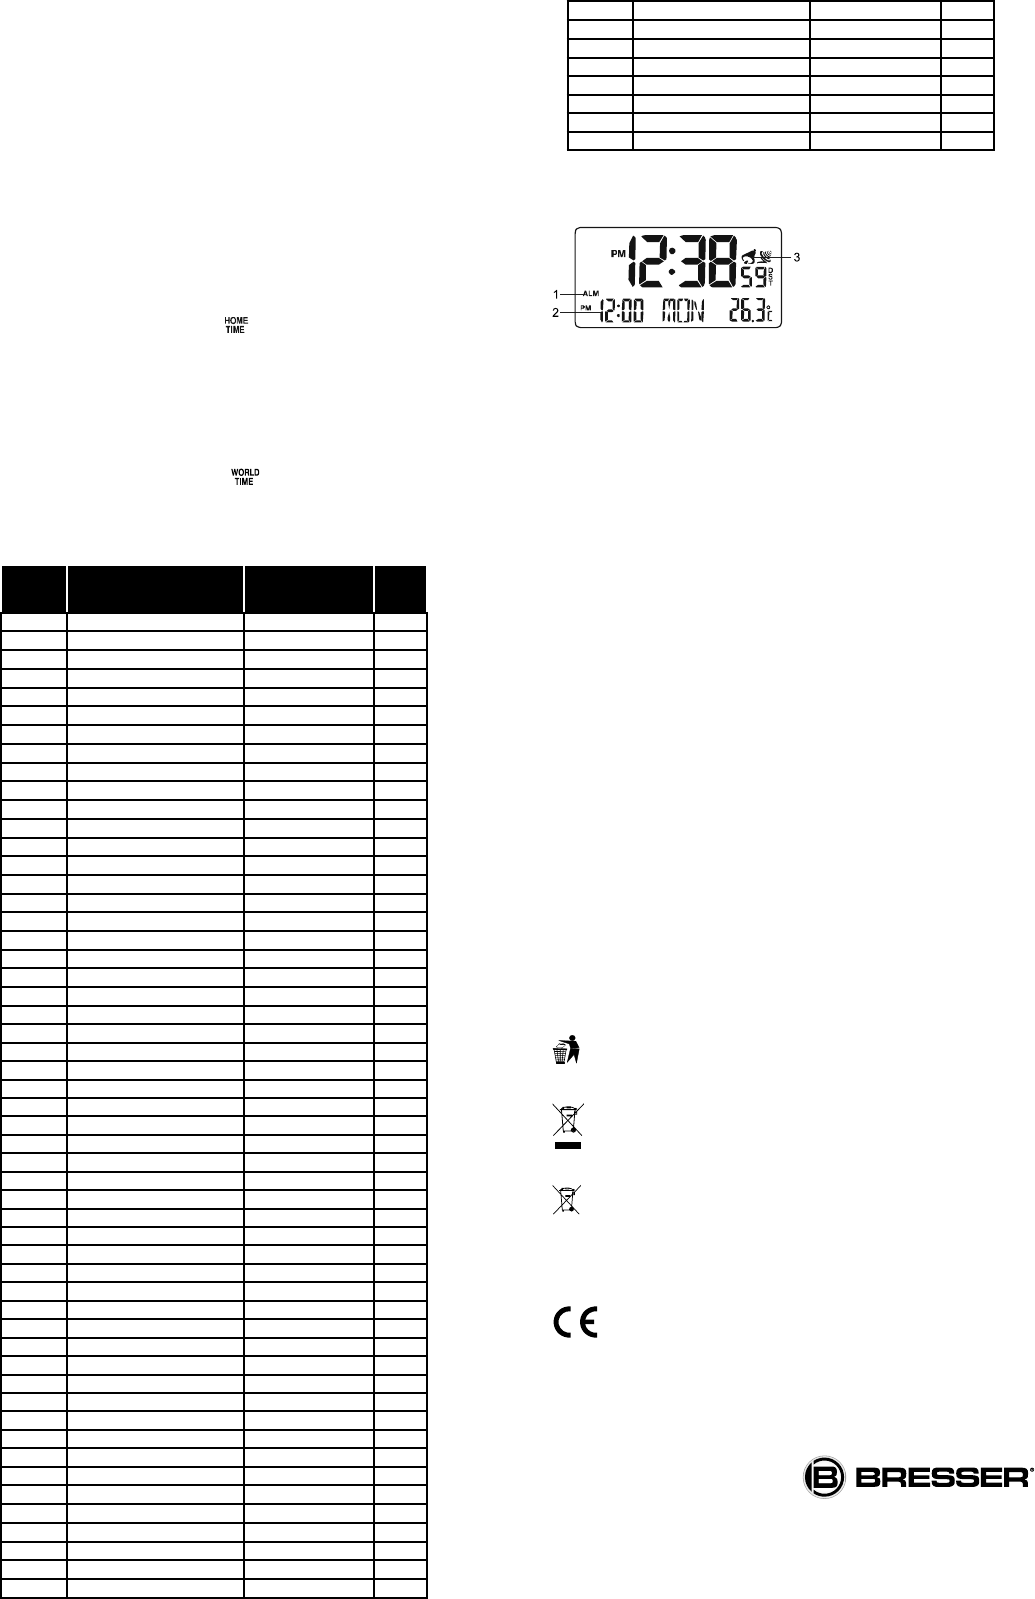
5. ALARM
1.
2.
3.
1. Alarm time mode
2. Alarm time
3. Alarm on Icon
5.1 Setting the alarm
• Press the MODE button until the normal time is displayed ( D1 ).
• Press and
• Set the alarm time in the following order as listed’ > Hours > Minutes
• Press UP or DOWN buttons to set the time, hold these butt
respectively
Note: If no entry is made, the clock will automatically exit the alarm setting mode after 30 sec.
5.2 Using the alarm
• Slide the ALARM switch upward/downward to turn on /off the alarm, as indicated by the yellow or
black surface respectively
• The beeping will start at the alarm time and continue to beep for 60 sec. The alarm beeping will
automatically stop after this and start beeping again at the same time on the following day
• To snoo-
ing will resume after 5 minutes. The snoo
6. TEMPERA
The temperature is displa
switch between °C and °F readings.
Note: When the temperatur
displays “ Lo ” or “ Hi ” icon respectively
7. BA
When the LCD becomes dim, it indicates that the battery power is not enough. Y
with 2 AAA size batteries at once.
8. SUGGESTION AND TROUBLESHOO
Please make sure you r
this sophisticated instrument for the best reception performance. However
Atomic Clock tr
range before r
- If the unit has trouble receiving the signal, try a different location, ideally near a window
- Always place the unit away from interfering sour
- Avoid placing the unit on or next t
- Closed areas such as airport, basement, tower block, or factory are not recommended.
- Do not start reception in moving vehicles such as cars or trains.
- Electrical storms between may interfere with the DCF signal.
DISPOSAL
Dispose of the packaging materials properly
cardboard. Contact your local waste-disposal service or environmental authority for
information on the proper disposal.
Do not dispose of electronic devices in the household garbage! As per Directive 2002/96/
EC of the European Parliament on waste electrical and electronic equipment and its
adaptation into German law
recycled in an environmentally friendly manner
In accordance with the regulations concerning batteries and rechar
disposing of them in the normal household waste is explicitly forbidden. Please make sure to
dispose of your used batteries as required by law — at a local collection point or in the r
Disposal in domestic waste violates the Battery Directive. Batteries that contain toxins ar
with a sign and a chemical symbol. "Cd" = cadmium, "Hg" = mercury
EC DECLARA
Bresser GmbH declares that the device (World time alarm clock/Art.No.: 3510000) is in
accordance with applicable guidelines and corresponding standards of the 1999/5/EG
directive.
WARRANTY & SERVICE
The regular guarantee period is 2 y
guarantee terms as well as information on extending the guarantee period and details of our services at
www
Bresser GmbH
Gutenbergstr
Rhede, Germany
www
Irrtümer und technische Änderungen vorbehalten. · Errors and technical changes reserved. Manual_3510000_World-time-alarm-clock_de-en_LUFTHANSA_v112017a