TM3090-RF
1. In
This
o
stat (see
wil
ing ventilat
function
be l
T-
tected
or
p
ual does no
inv
conv
domestic use
2
3. P
T-
d
el
mus
on
the
re
th i v a a “
op
In
Firs•
us
dow c
Th•
lef
Th-•
ta
(3) at t
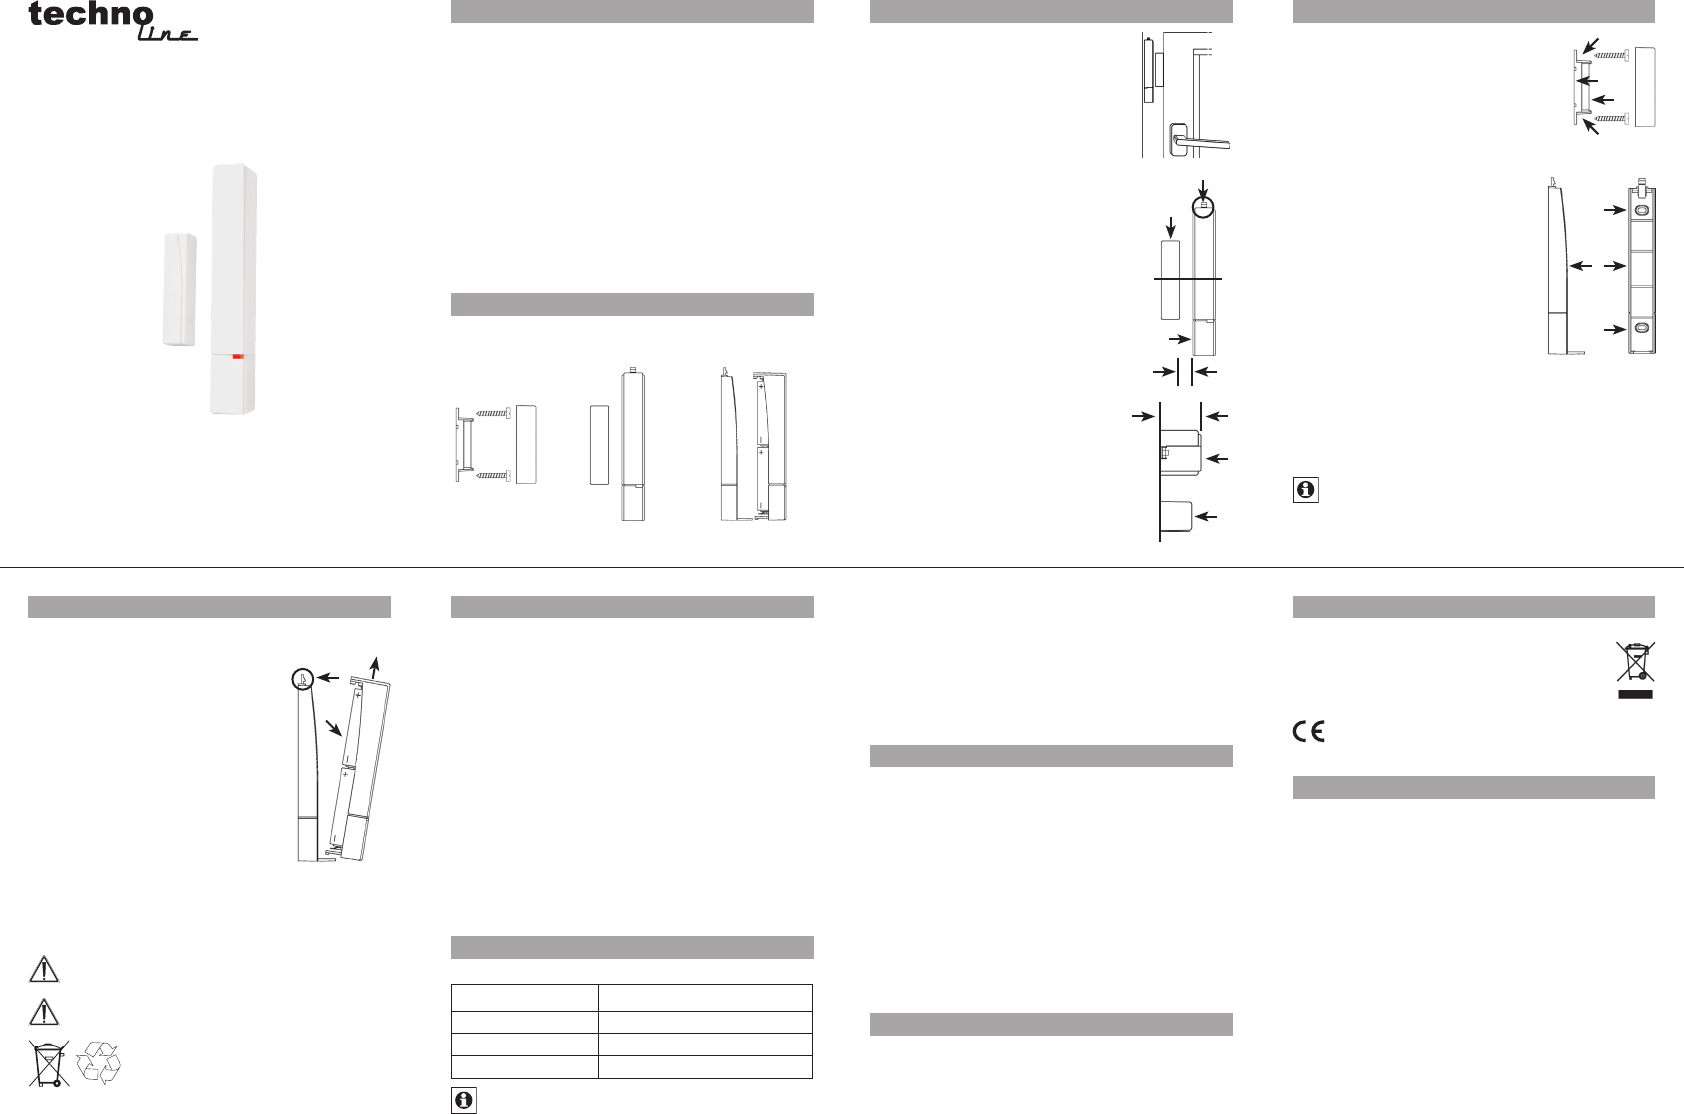
Distances:
T un•
(2) m n be an m th 8 mm
(A
Th•
mu
so th
Th•
mu
ali
4. I
Use •
tr
ali
If ne•
bo
net (1)
fr
•
Th
two w
Ad
Th•
win
Use t•
Sti•
the b
Th p th br o th•
fr
Sc
If •
the h
Use the co h s s to fa•
the e
O n c e f a s t e n e d , t h e m a g n e t ( 3 ) c a n b e i n s e r t e d i n t h e m a g -•
net b
Usi
For
le
or h
5. I
Th
batteries.
Pus•
Pull •
an at an angl (2), and rem it
fr
Ins ba (L•
A
of pa the
ar
Pla th up pa b o t•
b a i to l i
place.
Th alk
ie
op
If th
or c th in t the b n to b
replaced.
Neve re st b s
pre
Do n
Do n
Use b sh no be d
of
the
dis
6. Teac
T ra co t co w o
anoth
con
ra
Th•
st
p r
Foll•
sig
clo
If ha•
ca
re t ag on an pl note
tha bat have b
or
Wh•
lig
A
ato
7
Th
Fl Meaning
1 Con
2x fla Co
3x fla Re
If, whi
dow
dete
em
sig
Af
ta
ge
ted
ha
tra
fla
8
R t i p o a n
tra
of
moto
why in
Th ra of tr wi bu ca d
gre
powe
env
an
T
thi
oth
de
ww
9. S
Th
wit
as th
Do not op
en
a
10. D
Do n
waste
Ele dev m b dis of i ac-
co
Equ
el
Th
sive
proper
18. Tech
Su 3 V
Bat 2x LR
Bat Ap
(win
2 hou
T
Ra
in op 30 m
Hou
Ele 1
Mag 12 x 48 x 12 mm (
We re
t
Ple
the de
ca
El
2
Wi
1 2
Magnet
1
2
A
C
1
3
B
2
1
a
a
1
3
a
a
2
1
2
3
Is
Documentation
Al
CC
5
2
6
3
7
4
8