– 8 –
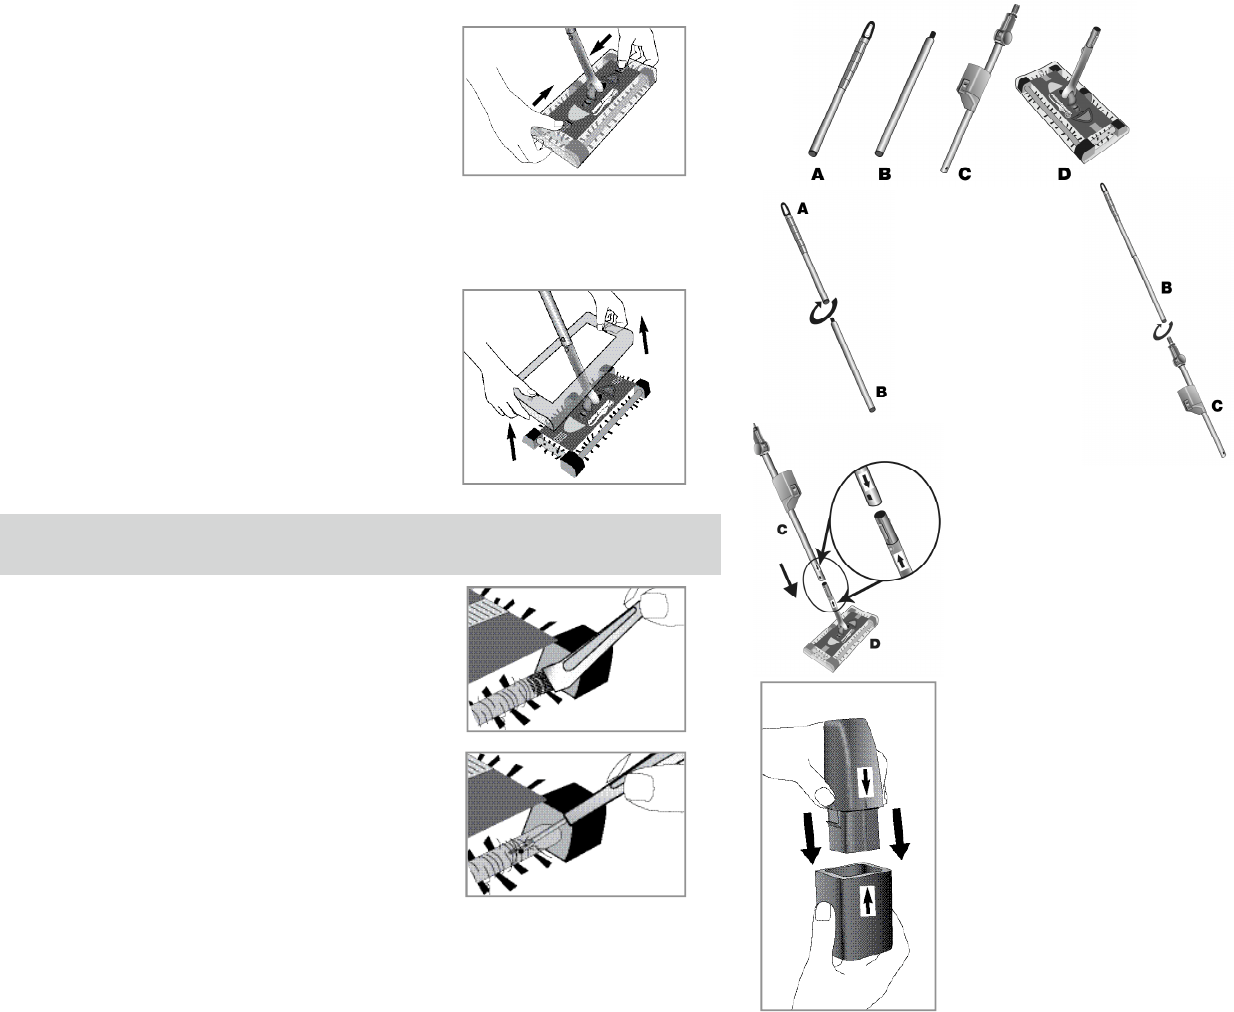
TO ASSEMBLE SWIVEL SWEEPER:
A. Upper Pole
B. Middle Pole
C. Lower Pole
D. Sweeper Head
Align the arrow on "Pole C" with the arrow
on "Sweeper Head D." When arrows are
aligned, pole will easily slide onto Sweeper
Head. Then push firmly together until pole
locks into place.
Step 3)
Step 1)
– 5 –
IMPORTANT MAINTENANCE & CARE:
As with any rotating brush cleaning device,
Swivel Sweeper’s four cleaning brushes
will accumulate fine debris such as hair,
thread and other particles. To maintain
optimal sweeper performance, clean the
sweeper’s rotating brushes of hair and
debris and its "Air Filter" of dust and dirt as
necessary following the directions below.
Step 1) Make sure the Swivel Sweeper is turned OFF and remove
the battery to ensure unit does not accidentally turn on.
Step 2) Unlock the "Tinted Outer Body
Frame" by sliding the two "Outer Body
Frame Lock Clips" inward towards the pole
(SEE FIG. 8).
Step 3) Next, lift the "Tinted Outer Body
Frame" up and over the aluminum pole to
remove it. The four rotating brushes are
now completely exposed (SEE FIG. 9).
CAUTION: Brush Cleaning Tool has sharp tip and ripping
blade. Avoid contact with tip and ripping blade.
Step 4) Use the comb side of the "Brush
Cleaning Tool" to pull up and loosen
tangled debri s . Simply guide the bl a d e
along the shaft of the "Rotating Cleaning
Brushes" (SEE FIG. 10).
Step 5) Use the other end of the "Brush
Cleaning Tool" to cut and remove tangled
debris. Simply guide the blade along the
shaft of the "Rotating Cleaning Brushes"
(SEE FIG. 1 1 ) . Dispose of debris in
garbage.
FIG. 10
FIG. 8
FIG. 9
FIG. 11
Screw "Pole A" onto
"Pole B" until secure.
Screw "Pole B" onto
"Pole C" until secure.
Step 2)
CHARGING YOUR BATTERY:
Step 1) Plug the "Battery Charger" into a
standard electrical outlet as below:
UL/cUL 120V AC 60Hz
TUV/UK 220-240V AC 50/60Hz
S t e p 2) Align the arrow on the "Rechargeabl e
B a t t e ry" with the arrow on the "Battery Charger. "
Then, insert the "Rechargeable Battery" down into
the "Battery Charger" (SEE FIG. 1 ) . N OT E : R e d
light on the front of the "Battery Charger" should
t u r n on to indicate that the battery is charging.
FIG. 1