Babytalker 3600www.topcom.netThis product is in compliance with the essential requirements and other relevant provisions of the R&TTE directive 1999/5/EC. The Declaration of conformity can be found on: http://www.topcom.net/cedeclarations.aspMD10600412 ECO V1.0
1
BABYTALKER 3600
1Getting started
Thank you for purchasing this TOPCOM product. This
product has been designed and assembled with utmost
care for you and the environment. Because we at
TOPCOM like to think of the future of our planet and our
children, we aim to do our best to help saving the
environment. This is why we decided to reduce the
number of pages of our user guides and product manuals.
If you keep in mind that it takes up to 24 trees to produce
1 ton of paper, publishing product manuals in many
languages costs our planet a lot of trees. In this short manual provided with
your TOPCOM device you can find a brief explanation of how to install and
use your TOPCOM device.If you would still like to discover all the features
of your new TOPCOM device, please visit our website (www.topcom.net)
where you can download the complete user manual in your language. By
doing this TOPCOM hopes to do its share to make our planet a better place,
but we can only succeed with your help!
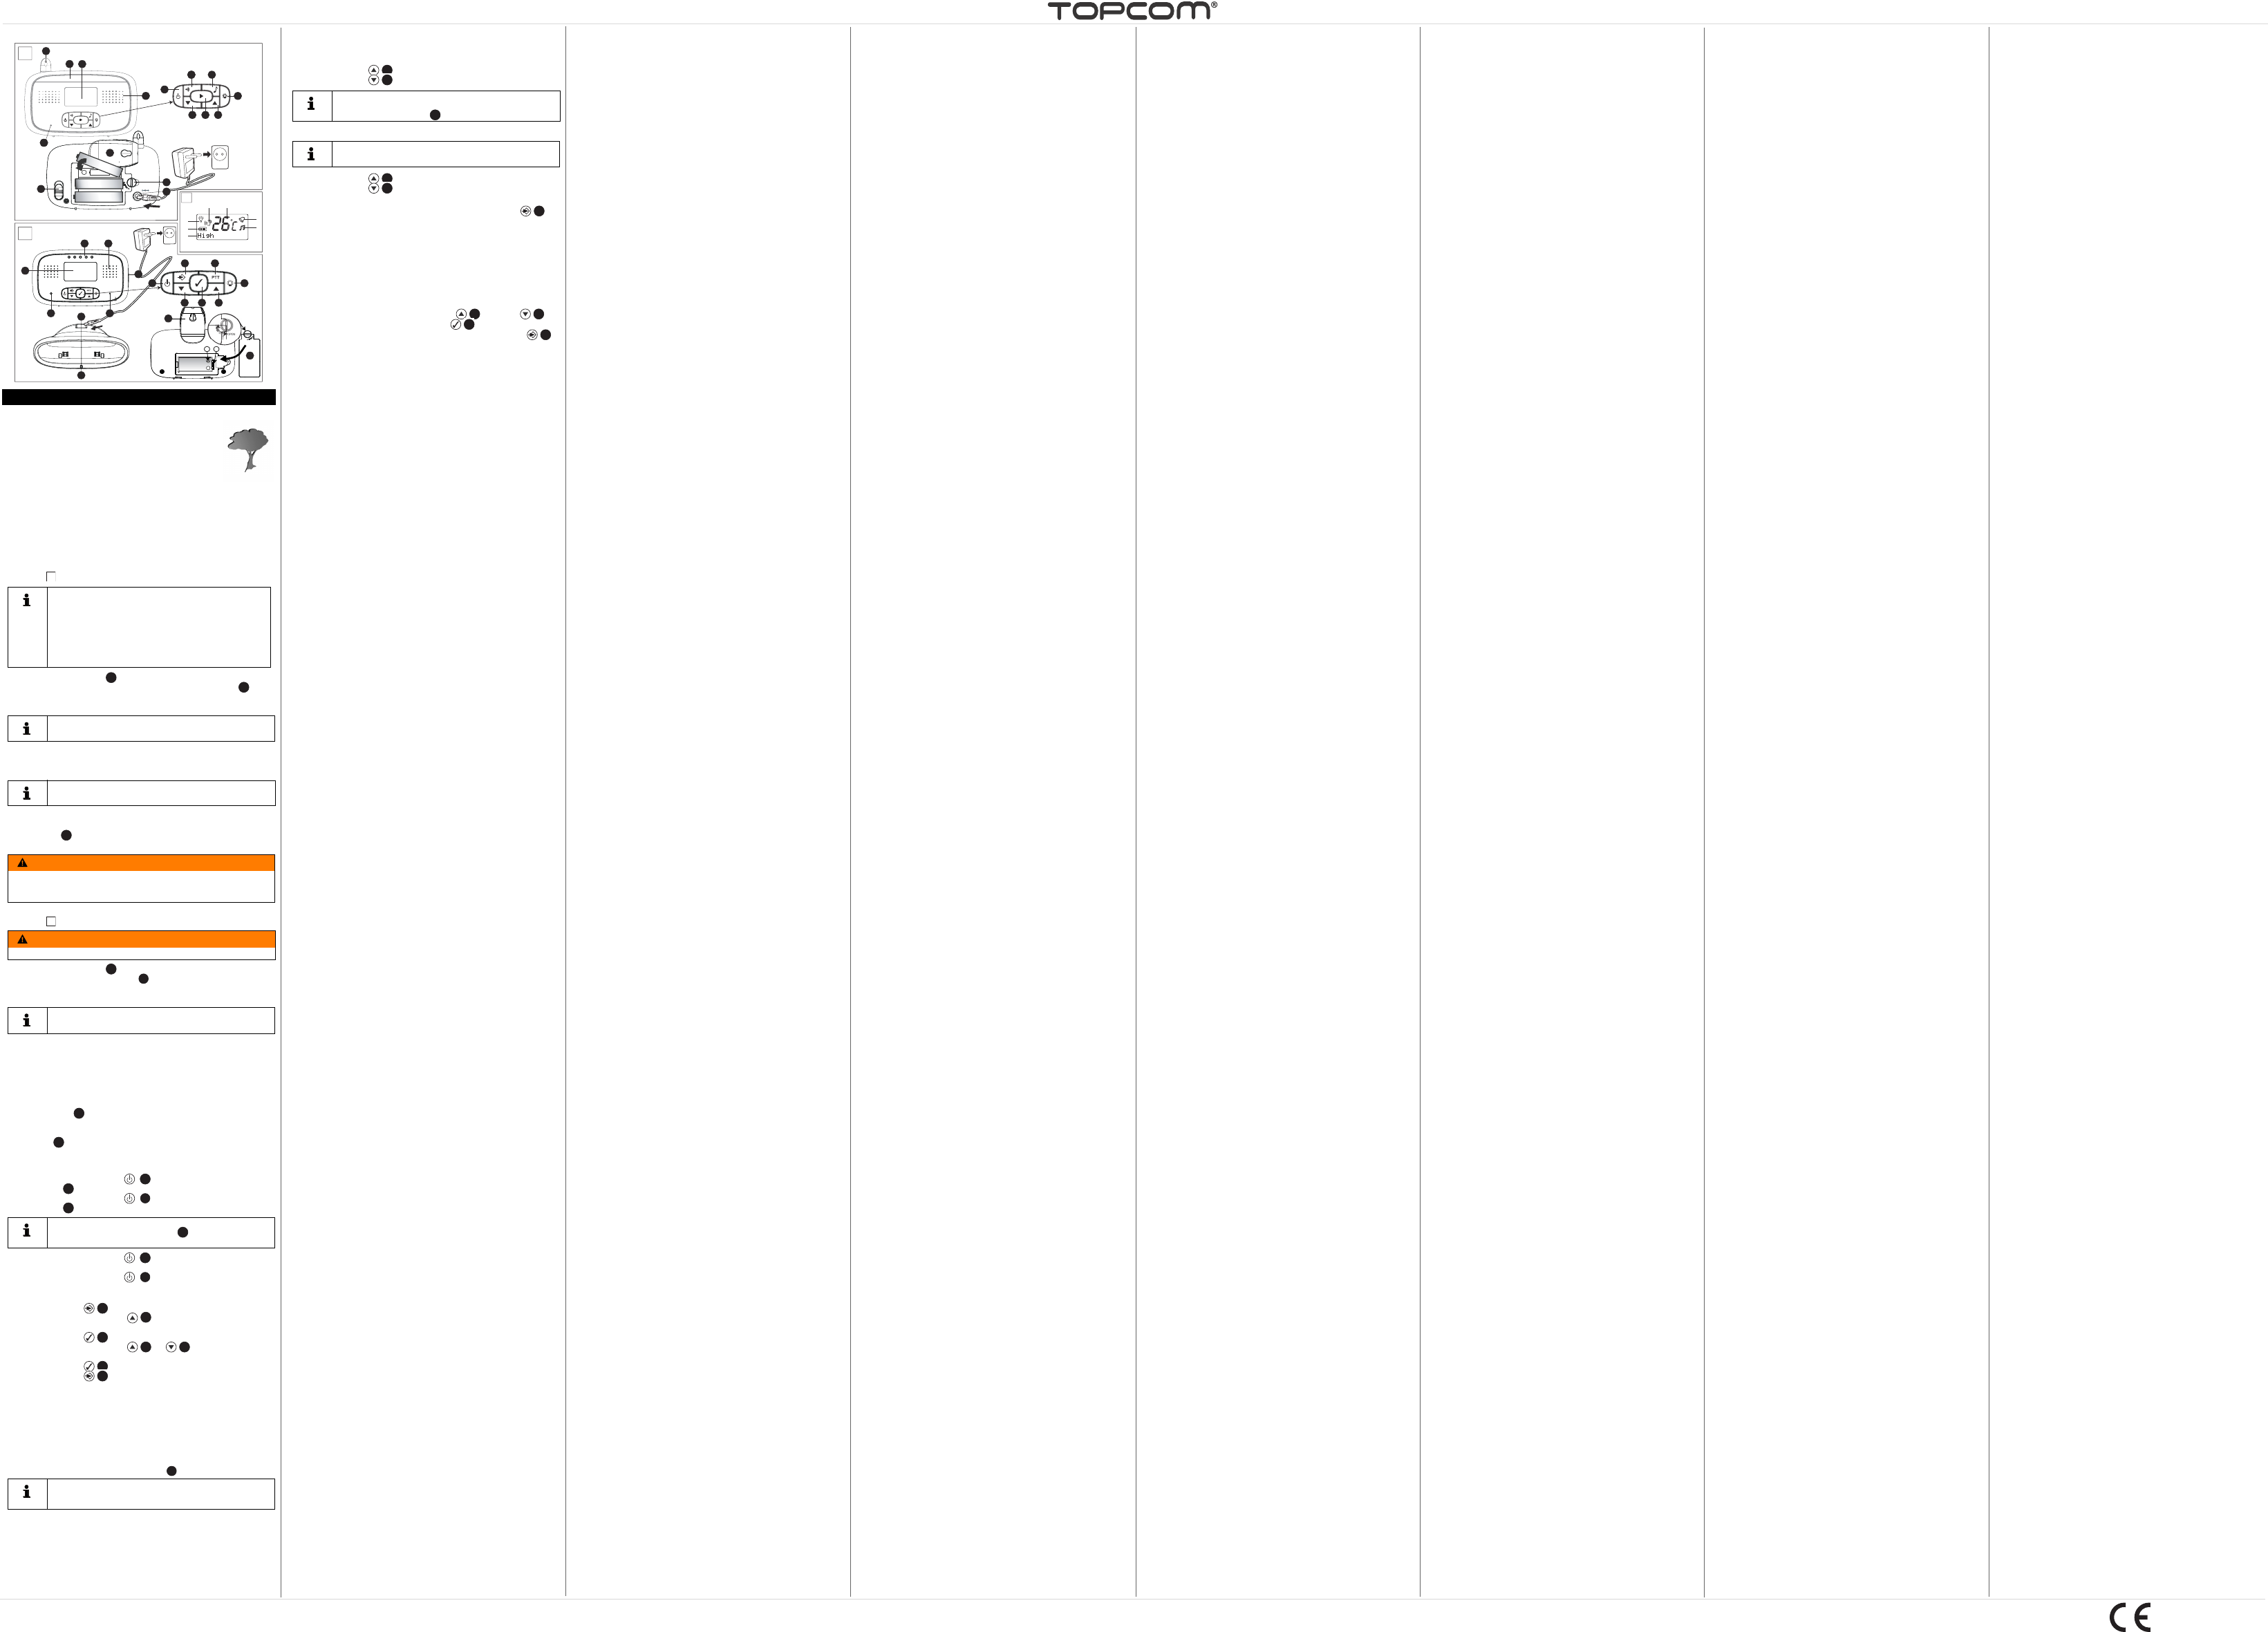
1.1Installing Batteries in the Baby Unit
See Figure on the fold-out page.
–Rotate the belt clip upward.
–Turn the screw on the cover of the battery compartment at the
back of the baby unit 90° counterclockwise and remove the
battery compartment cover.
–Fit three AA alkaline cells (LR06/Mignon) in the battery
compartment. Ensure that the polarity is correct.
–Close the battery compartment.
1.2Connecting the Baby Unit to the AC Mains
Insert the small plug of the AC mains adapter in the mains power connector
of the baby unit and plug the AC mains adapter into a mains connector
(230 V / 50 Hz).
1.3Installing Rechargeable Batteries in the Parent Unit
See Figure on the fold-out page.
–Rotate the belt clip upward.
–Turn the screw on the cover of the battery compartment at the
back of the parent unit 90° counterclockwise and remove the
battery compartment cover.
–Place the NiMH battery pack in the battery compartment.
Ensure that the tab of the battery pack fits in the corresponding
recess and that the polarity matches the figure (B).
–Carefully close the battery compartment and rotate the belt clip
back downward.
1.4Installing the Parent Unit charging cradle
–Insert the small plug of the AC mains adapter in the mains power
connector of the charging station and plug the AC mains
adapter into a mains connector (230 V / 50 Hz).
–Place the parent unit in the charging station. The red Charging
LED will go on.
2Operation and Use
2.1Switching the Baby Unit and Parent Unit On and Off
–Press the On/Off switch to switch on the parent unit. The
display is activated.
–Press the On/Off switch to switch on the baby unit. The
display is activated.
–Press the On/Off switch to switch off the parent
unit (press and hold until the display goes blank).
–Press the On/Off switch to switch off the baby unit (press
Libble nimmt den Missbrauch seiner Dienste sehr ernst. Wir setzen uns dafür ein, derartige Missbrauchsfälle gemäß den Gesetzen Ihres Heimatlandes zu behandeln. Wenn Sie eine Meldung übermitteln, überprüfen wir Ihre Informationen und ergreifen entsprechende Maßnahmen. Wir melden uns nur dann wieder bei Ihnen, wenn wir weitere Einzelheiten wissen müssen oder weitere Informationen für Sie haben.
Art des Missbrauchs:
Forenregeln
Um zu sinnvolle Fragen zu kommen halten Sie sich bitte an folgende Spielregeln:
Lesen Sie zuerst die Anleitung;
Schauen Sie nach, ob die Frage bereits gestellt wurde;
Stellen Sie die Frage so deutlich wie nur einigermaßen möglich;
Erwähnen Sie was Sie bereits versucht haben um das Problem zu lösen;
Ist Ihr Problem von einem Besucher gelöst dann lassen Sie ihn / sie wissen in diesem Forum;
Falls Sie reagieren möchten, so verwenden Sie bitte das Antworten- Formular;
Da ihre Frage für alle Besucher sichtbar ist, sollten Sie lieber keine persönliche Daten erwähnen.
Neu registrieren
Registrieren auf E - Mails für Topcom Babytalker 3600 - KS 4236 wenn:
neue Frage gestellt werden
neue Handbücher vorhanden sind
Sie erhalten eine E-Mail, um sich für eine oder beide Optionen anzumelden.
Andere Handbücher von Topcom Babytalker 3600 - KS 4236
Das Handbuch wird per E-Mail gesendet. Überprüfen Sie ihre E-Mail.
Wenn Sie innerhalb von 15 Minuten keine E-Mail mit dem Handbuch erhalten haben, kann es sein, dass Sie eine falsche E-Mail-Adresse eingegeben haben oder dass Ihr ISP eine maximale Größe eingestellt hat, um E-Mails zu erhalten, die kleiner als die Größe des Handbuchs sind.
Ihre Frage wurde zu diesem Forum hinzugefügt
Möchten Sie eine E-Mail erhalten, wenn neue Antworten und Fragen veröffentlicht werden? Geben Sie bitte Ihre Email-Adresse ein.