Lea detenidamente
futura referencia.
de este
ciclocomputador Incite
consulte con
contacto con
Trek Bicycle
A la
801 W
W
http://www
Cuando vaya
putador durante
(F1). Si
contra algún
control y
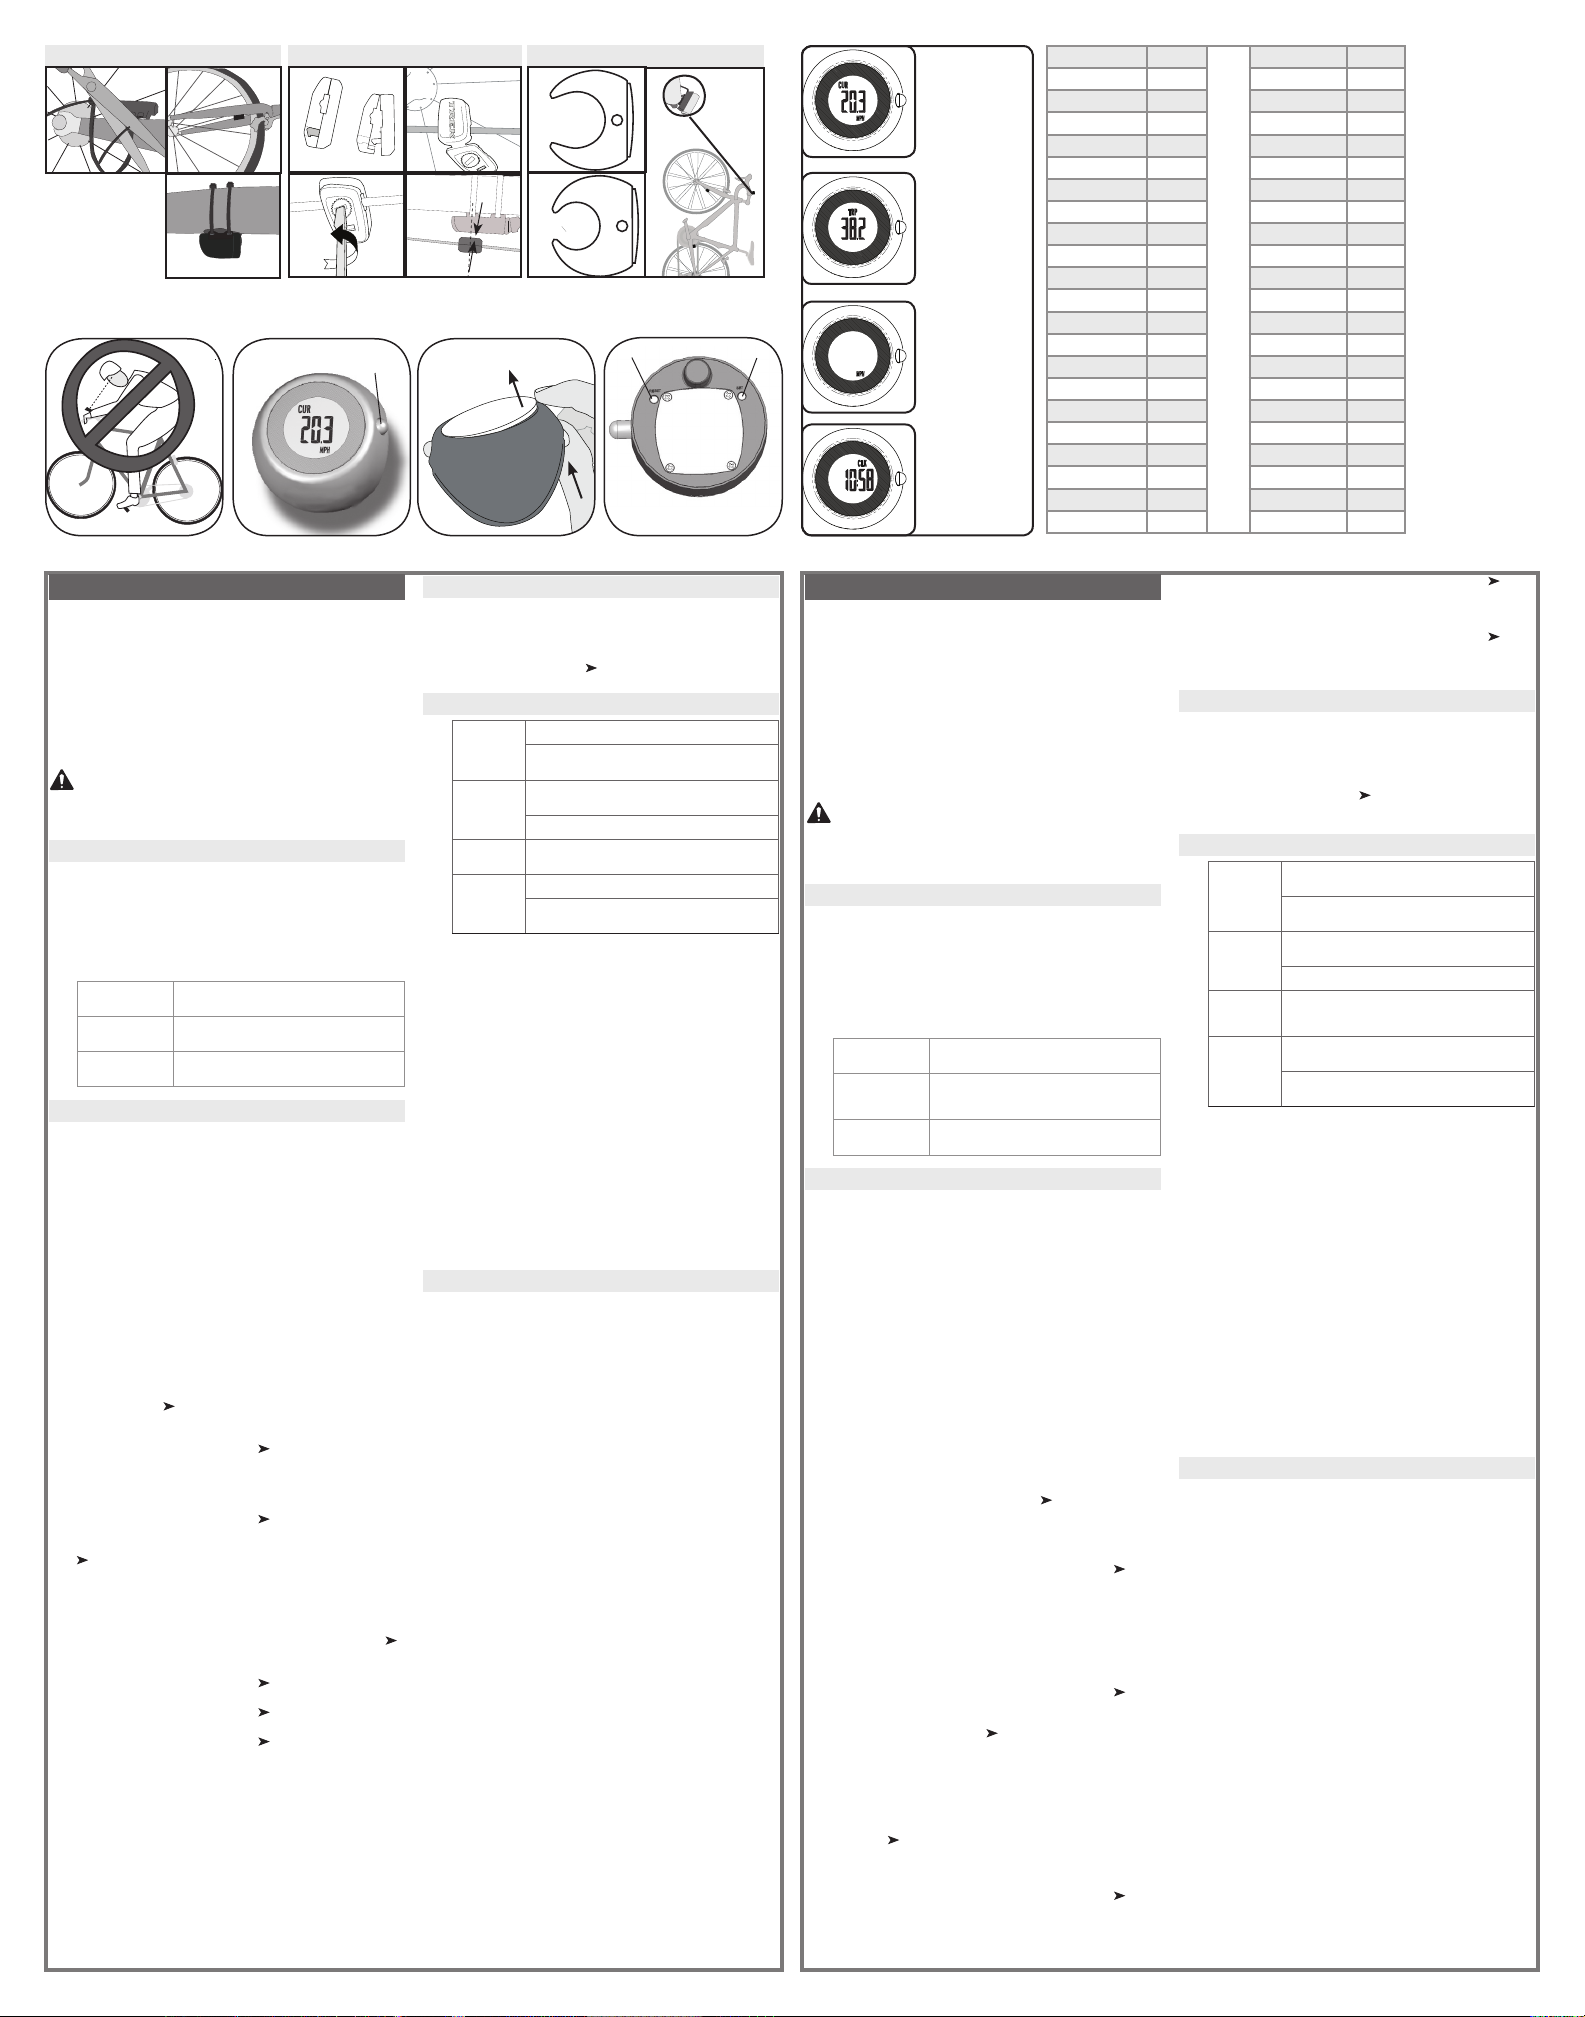
Existen tres
• Pulsar: pulsar una
• Pulsar repetidamente: pulsar
• Mantener:
segundos.
CUR
V
V
hora (MPH) o kilómetros por
TRP
Distancia recor-
rida
Distancia acumulada (Mi or
reinicio.
CLK
Reloj
Hora del día, mostrada en horas y
Si el
la pila),
tamaño de
Cuando se
la función
ahorrar pila.
1. Quite
2. Enfrente
(F3) hasta
3. Deslice
opuesto al
banda.
P
estos pasos
Si reinicia
las unidades
1. Extraiga
2. Pulse el botón
posterior del
pantalla de
MPH (F5).
3. Pulse repetidamente el
valor
4. Pulse el botón
Aparece el
tamaño de
ando.
5. Determine
correspondiente al
tabla (F6).
6. Pulse repetidamente el
primer dígito.
7. Pulse el botón
P
8. R
ajustar los
9. Coloque
1. Extraiga
2. Pulse repetidamente el
la pantalla
3. Pulse el botón
putador)
horas del
4. Pulse repetidamente el
reloj de
5. Pulse el botón
P
6. Pulse repetidamente el
hora.
F4
x 93 2 205
x 102 2 207
x 1185 2 207
16 x 1195 26 x 2083
x 1340 2 217
18 x 13 x 193
x 1515 x 2086
20 x 3/ 1615 7 2096
x 13/8 17 7 2105
x 17 7 213
21/ 179 7 2155
21/ 1905 7 2168
2 18 7 2180
2 182 700 x 40 22
2 1965 x 2145
x 7 19 27 x 1/ 2155
2 1913 27 x 1/ 2161
2 1953 27 x 13/ 2169
23/ 2068 27 x 1 2145
2 2010 27 x 2145
2 20 x 2.1 22
2 2050 2 2
F6
Please read
future reference.
information in
about your
cover
Trek Bicycle
Attn: Customer
801 W
W
http://www
While riding
computer for
not watch
which could
There are
• Push-
• Cycle-
• Hold-
CUR
Current speed
Current speed of the
(MPH) or
TRP
T
Accumulat
Rest
CLK
Clock
Time of day
When the
the battery)
your choice
bicycle, and
When the
autostart feature
wake it,
1. R
2. Opposite
until the
3. Gently
mode button,
T
If you
and wheel
1. R
2. Push the RESET
computer
KMH or
3. Cycle
4. Push the SET
for wheel
5. Determine
size, as
6. Cycle
7. Push the SET
flashes.
8. R
9. Place
1. R
2. Cycle
3. Push the SET
12 (hour
4. Cycle
5. Push the SET
6. Cycle
7. Push the SET
8. Cycle
9. Push the SET
screen appears.
10. Place
1.0-8.0 mm
CUR
Current speed
V
Vites
Aktuelle Geschwindigk
V
Huidige snelheid
V
当前速度
MPH or
Units
Unidades
Unités
Maßeinheiten
Unità
Eenheden
Unidades
单位
CLK
Clock
Reloj
Horloge
Uhr
Orologio
Klok
Relógio
时钟
TRP
Distance
Distancia
Distance
Etappe
Distanza
Afst
Distância percorrida
里程
F2
31.8 mm 22.2, 25.4,
26.
F3 F5
Modes
7. Pulse el botón
P
8. Pulse repetidamente el
minutos.
9. Pulse el botón
Aparece la
10. Coloque
El ciclocomputador
distancia que
1. Pulse repetidamente el
la distancia
2. Mantenga
(TRP) 0.0.
Pant
blanco
El ciclocomputador está en
un botón.
La pila
mente
Datos erró-
neos
El imán
Reajust
La pila
Ninguna
velocidad
actual
El imán
Reajust
La velocidad
no es cor-
recta
El tamaño de
ciclocomputador
El sensor no
alineación del imán
Si el
errónea, es
Reemplace
no funcione
nuevas, lo
a la
•
Si se
automáticamente los
1. Extraiga
2. Quite
3. R
T
4. Quite
5. Inserte
cativa señalando
6. Vuelva a colocar
tornillos.
7. Coloque
Trek Bicycle
ordenadores Incite
materiales.
Esta garantía
• Los
periodo de
Esta garantía
• El
de la
• El
• La
mente no
los componentes
• Daños
negligencia.
Esta garantía
cualquier modificación
Esta garantía
ción o
remedio de
desde la
propietario original
hace responsable
Algunos estados
consecuentes o
anterior puede
Las reclamaciones
a través
prueba de
Esta garantía
legales específicos
lugar a
reglamentarios del
Y
have ridden
1. Cycle
2. Hold
Blank screen Computer is in shipping
Battery is dead, or
good battery
Erratic data Magnet misaligned or
net and sensor placement.
Battery pow
No current
speed
Magnet misaligned or
net and sensor placement.
Speed is
incorrect
Wheel size is
Sensor is not
magnet and sensor alignment.
If the
battery may
whenever the
months. When
take the
•
When the
cally resets
1. R
2. R
(F4).
3. Lif
Be careful to avoid
4. R
5. Insert
label pointing
6. R
7. Place
Trek Bicycle
computer against
materials.
This warranty
• Trek
from the
This warranty
• Normal
life
• Improper
• Installation
intended for
sold
• Damage
neglect
This warranty
tion of
This warranty
replacement of
of the
of purchase,
not transferable.
or consequential
the exclusion
so the
Claims under
an authorized
This warranty
rights, and
This warranty
the consumer
SET
Mode
RESET