Taking care of your machine
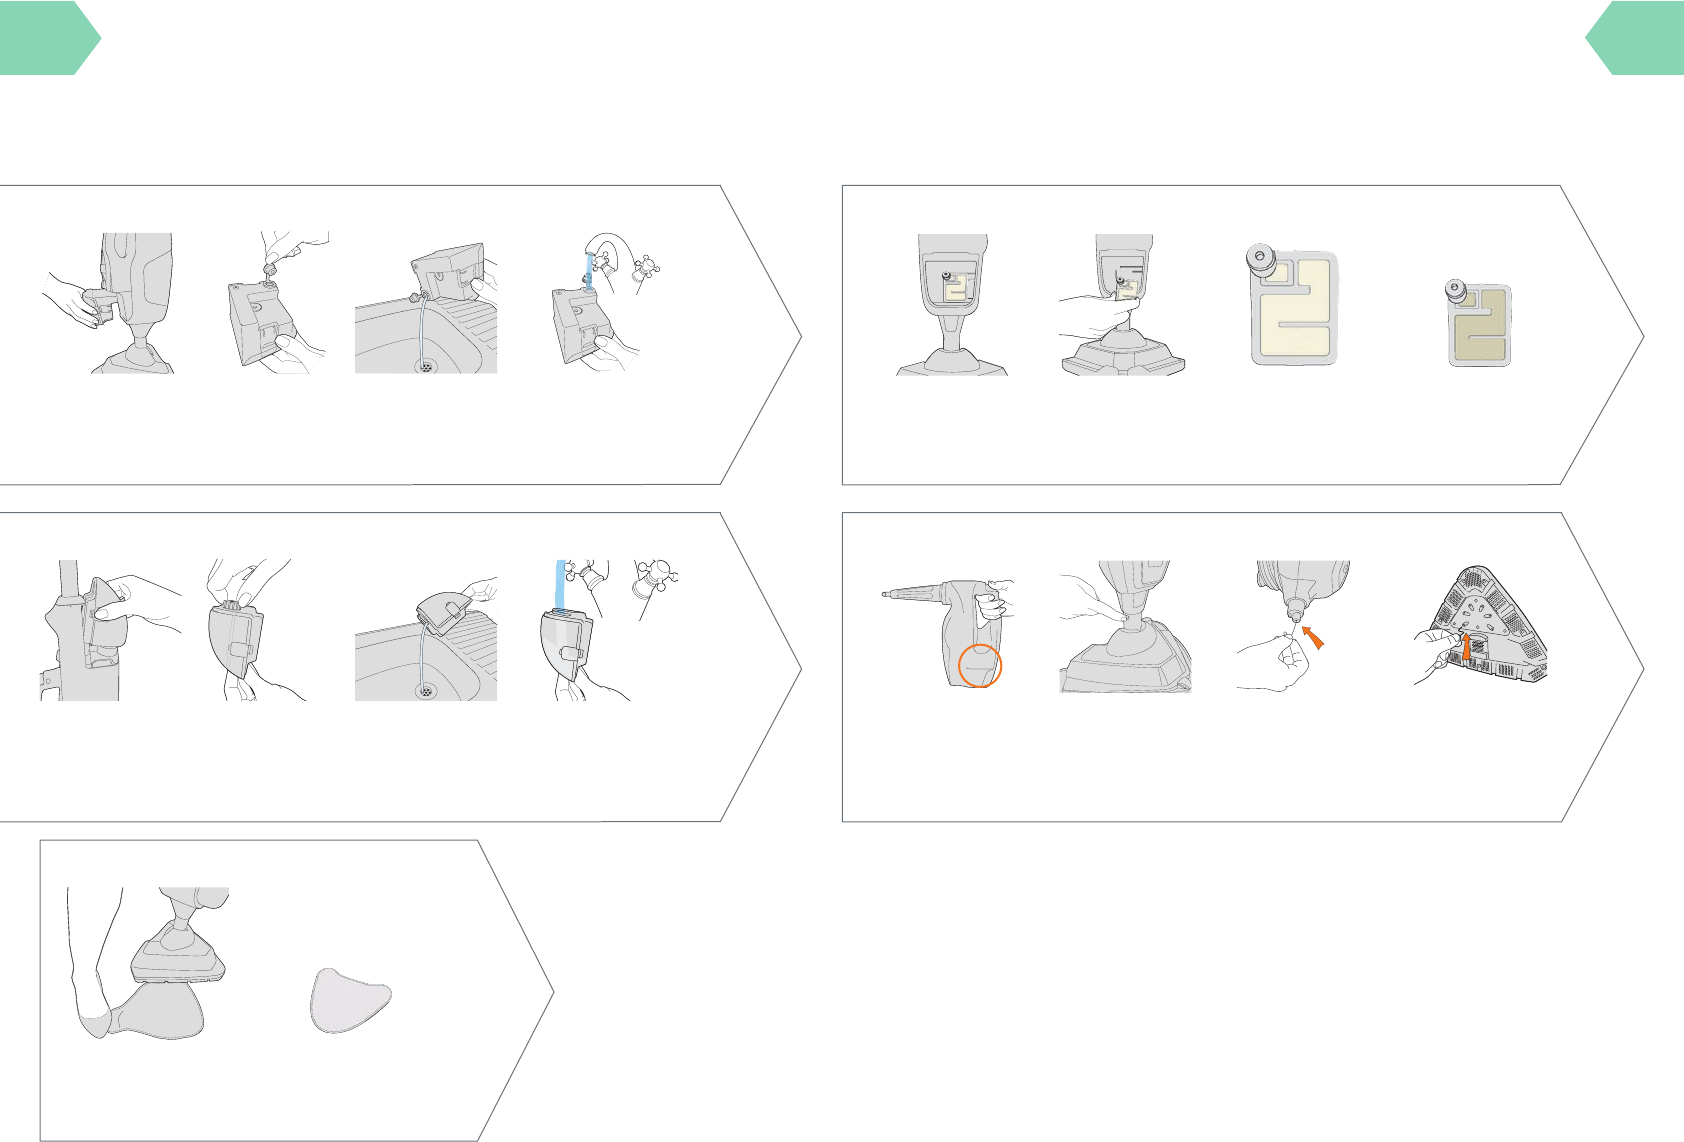
Replacing the hard water lter
Pull to remove the hard
water lter
New lter
(beige/cream colour)
Hard water lter should
be replaced every 3 to 6
months or if discoloured
Remove the water tank
to access the hard
water lter
Press the water tank
release button and lift the
water tank by the handle
Emptying the water tank
Pull the tab on the water
tank to open
Hold corner of pad down with
foot and lift steam mop to
peel away
All cleaning pads are machine
washable (Max 40’C) allow to
fully dry before use
Removing cleaning pads
Taking care of your machine
Max 40°C
IMPORTANT: Allow the steam mop to fully cool down before performing any maintenance or troubleshooting checks
Don’t leave water or detergent in the tanks between uses, as this can eect the machines performance,
the water/detergent tanks need to be emptied and rinsed after each use.
Empty any excess water
over the sink
Rinse water tank with water and
replace water tank tab, push rmly
to close before replacing back onto
the machine
Push both detergent tank
release buttons and lift
to remove
Emptying the detergent tank
Twist detergent tank cap
anti-clockwise and lift
to remove
Empty any excess
detergent over the sink
Rinse detergent tank with water
and replace detergent tank cap,
turn clockwise to tighten before
replacing back onto the machine
3-6 Months
IMPORTANT: Don’t operate the steam mop without hard water lter in place. The condition of the lter aects the
performance of your machine, check and change lter periodically. If you live in an area of hard water the lter will
discolour or darken over time. Depending on water hardness and frequency of use, the lter should be changed every
3 to 6 months or if the lter has discoloured.
If there is an obstruction
to the steam ow through
the machine, steam may be
released through the bleed
valve located on the side of
the handheld
With the pad removed from
the oor head, insert a
small thin object such as
a paper-clip in to the steam
holes to remove a blockage
To remove the oor head
from main body push the
oor head release button
and lift
After oor head is removed,
using a thin object such as
a paper-clip (in the area
shown), insert to remove
the blockage
Removing blockages